Learn how to make a simple DIY sleigh centerpiece this Christmas that feels festive and makes the perfect addition to your holiday decor.

*As an Amazon affiliate, I earn from qualifying purchases at no extra cost to you. My blog contains other affiliate links as well for your convenience. To learn more, you may read my Disclosure Policy. Thank you for supporting my blog!
How to Create a Beautiful DIY Christmas Sleigh Centerpiece
If you’ve been around here a while, you know I love a good holiday DIY. And when it comes to Christmas decor, there’s just something so nostalgic about Santa’s sleigh.
I had been on the hunt for a sleigh for a while to create a fun and festive Christmas centerpiece, but I could never find a one I really liked…or one I was willing to pay for that wasn’t crazy expensive. So I decided to make my own!
And I’m so glad I did.
The best part is that you can put your own easy Christmas sleigh centerpiece together with just a few pieces of greenery and some ornaments you probably already have in your stash of holiday decor bins.
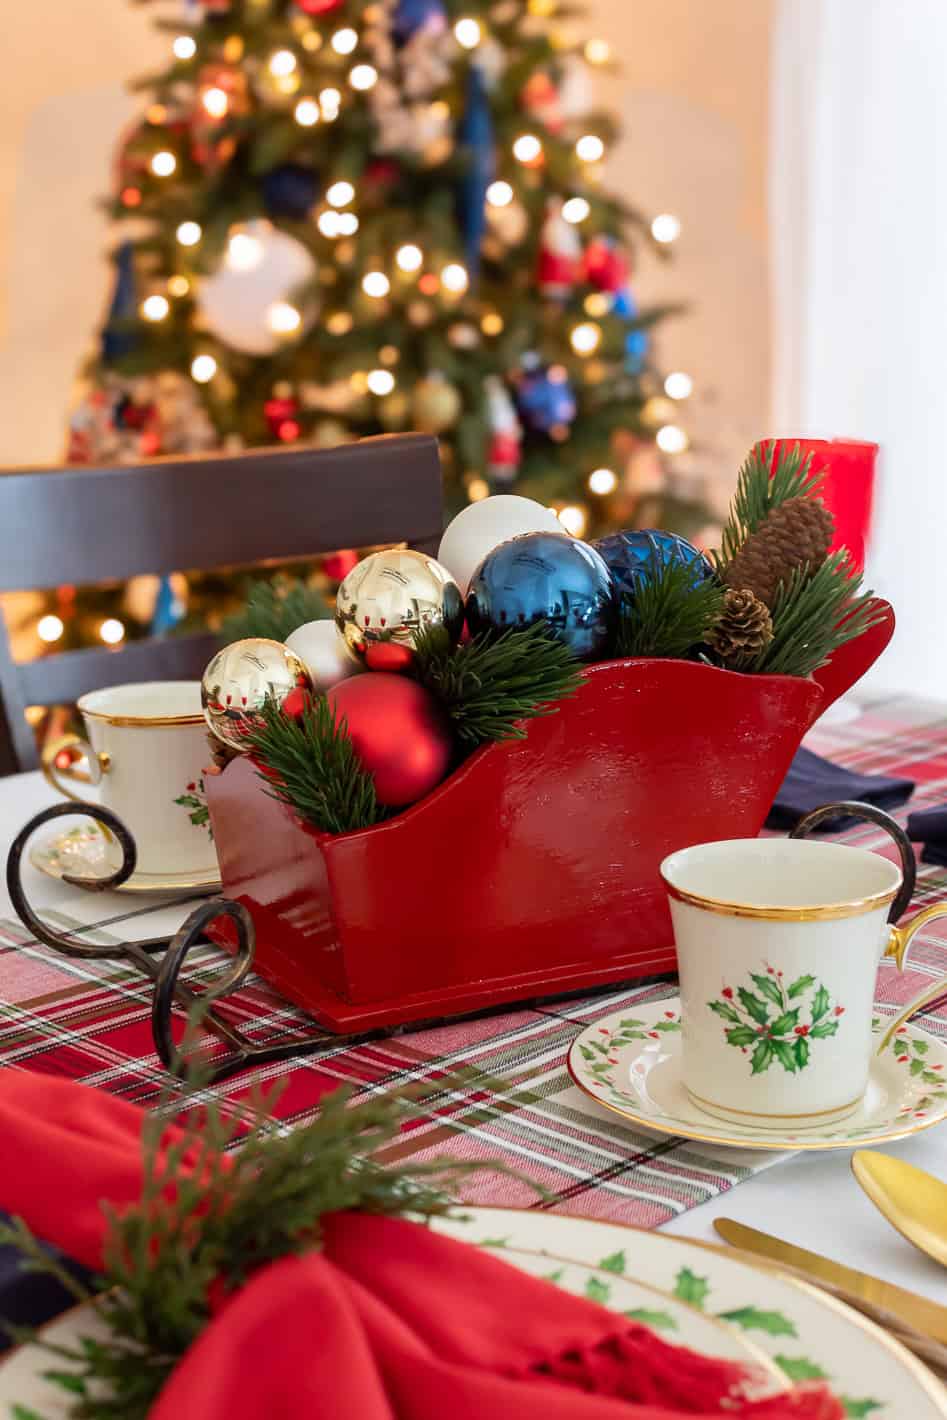
Whether you’re decorating your dining room for the holidays, setting your table for a cozy Christmas dinner, or decorating your mantel, this DIY sleigh centerpiece is a festive and cheerful option.
So grab your supplies and let’s get ready to create this holiday centerpiece together.
Table of Contents
- How to Create a Beautiful DIY Christmas Sleigh Centerpiece
- Why You’ll Love This Craft
- Tools and Supplies Needed to Make a Christmas Sleigh Centerpiece
- How to Create a Christmas Sleigh Centerpiece
- Other Christmas Sleigh Centerpiece Ideas
- How to Style Your Christmas Sleigh Centerpiece
- More Christmas Centerpieces You’ll Love
- A Few Final Thoughts
- Did You Enjoy this Post? PIN It for Later!
Why You’ll Love This Craft
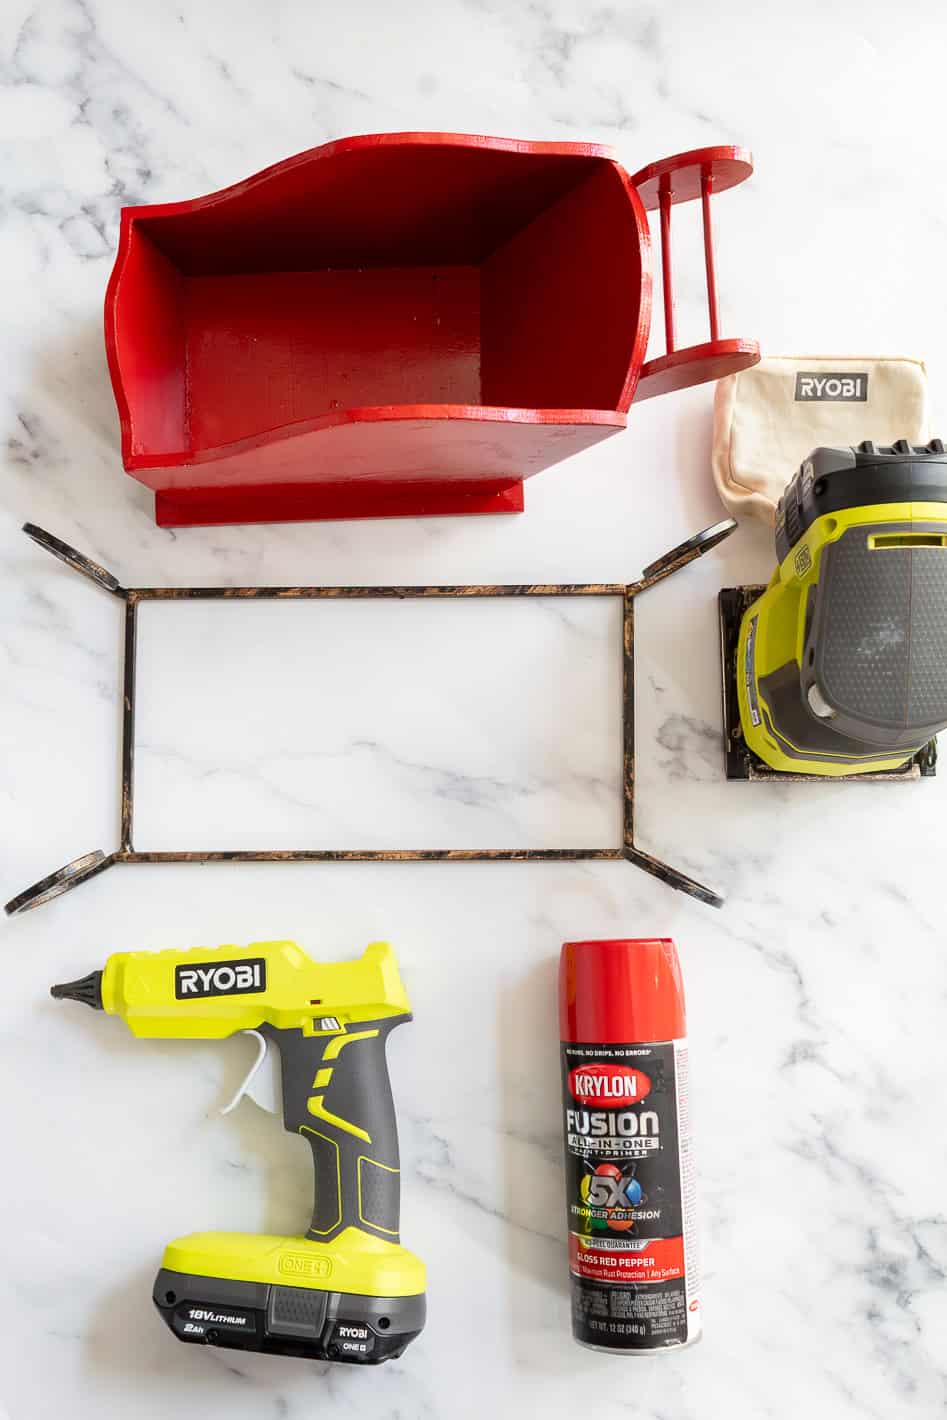
Tools and Supplies Needed to Make a Christmas Sleigh Centerpiece
Here’s everything you’ll need to create a Santa sleigh centerpiece for Christmas this year:
a note from jen
I found my sleigh at my local Goodwill for just a few dollars, so don’t be afraid to hunt around a bit before buying a new one. Thrift stores, garage sales, and estate sales are all great places to look for seasonal decor.
How to Create a Christmas Sleigh Centerpiece
Step 1: Find and Prep Your Christmas Sleigh
If you already love the sleigh you’re using as it is, you can skip right ahead to the next step. But if you’re starting with a thrifted find like I did, a little prep work makes a big difference.

When I found my sleigh at Goodwill, it was painted deep green with glittery stars and a smiling Santa face. Cute in its own way, but not at all what I had in mind, so it needed a quick refresh.
If you’re painting your sleigh, start by giving it a light sanding to smooth out any rough spots and remove any extra sheen or leftover paint or stain.
I lightly sanded mine, sprayed on a couple of coats of red paint, and let the paint dry fully between coats.
And of course, it wasn’t until after a few coats were already on that I realized I never took a proper “before” photo. I was a little too excited to get started, but trust me… it needed the makeover!
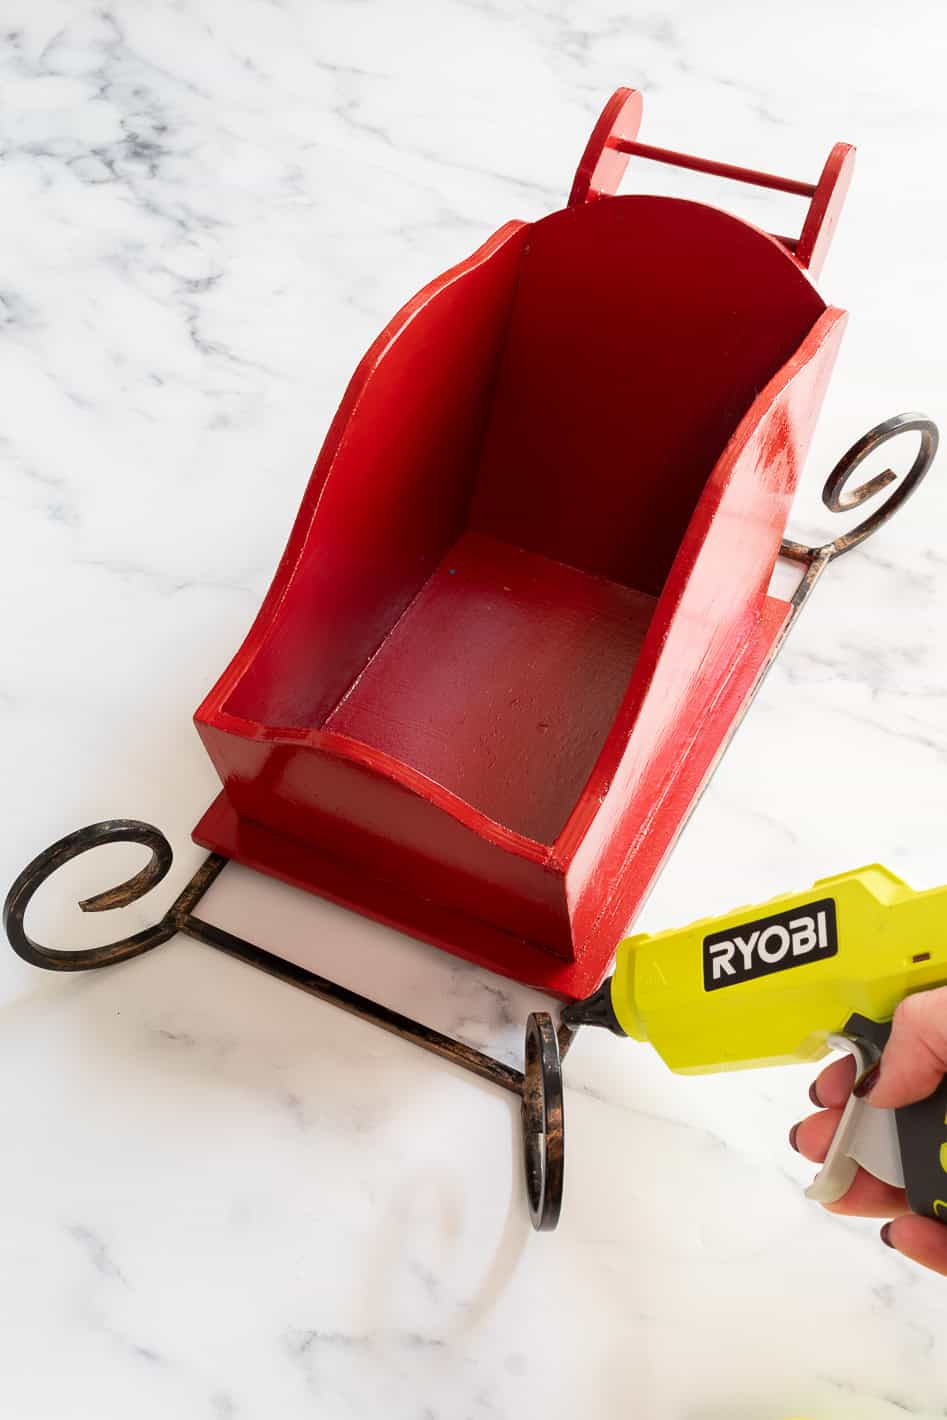
While I was wandering the store, I also came across what looked like the sleigh runners in a totally different aisle.
I don’t know if they originally belonged with my sleigh or if it was just good luck, but either way, the size was perfect.
So, I grabbed those too and hot-glued them to the bottom of my newly painted sleigh.
a note from jen
Holiday decor starts to show up in thrift stores earlier than you might think. It’s not uncommon to see Christmas pieces in October, so keep your eyes peeled early and often on your thrifting trips as you plan for your holiday decor and crafts.
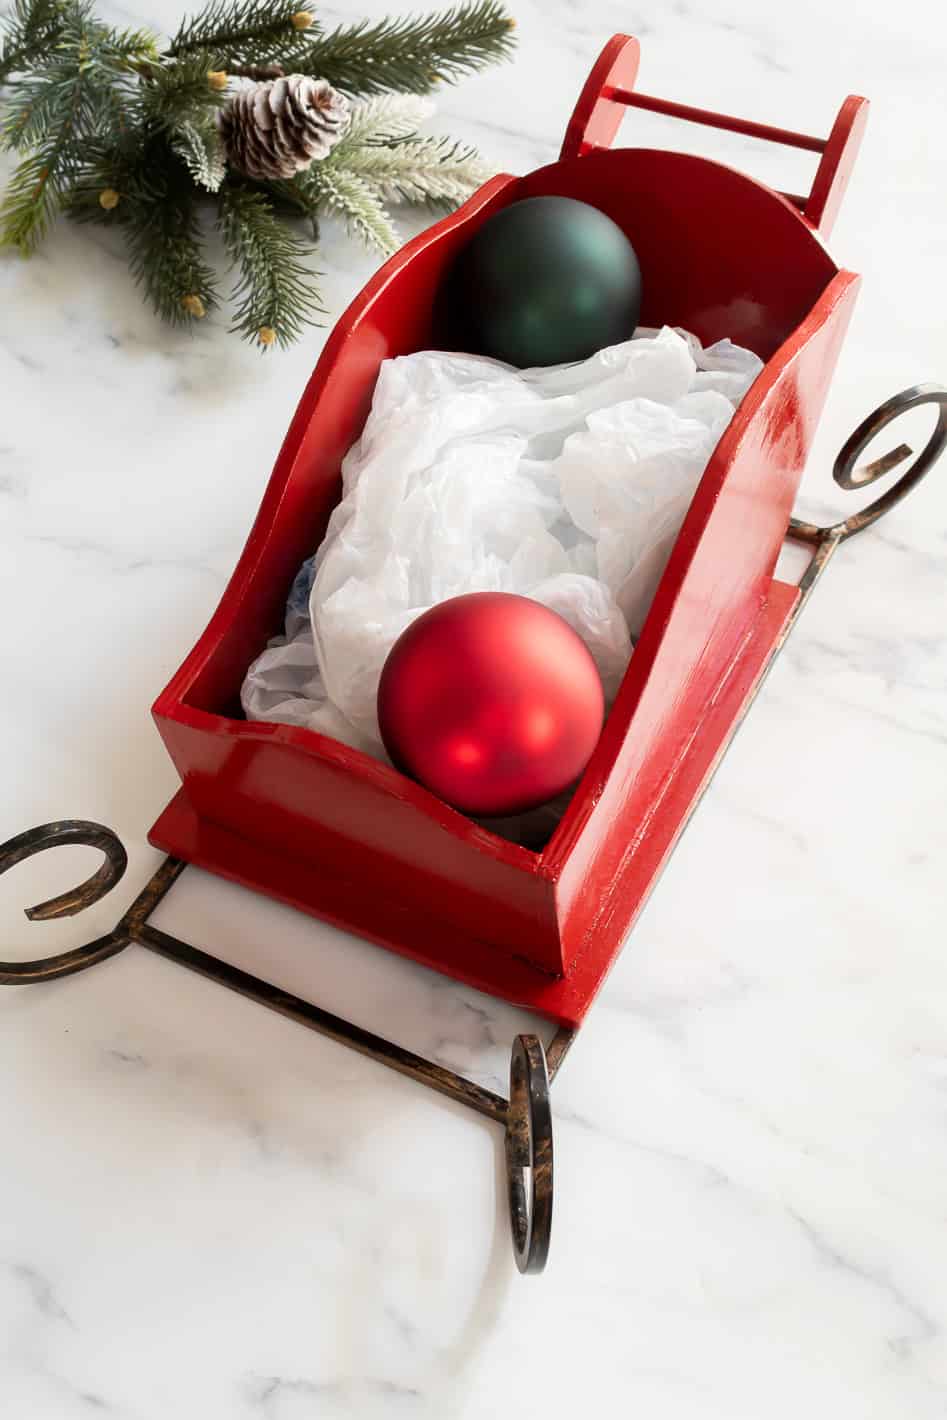
Step 2: Add Your Filler
Next, fill the bottom of your sleigh with plastic bags or crumpled brown kraft paper. I like using these because it’s easy to adjust the amount you need, and they help lift your ornaments and greenery so everything sits a little higher.
Not only are you using recycled materials, but it also means you don’t need nearly as many ornaments or greenery, which is a win-win in my book!

If you want more structure, you can also tuck in a small piece of floral foam. It doesn’t have to be perfect.
You just need to fill the sleigh and give your ornaments and greenery something to rest on as you build your centerpiece.
Step 3: Layer in Your Ornaments
Begin filling your sleigh by adding your ornaments. Choose any mix of sizes and colors that fit your Christmas style, and start by nestling the larger ornaments in place.

Then tuck the medium and smaller ones around them, layering as you go until the sleigh starts to feel full and the filler is mostly covered.
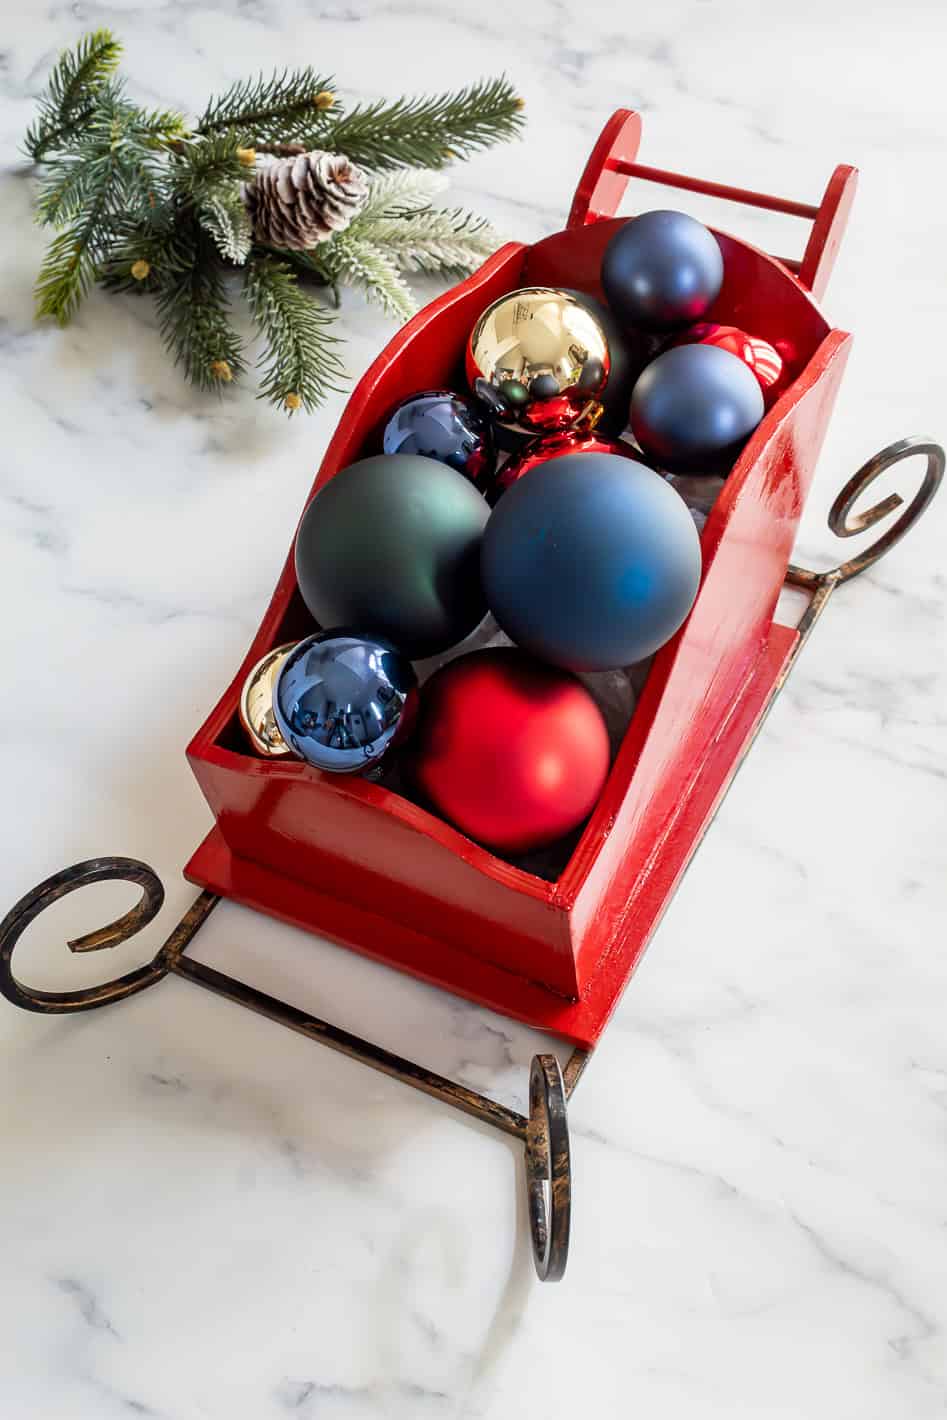
If you love a more traditional Christmas look, a classic palette works beautifully. I used a mix of red, blue, gold, white and green ornaments to tie in with the Ralph Lauren–inspired holiday style I gravitate toward in my holiday decor.
Crafting Tip
Once you’ve added your ornaments, take a step back and make sure everything feels balanced. Play with the colors and mix of sizes until you’re happy with how it looks.
Step 4: Add the Greenery
To finish your Christmas sleigh centerpiece, start tucking greenery in around the ornaments and work your way around the sleigh until everything feels even and full.
I usually add a few pieces toward the back and sides first to give it a bit of height, and then I move to the front and fill in any little gaps. It’s very much a go-with-the-flow kind of step, so take your time and keep adjusting pieces until it looks good to you.
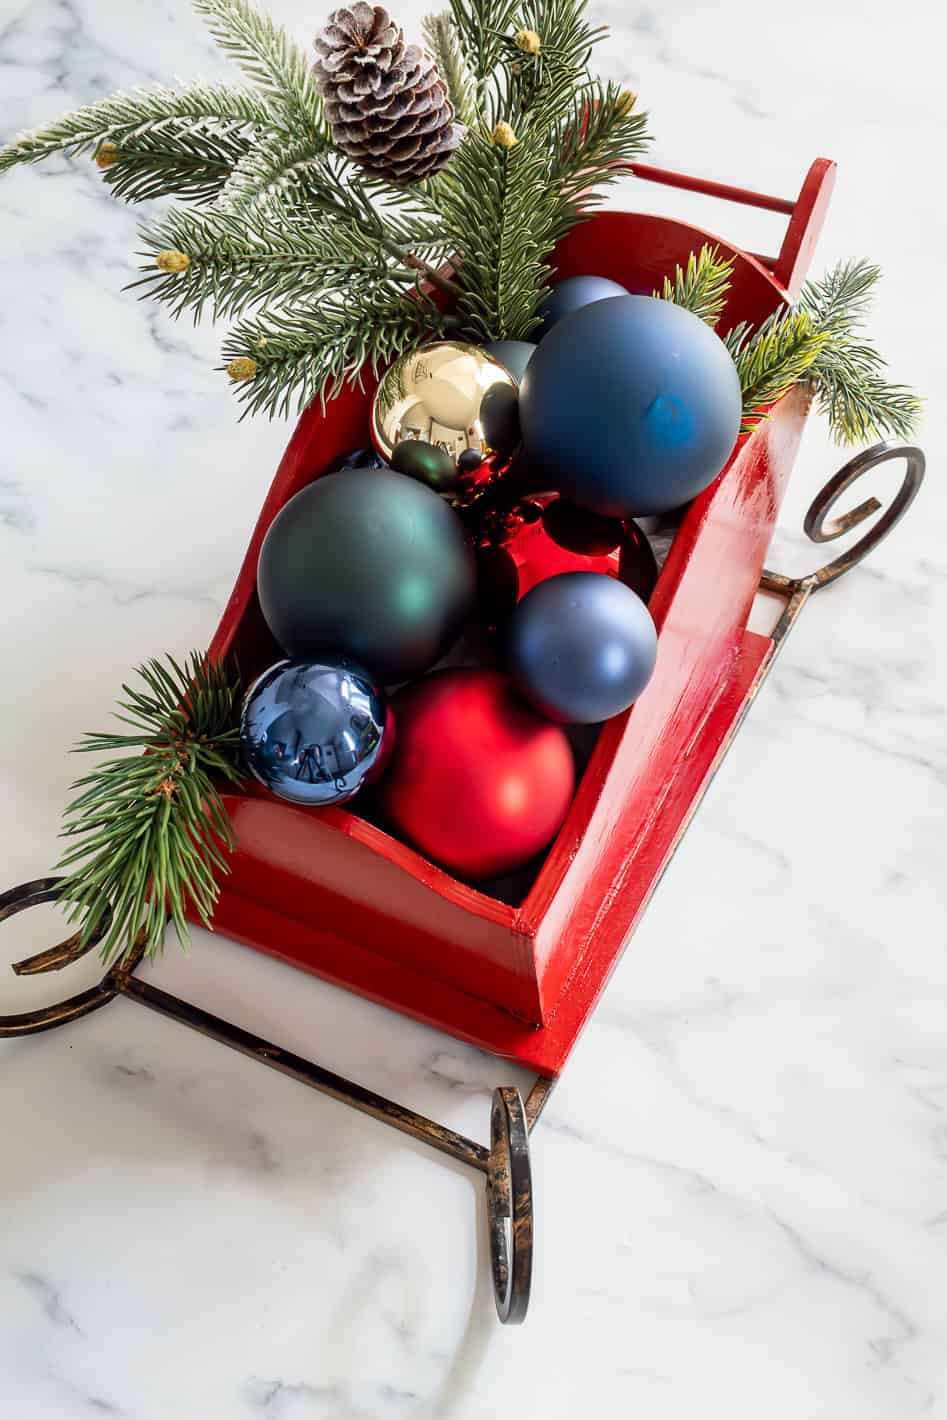
For my centerpiece, I used faux greenery with pinecones already attached. I just grabbed my wire cutters and trimmed a few smaller pieces off a larger stem so they were easier to tuck in around the sleigh and layer in between the ornaments.

A mix of textures always looks really pretty, so feel free to play around with whatever you have. Cedar, pine, fir, eucalyptus… they all work together and give the arrangement a soft, natural feel.
If you like a little twinkle, this is also a great time to weave in a small strand of fairy lights so they nestle in with the greenery. (Because let’s be honest, twinkle lights make everything feel a bit more magical at Christmas time!)
Crafting Tip
If you’re adding fairy lights, tuck the battery pack behind the sleigh or under some greenery so it stays hidden.
Other Christmas Sleigh Centerpiece Ideas
If you’re looking for other ways to personalize your sleigh or try out a different color scheme or theme, here are a few ideas you can play around with.
How to Style Your Christmas Sleigh Centerpiece
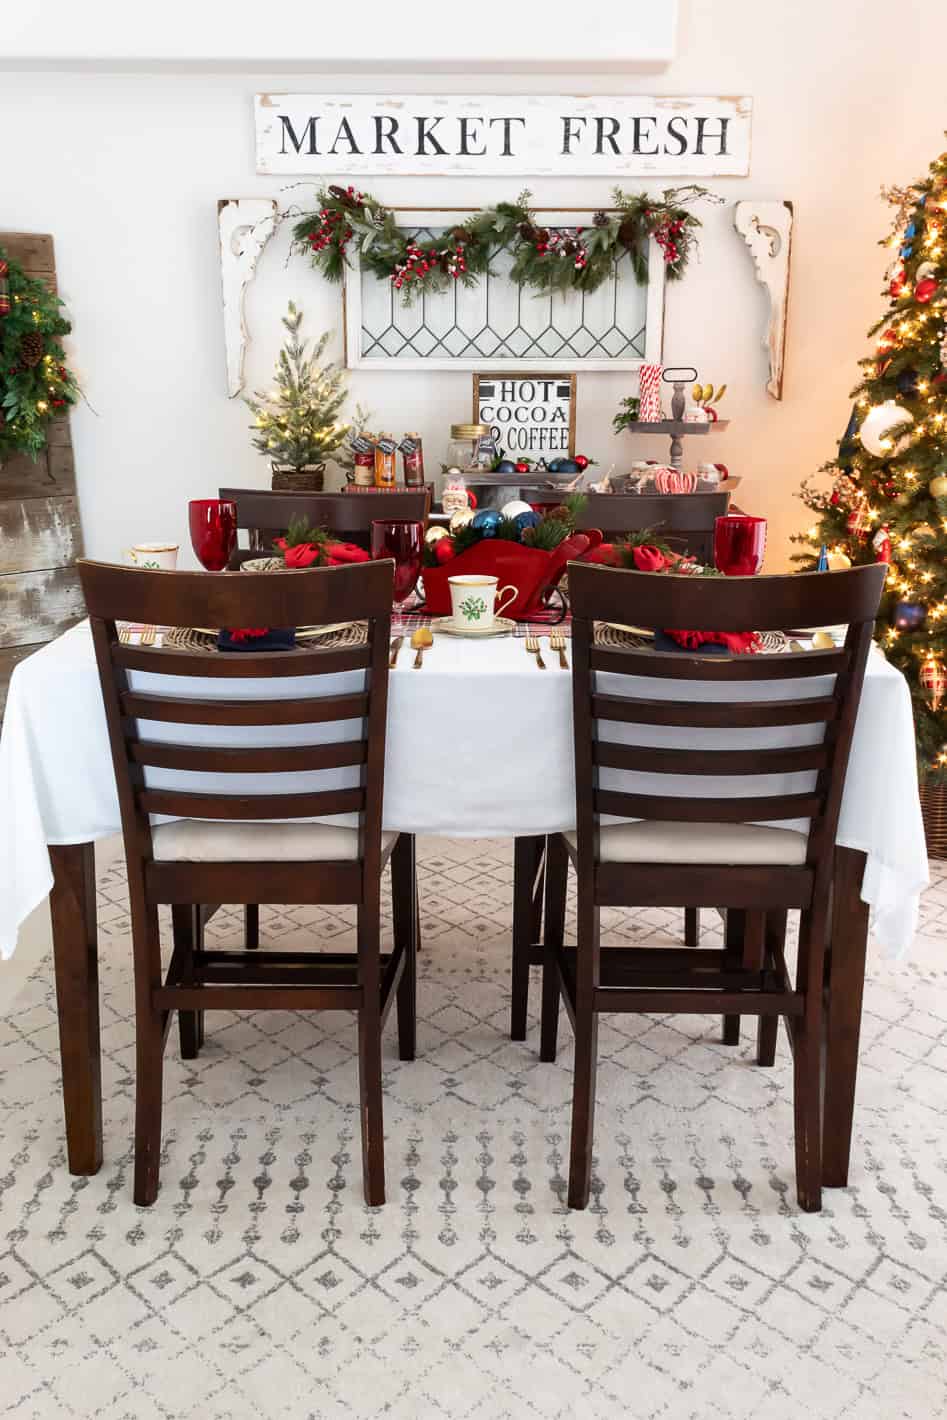
Once your sleigh is finished, it is time to style it, and this is always the part I look forward to most.

I used mine in the center of my Christmas table, but feel free to move yours around and see where it feels right in your home. Try a few spots, step back, and take a look until you find the perfect spot.
If you’re looking for a few additional ideas, here are a few to get you started.
More Christmas Centerpieces You’ll Love
If you’re planning your Christmas gathering, here are a few more ideas for Christmas centerpieces to help you set a beautiful table and serve up something delicious for your guests.

A Few Final Thoughts
I hope this little project inspires you to make a sleigh of your own! It really is such a fun and easy way to add some Christmas cheer to your home.
Whether you use a thrifted sleigh, something you already have tucked in your holiday bins, or a brand new piece you’ve had your eye on, it’s guaranteed to put a smile on your face.
If you decide to make one, I would love to hear how it turns out or see a photo, so don’t forget to share in the comments below!
Wishing you a very Merry Christmas and happy decorating.
Cheers!

Did You Enjoy this Post? PIN It for Later!


So cute, Jen!!!
Thank you, friend! It was such a quick and easy project. I don’t know why I didn’t make one sooner!
Like your sleigh. The blue makes it!
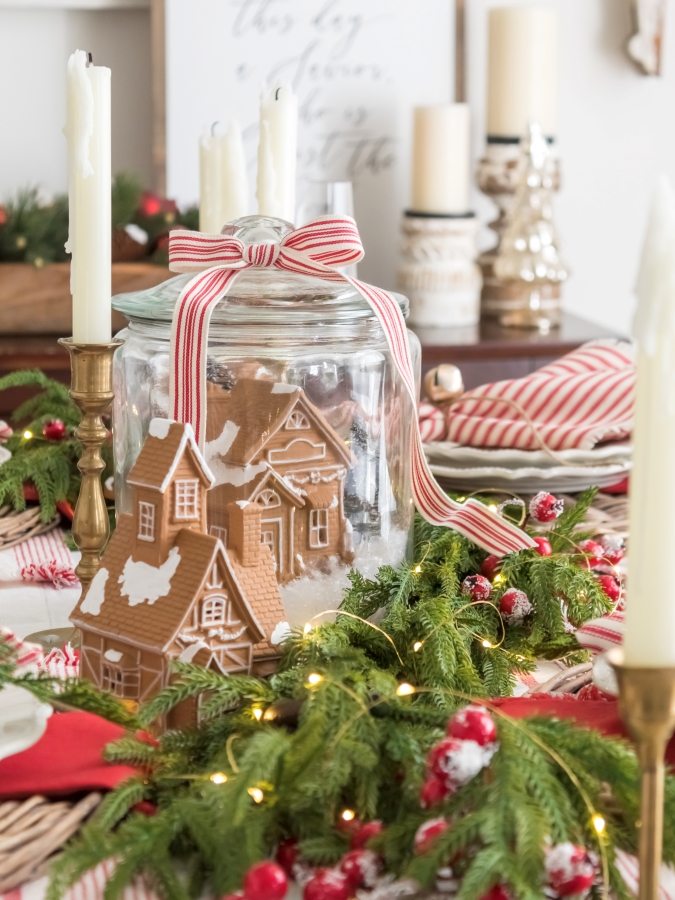
Where are you displaying the large snow jar with ginger bread houses?
It is my favorite!!!!
Happy holidays
Thank you, Nan. I really love it too and I agree….I love the contrast with the red and deep navy blue. I left the jar and snow tucked away this year, BUT I have all of my DIY gingerbread houses displayed above the cabinets in our kitchen. If you missed it, you can see how I displayed them in my holiday home tour here: https://www.midwestlifeandstyle.com/ralph-lauren-inspired-traditional-christmas-decorating-ideas/
Wishing you a wonderful holiday season!