Love the look of vintage garden pots but don’t want to wait years for that perfectly weathered finish? Learn how to easily create your own aged terra cotta pot in just a few simple steps!

*As an Amazon affiliate, I earn from qualifying purchases at no extra cost to you. My blog contains other affiliate links as well for your convenience. To learn more, you may read my Disclosure Policy. Thank you for supporting my blog!
This post was originally published on March 23, 2021. Last updated on March 12, 2025
Easy DIY Aged Terra Cotta Pot for Spring
After a long, cold winter, there’s nothing I look forward to more than getting outside and planting some flowers.
But if there’s one thing I’ve learned about Nebraska weather, it’s that it can be extemely unpredicatable!
One day, it’s 70 degrees and sunny, and the next, it’s 30 degrees with snow on the ground.
When it is not quite warm enough to plant outside, bringing a touch of spring indoors is the perfect solution.
This easy DIY aged terra cotta pot project is a great way to add charm and character to any space.
There are so many fun ways to age pots and give them that rustic, weathered look. You can use salt, yogurt, or even lime!
But today, I’m going to show you how to age terracotta pots with paint and just a bit of baking soda.
It’s budget friendly, simple to do, and creates a beautiful vintage, timeworn look for your planters just in time for the new season.
So grab your supplies and let’s get started!
Table of Contents
- Easy DIY Aged Terra Cotta Pot for Spring
- Tools and Supplies Needed to Make a DIY Aged Terra Cotta Pot
- How to Age Terra Cotta Pots Quickly
- Other Ways to Create an Aged Terra Cotta Pot
- More Spring DIYS from Midwest Life and Style
- Easy DIY Aged Terra Cotta Spring Flower Pot
- Did You Enjoy this Post? PIN It for Later!
Tools and Supplies Needed to Make a DIY Aged Terra Cotta Pot
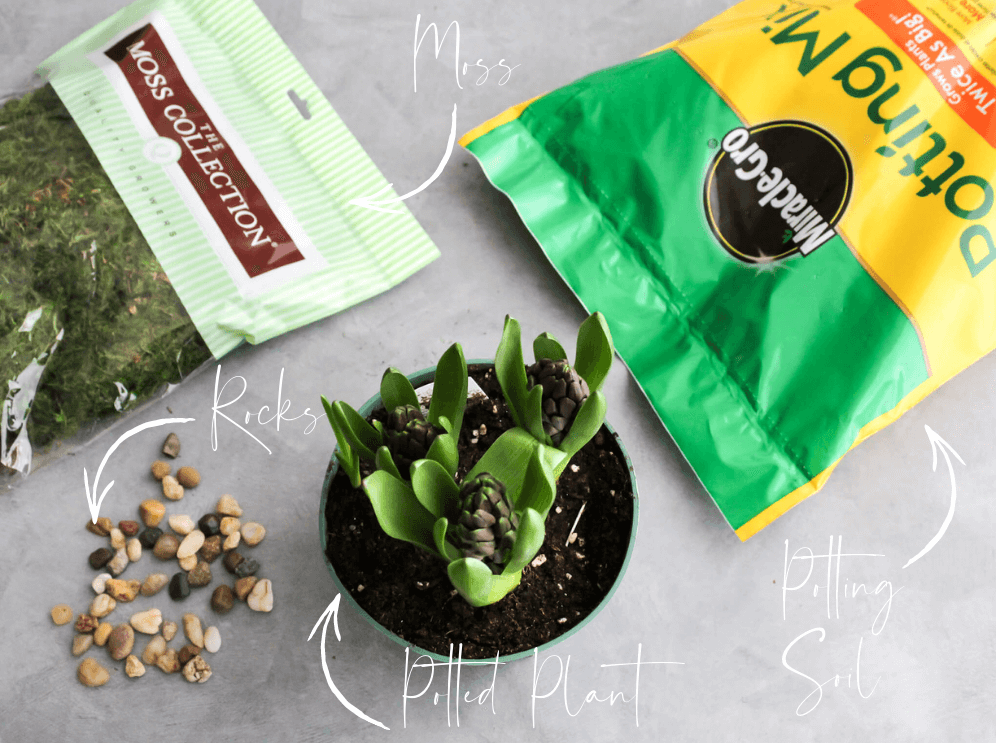
Here is a list of supplies that you will need for this project:
- Terra cotta flower planters or pots
- Water-based paint (For this DIY, I used my favorite Fusion mineral paint)
- Paint brush
- Baking soda
- Small pebbles
- Hand-held garden trowel
- Potting soil
- Moss
- Flowesr or plants of your choice

How to Age Terra Cotta Pots Quickly
Step 1: Select Your Pot
Did you know terra cotta pots are not just the classic reddish orange?
They also come in beautiful shades of pink, brown, gray, and even white, all created through different clay compositions and firing techniques.
For this project, you can use a traditional terra cotta pot or try one in a different color for a unique look.
While browsing the garden aisles at Walmart, I came across a beautiful gray terra cotta pot.
The planter dimensions were just the right size and had the perfect shape.
You can also save money by using a pot that you already have.
But, if you don’t have any containers at home, thrift stores and garage sales are also great places to find cheap pots that are perfect for DIY projects like this one.
As they say…one man’s junk is another man’s treasure!
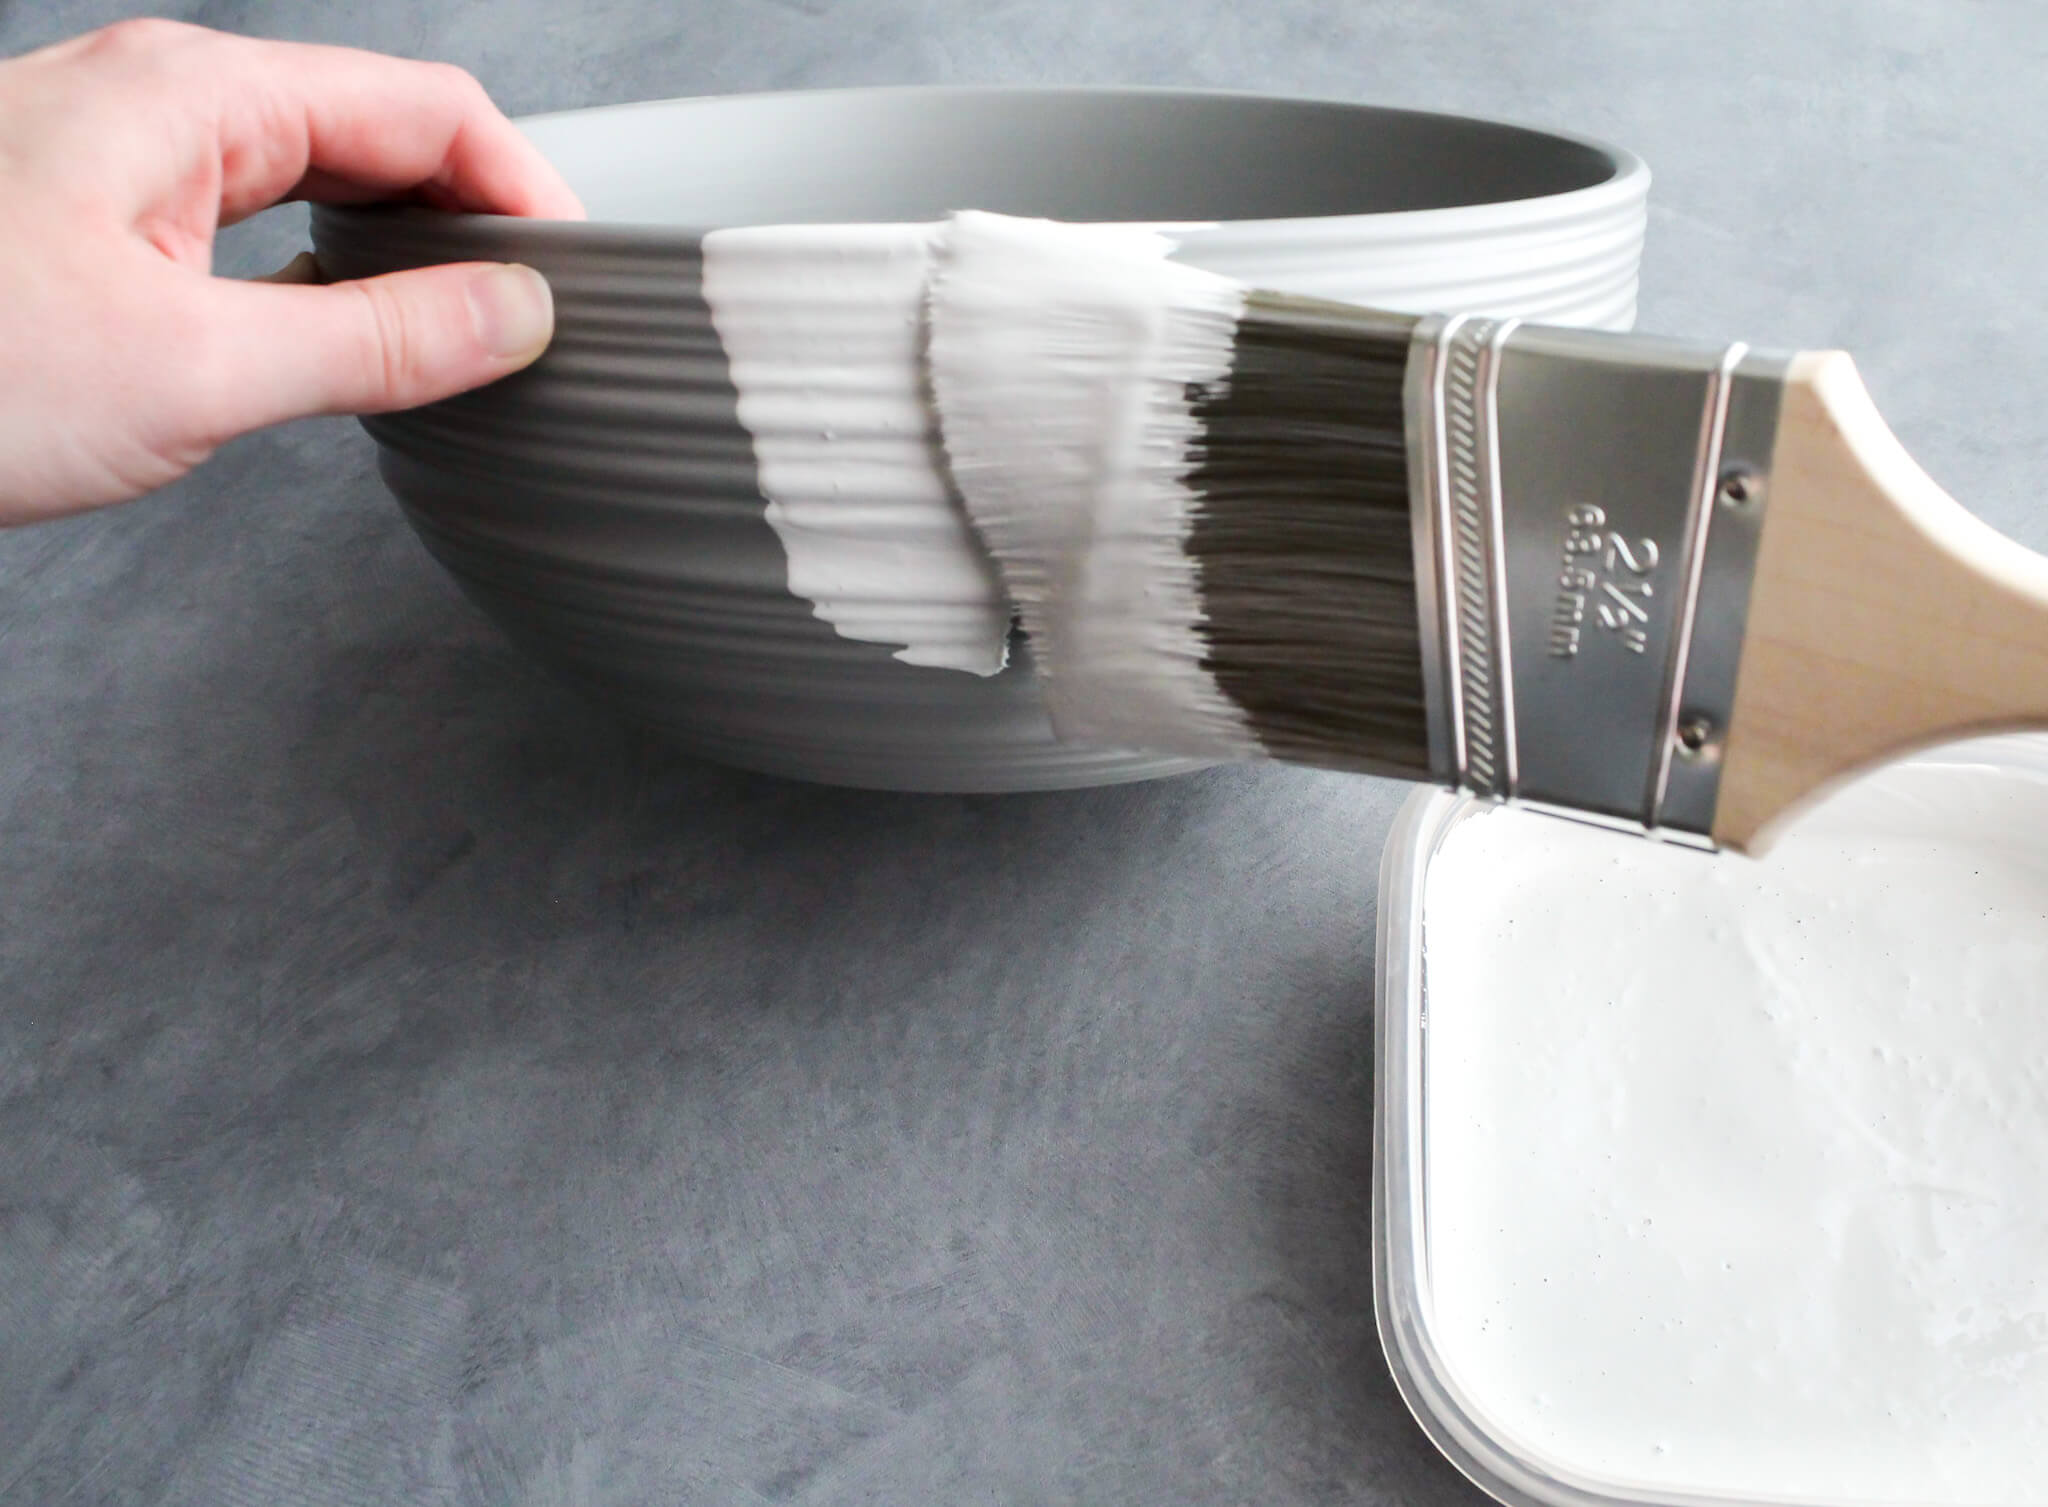
Step 2: Mix Your Paint
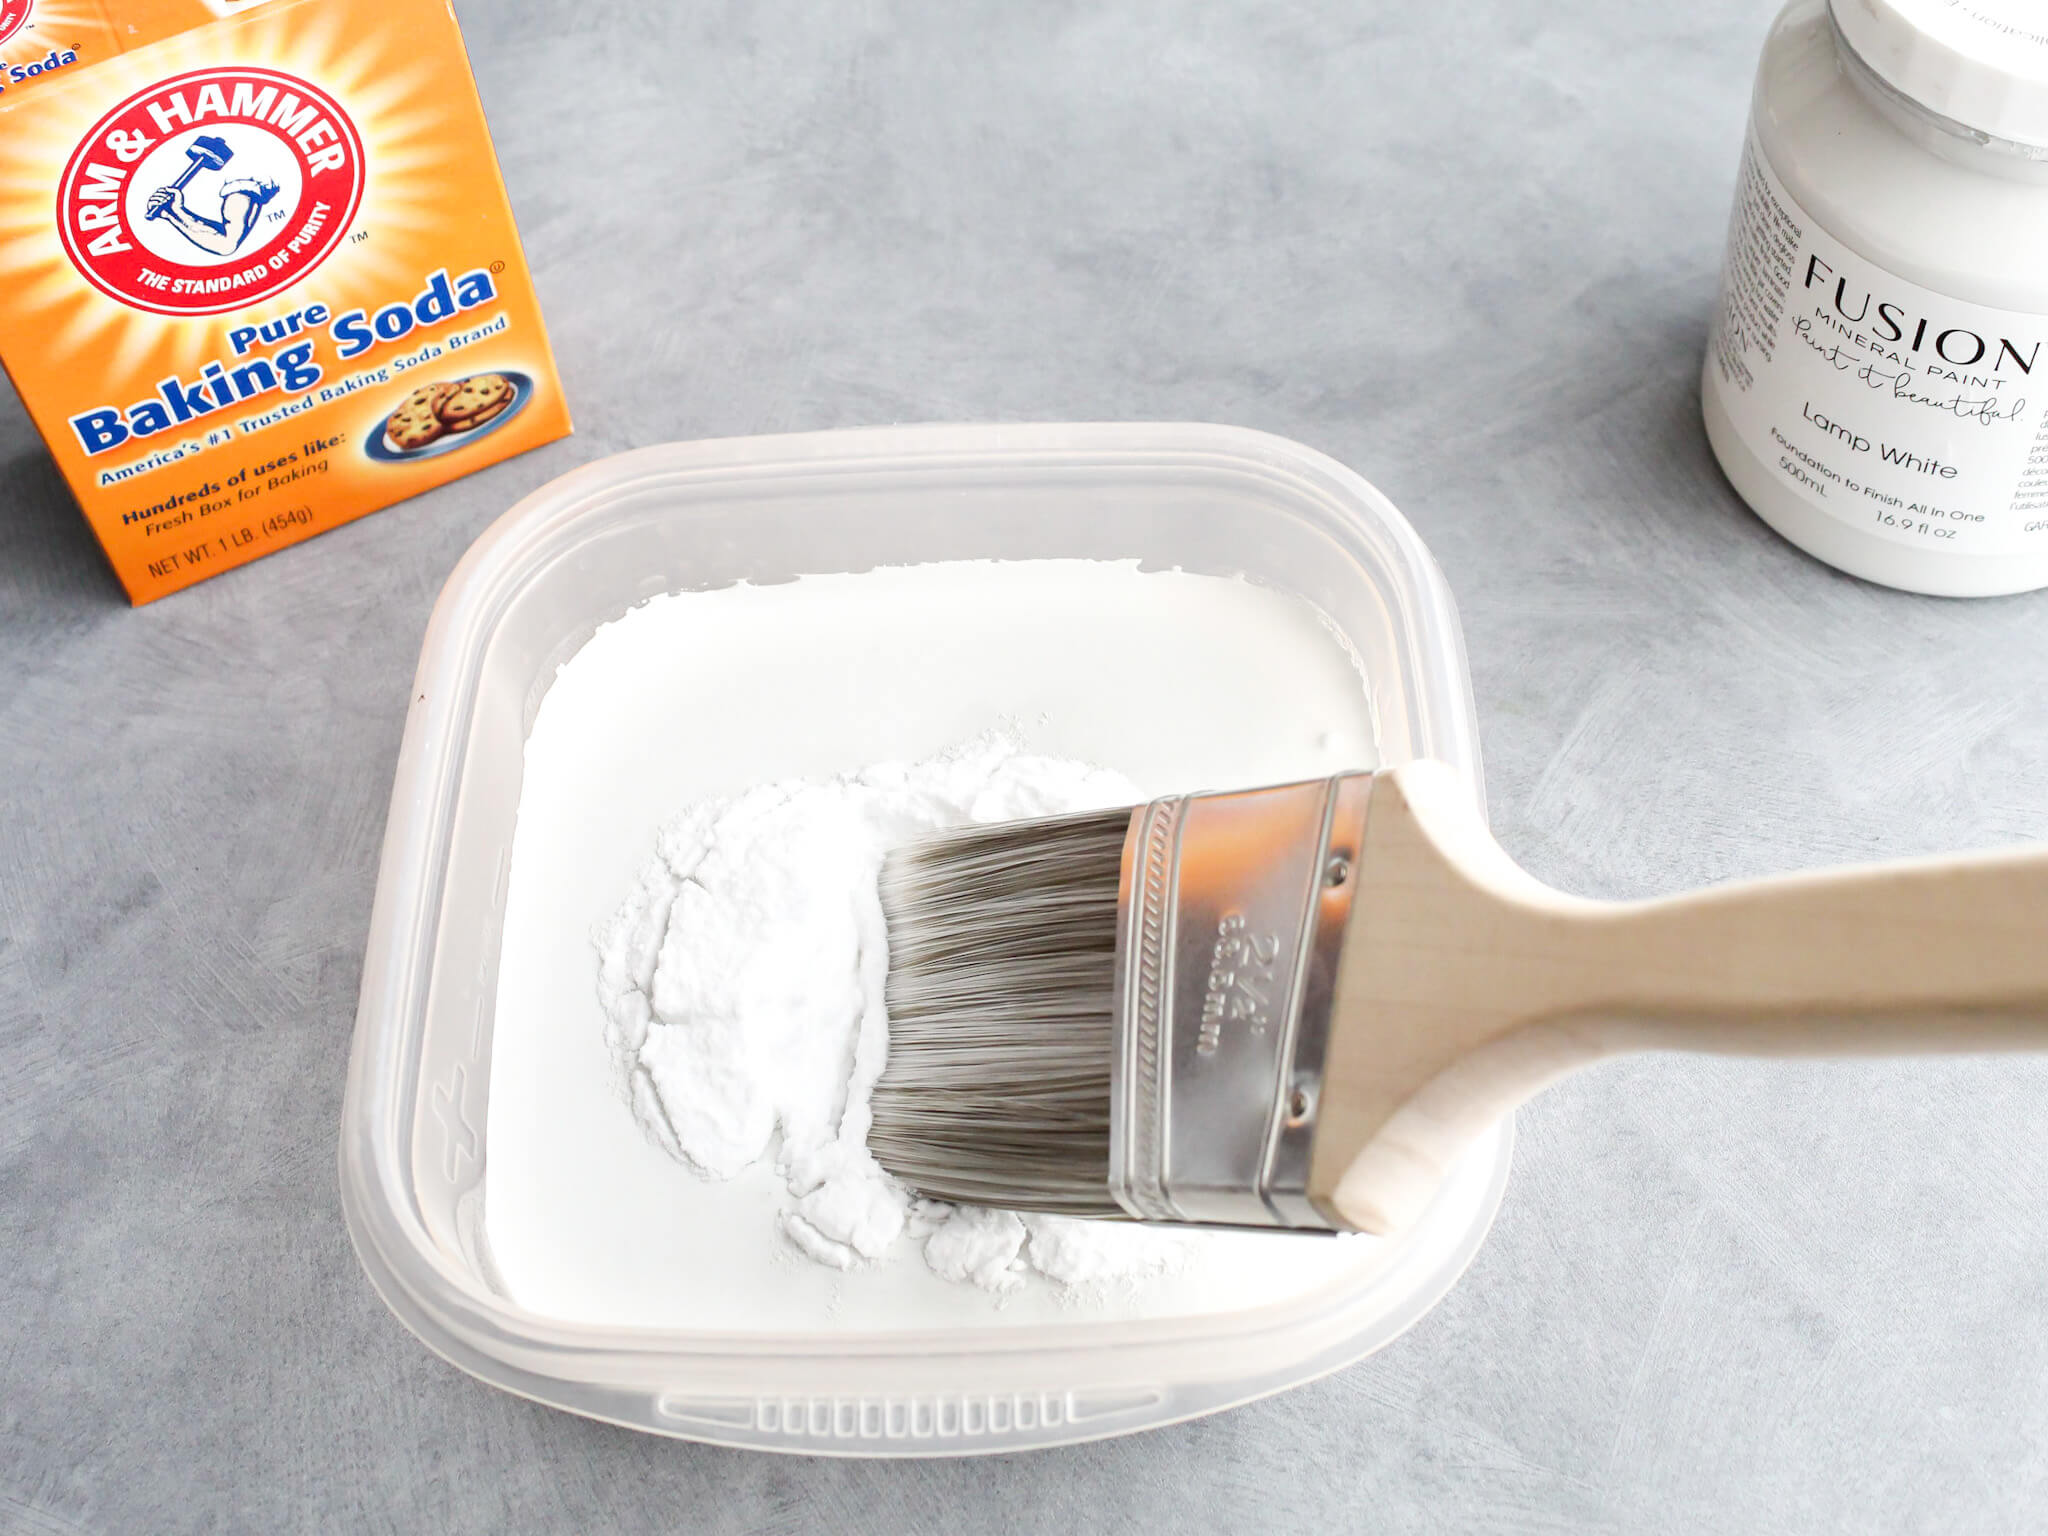
Now for the fun part—mixing the paint! Just grab a plastic container, pour in a cup of acrylic craft paint, and stir in a quarter cup of baking soda.
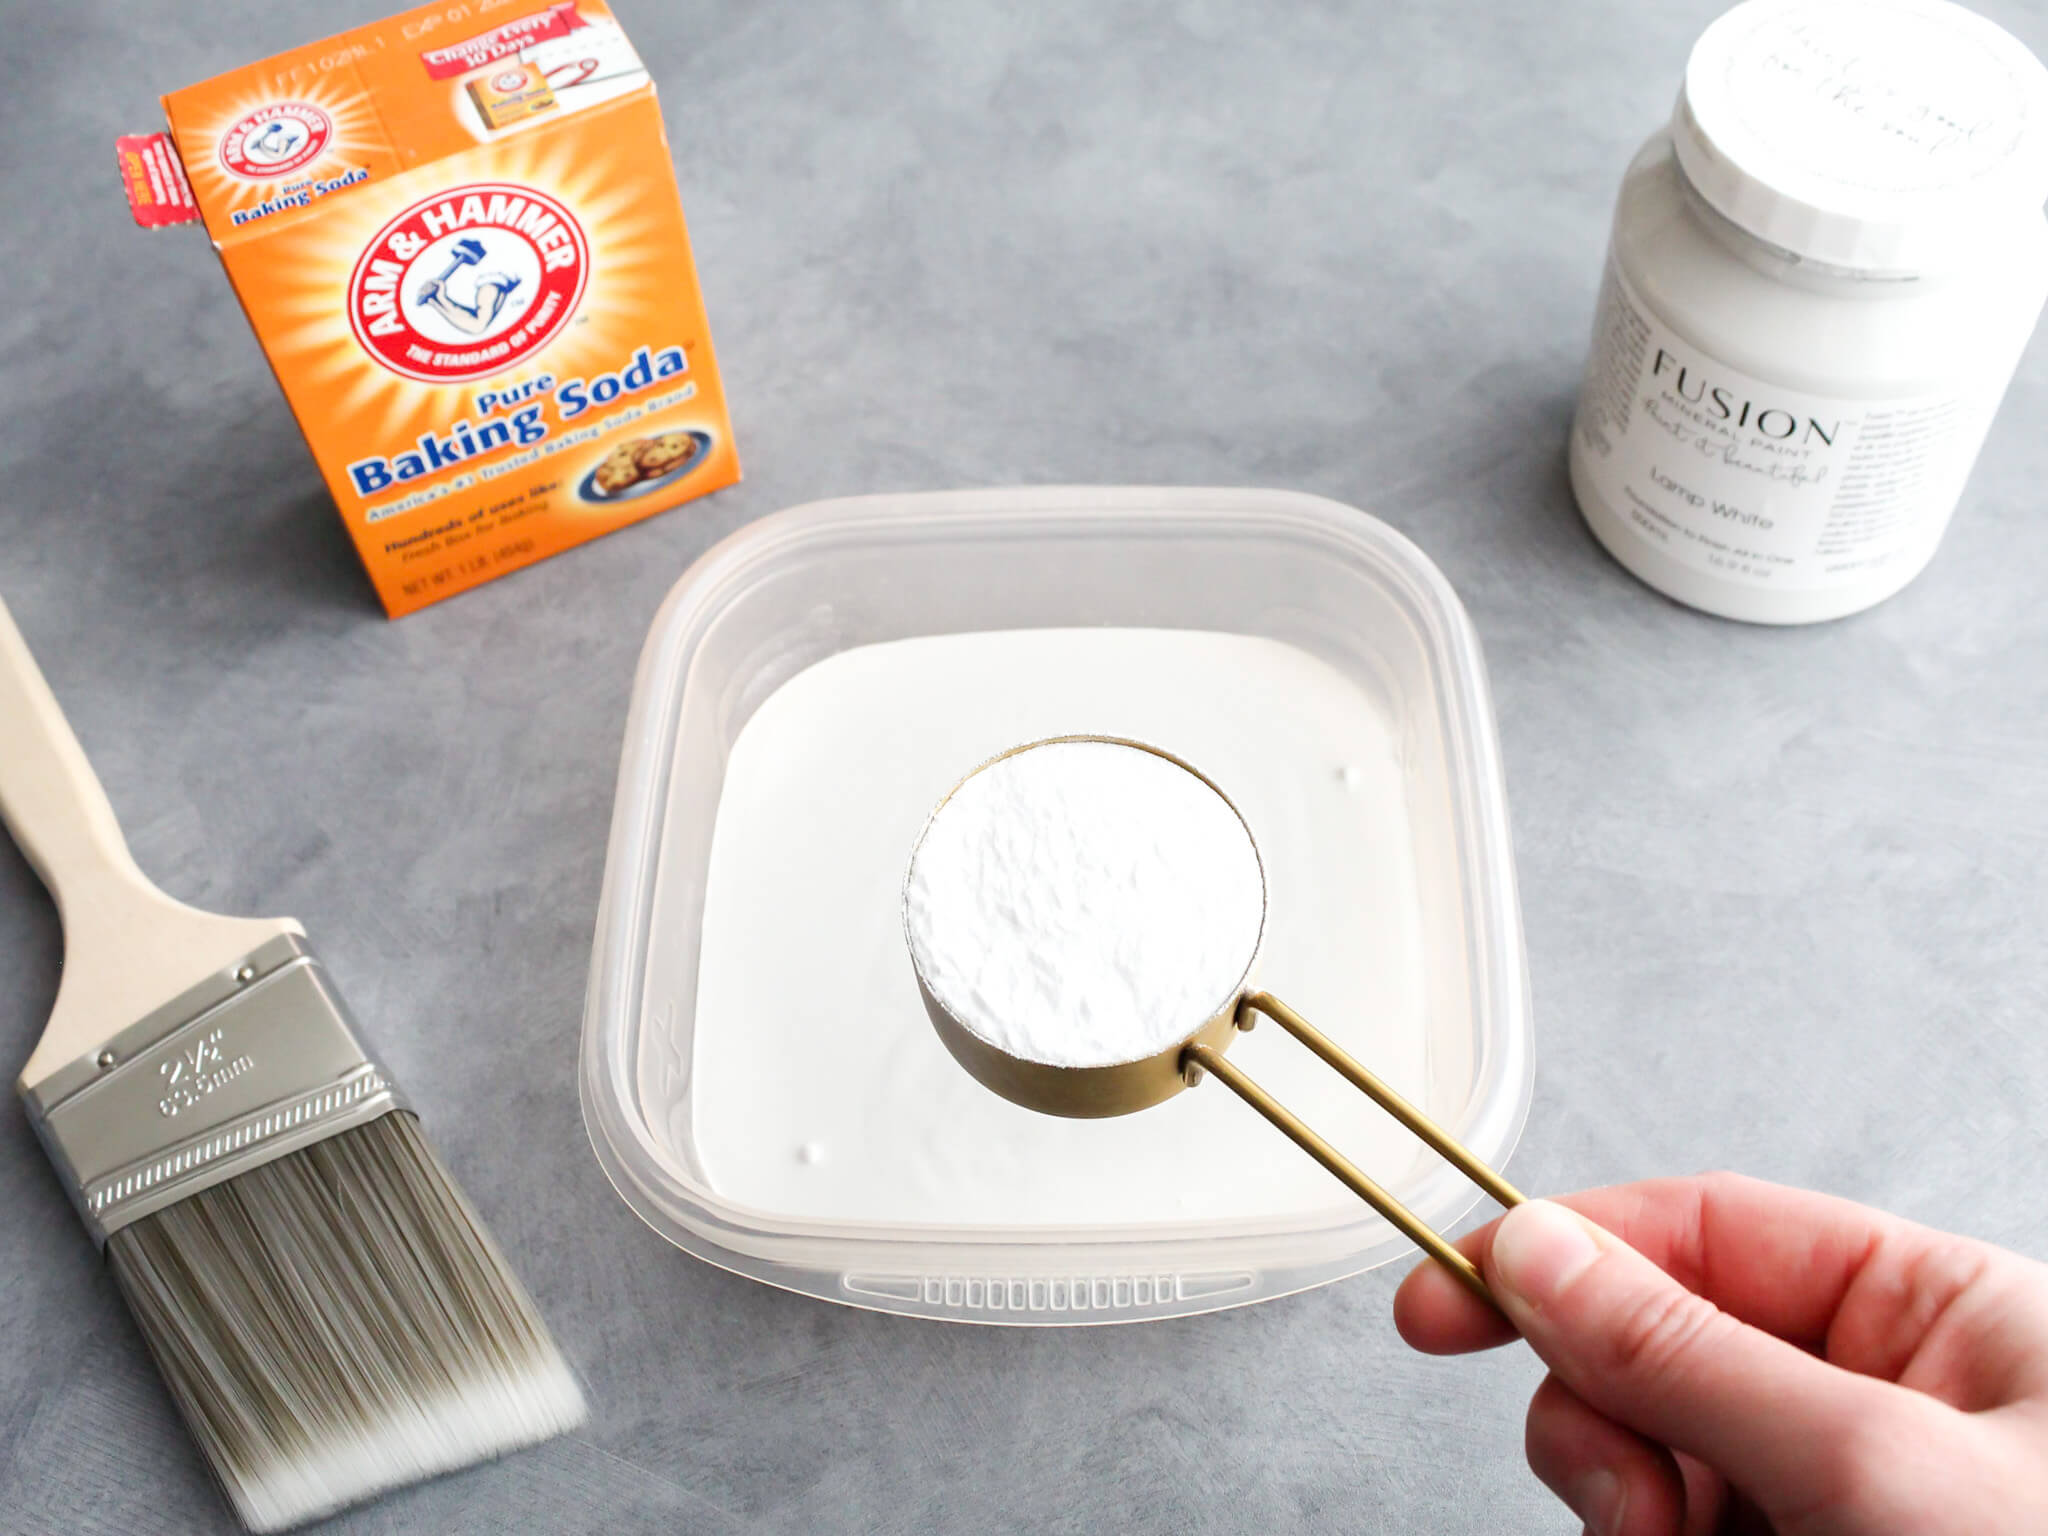
Give it a good mix until it’s nice and smooth, and you’re ready to go!
TIP FROM JEN : A quick heads-up, oil-based paints won’t work for this project! Stick with acrylic craft paint for the best results.
Step 3: Paint Your Pot and Let it Dry
Once your mix is ready, apply it to your terra cotta plant pot and let it dry completely.
I’ll admit, I used a hairdryer to speed up the process.
If you prefer to let it air dry, it will take about 30-40 minutes.
When dry, apply a second (or third) coat of paint as desired to add more texture.
Let the planter dry between each coat of paint.
TIP FROM JEN: Don’t forget to put a lid on your paint container between coats so the paint doesn’t dry out.
Once the paint is dry, take a look at your planter.
If it feels like it’s missing something, mix a little black paint into the leftover baking soda mix to make a soft gray color.
Then, dry brush the gray paint onto your terra cotta pot to give it some extra depth and help create that aged look.
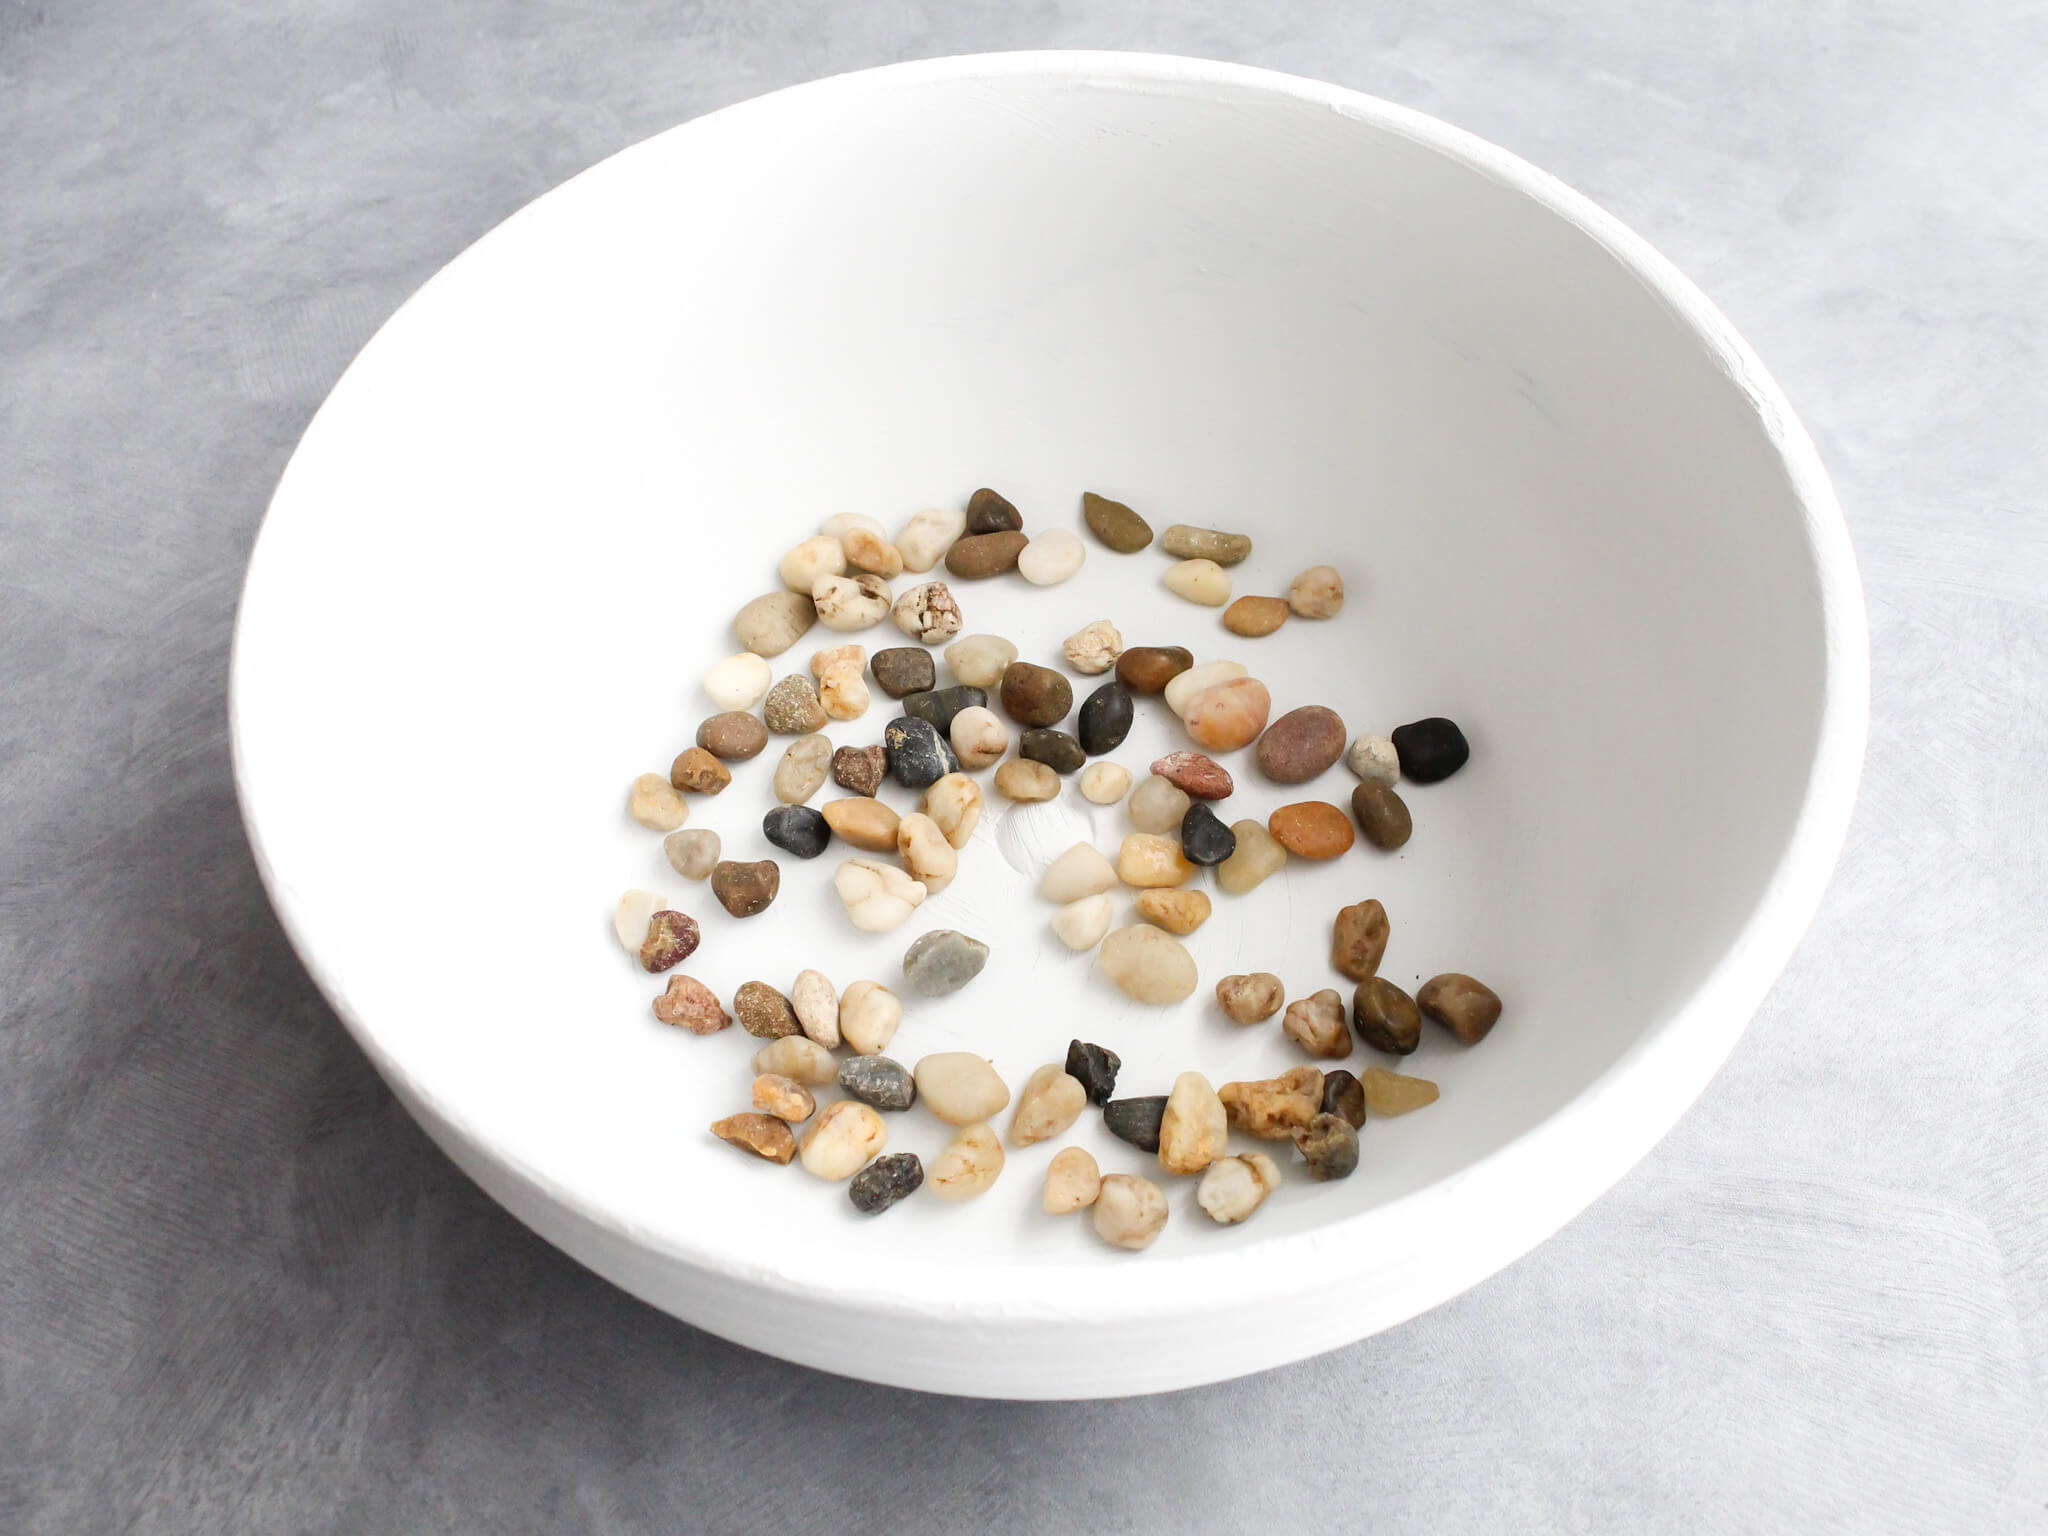
Step 4: Add Some Pebbles and Soil
Sprinkle a few small pebbles in the bottom of your planter. (This will help with drainage if your pot does not have drainage holes.)
Next, grab a garden trowel and add some potting soil.
Just be sure not to overfill the pot, and leave enough space for your plant to fit comfortably!
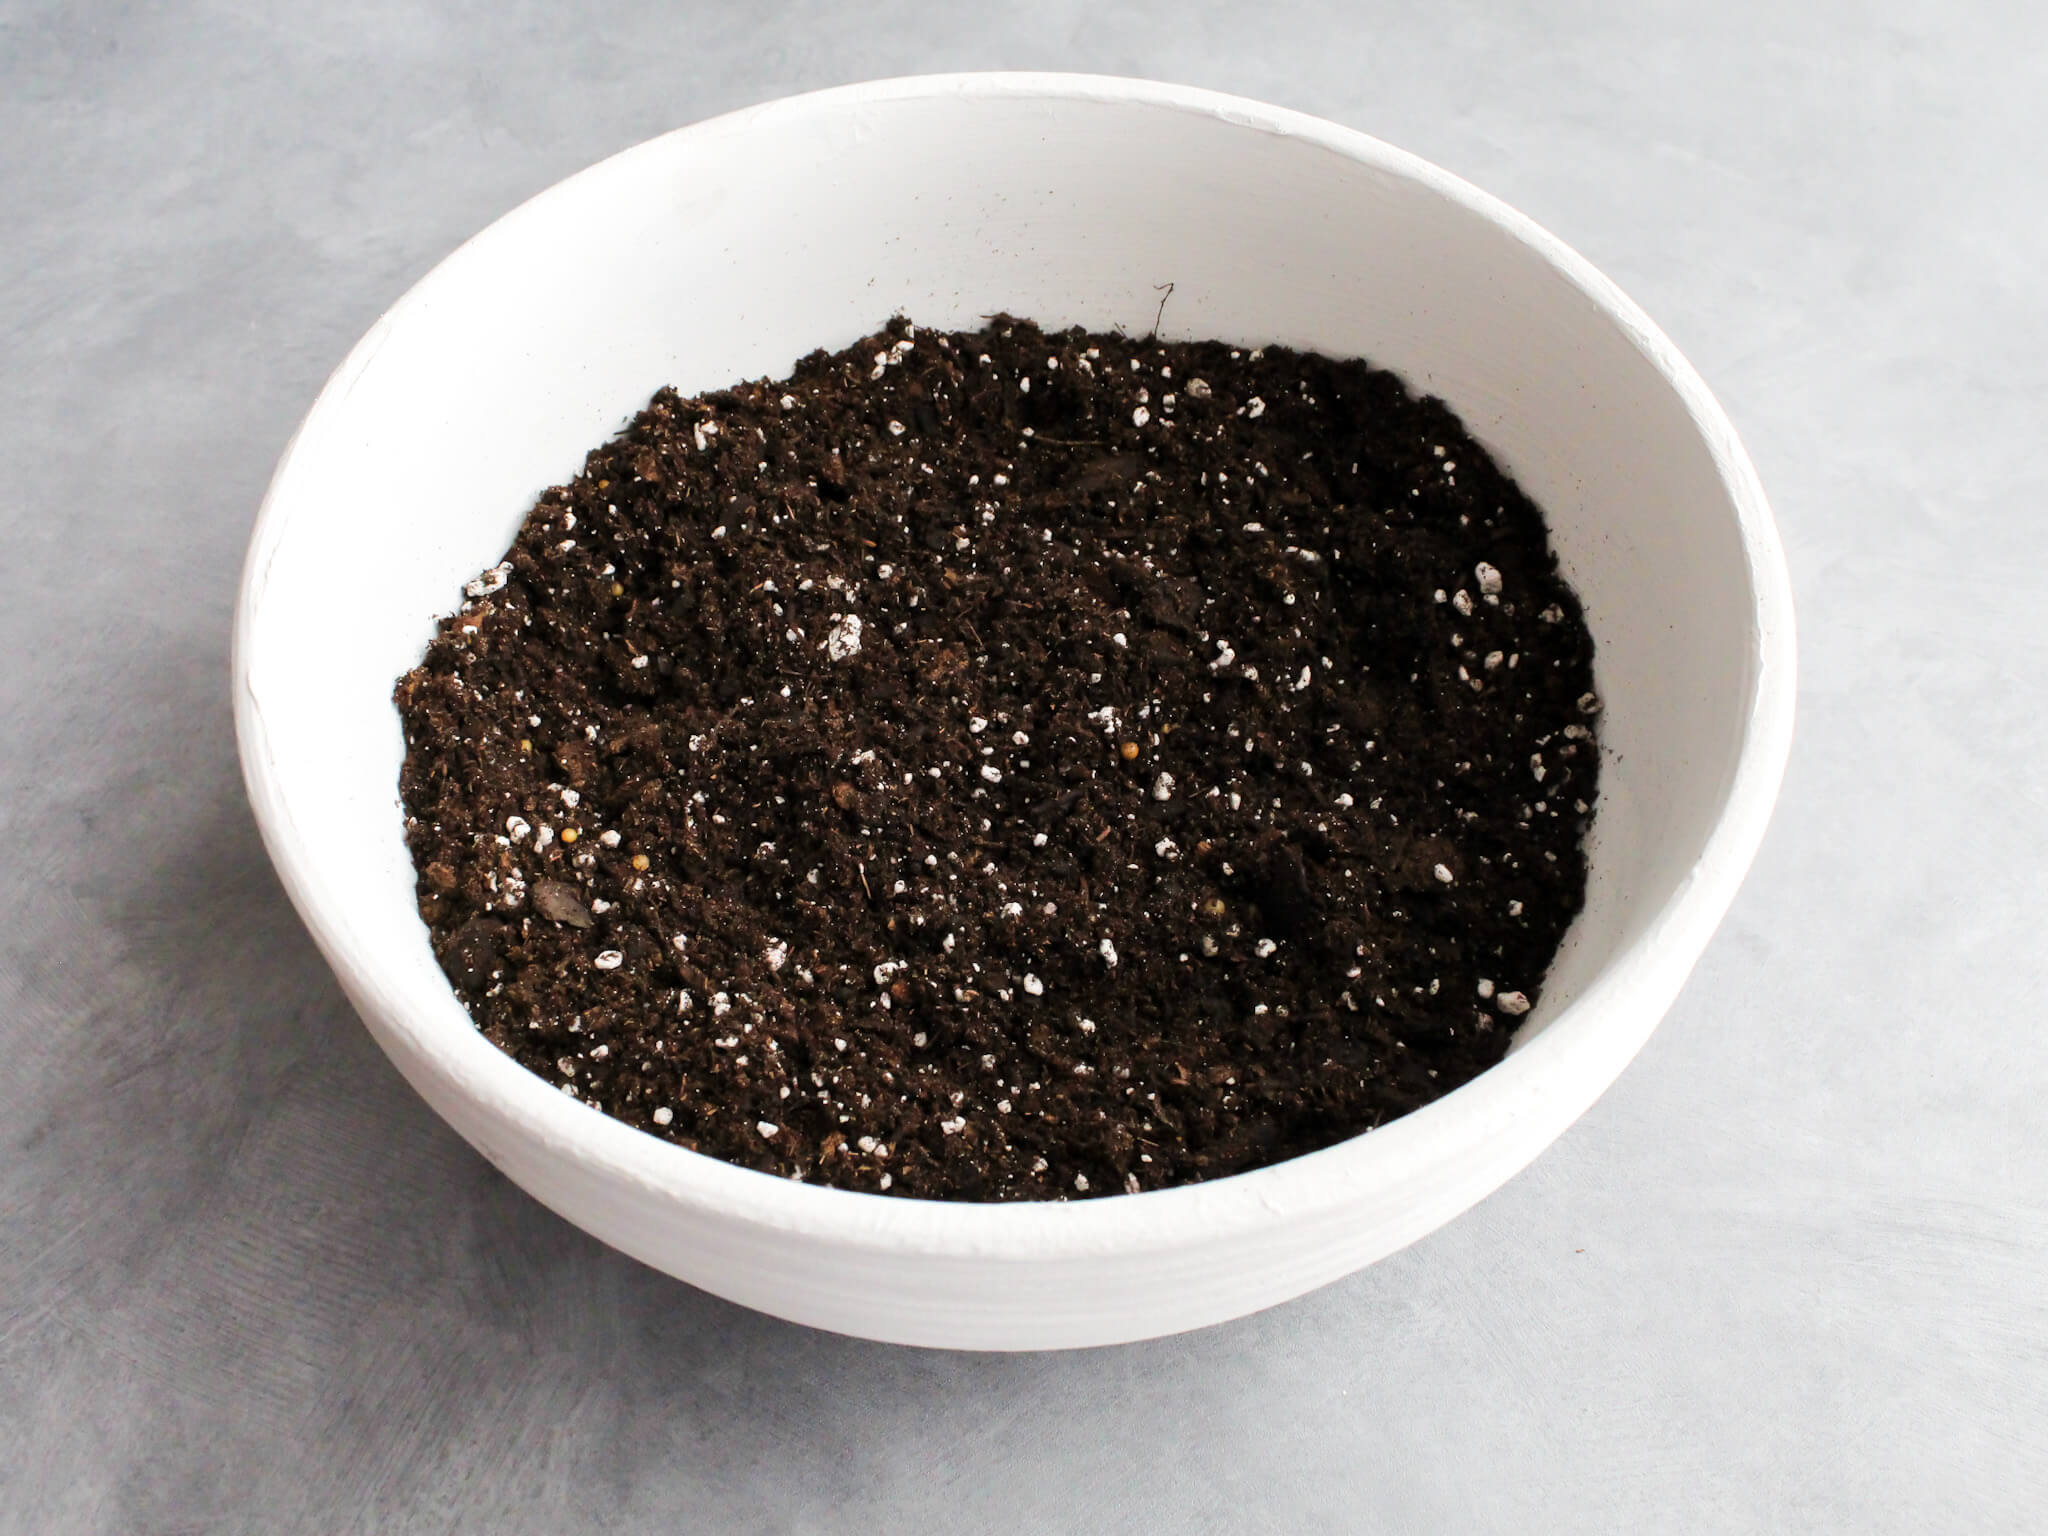
I filled my small round flower pot about halfway, but the amount of soil you’ll need depends on the size of your planter and how much soil your plant already has.
Step 5: Pot Your Plant
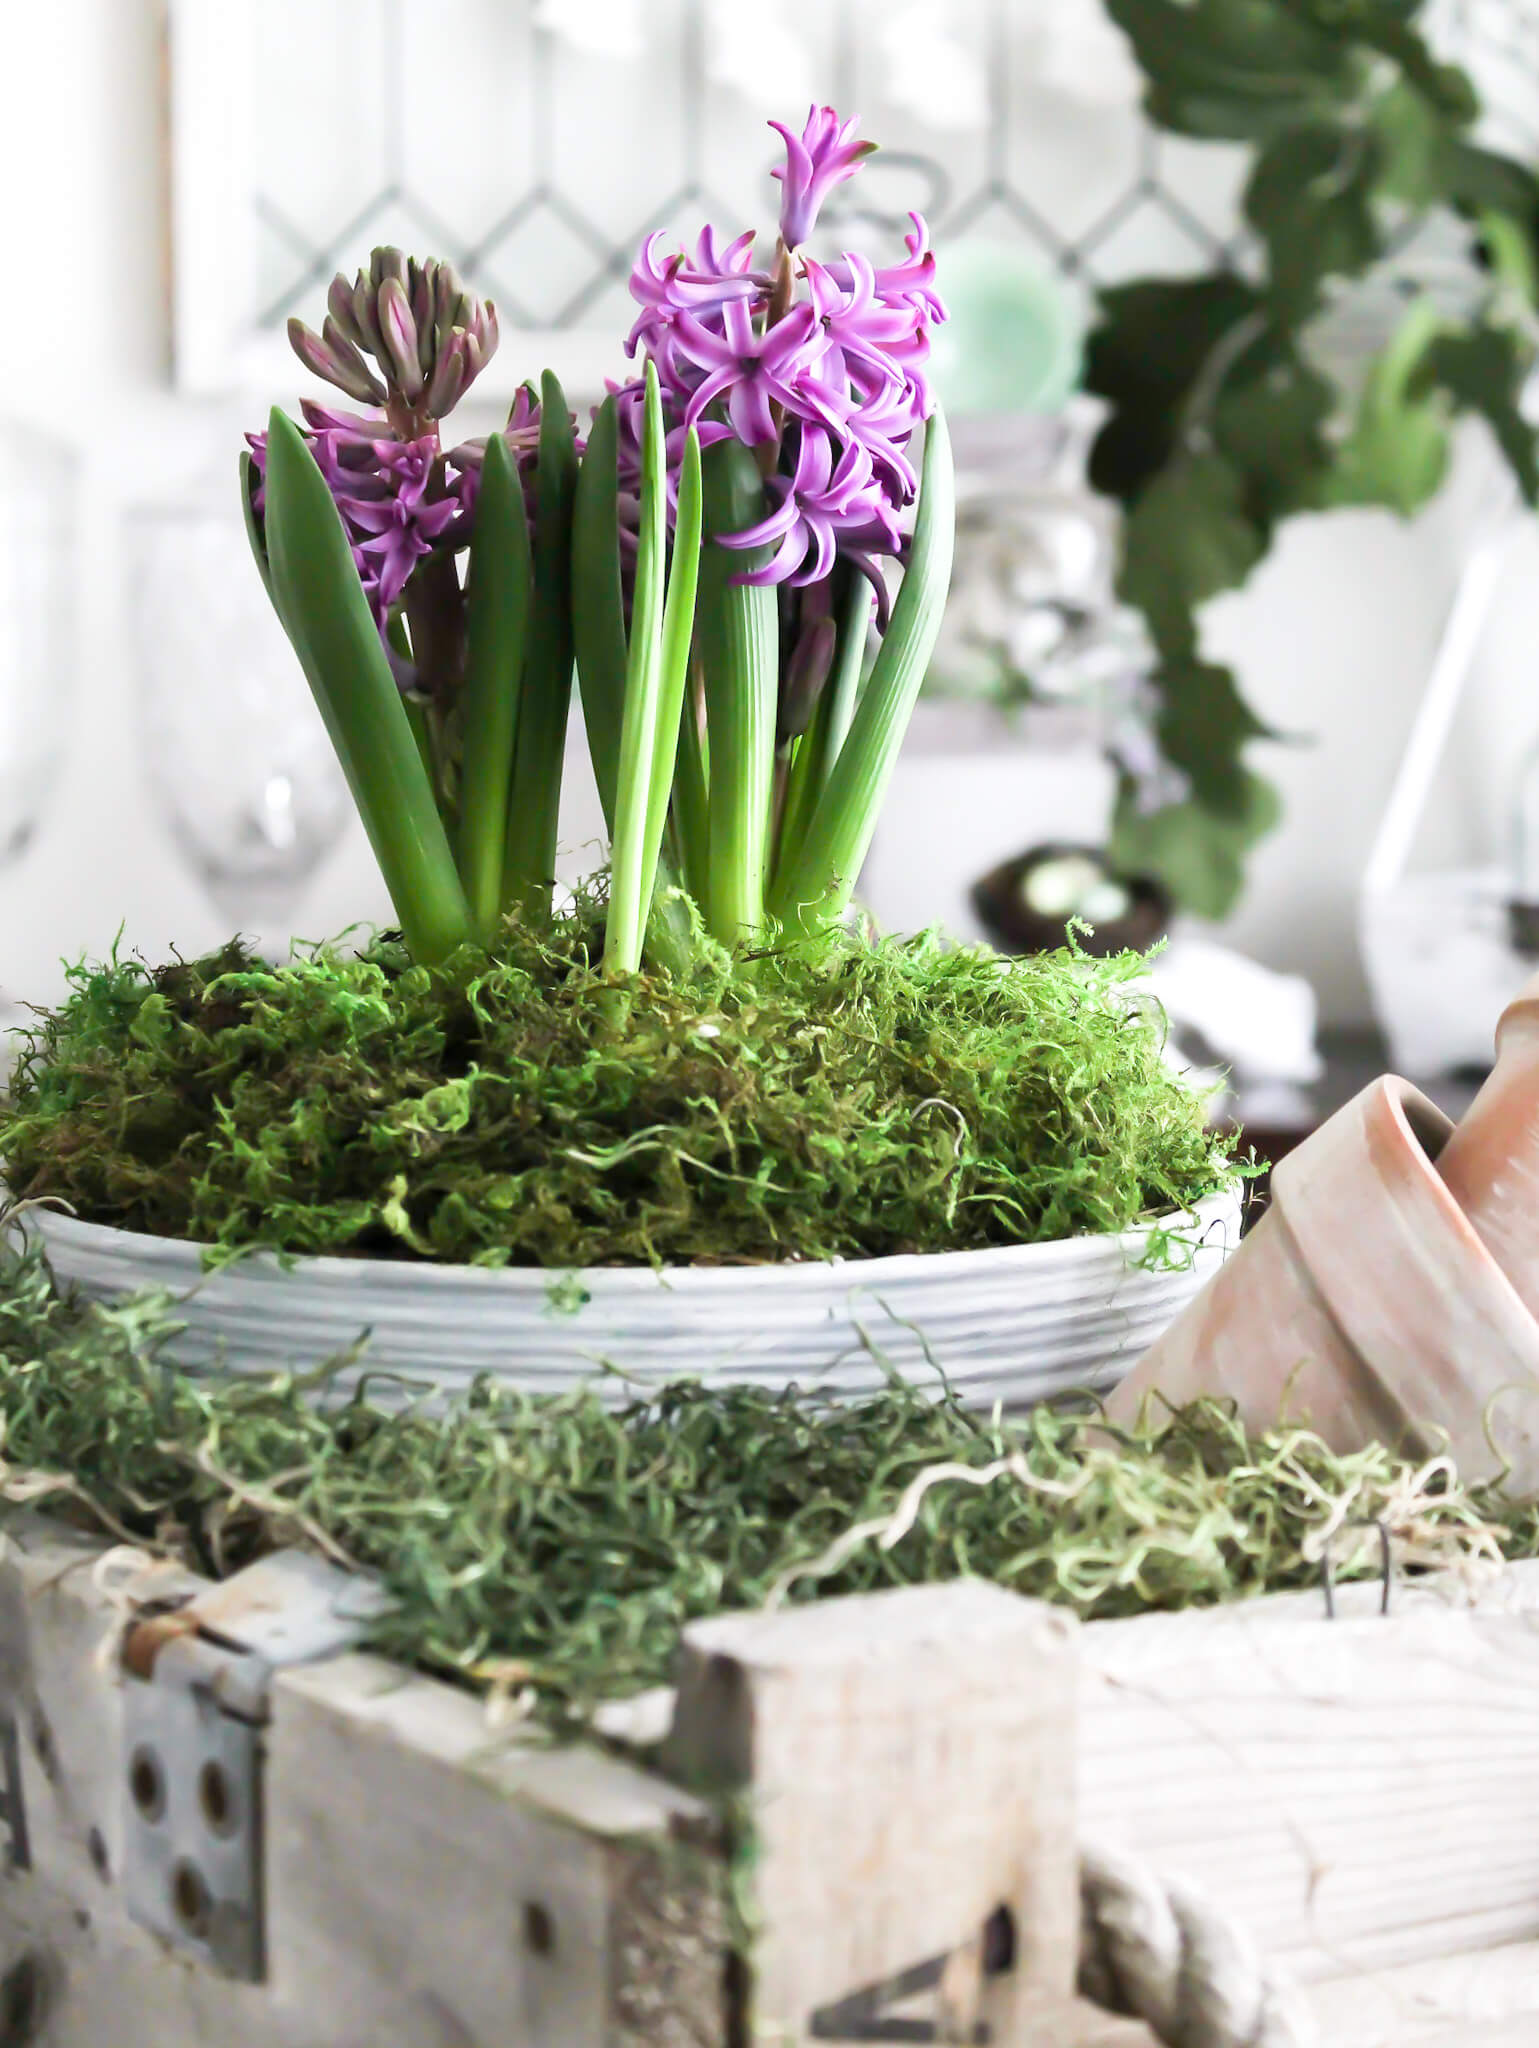
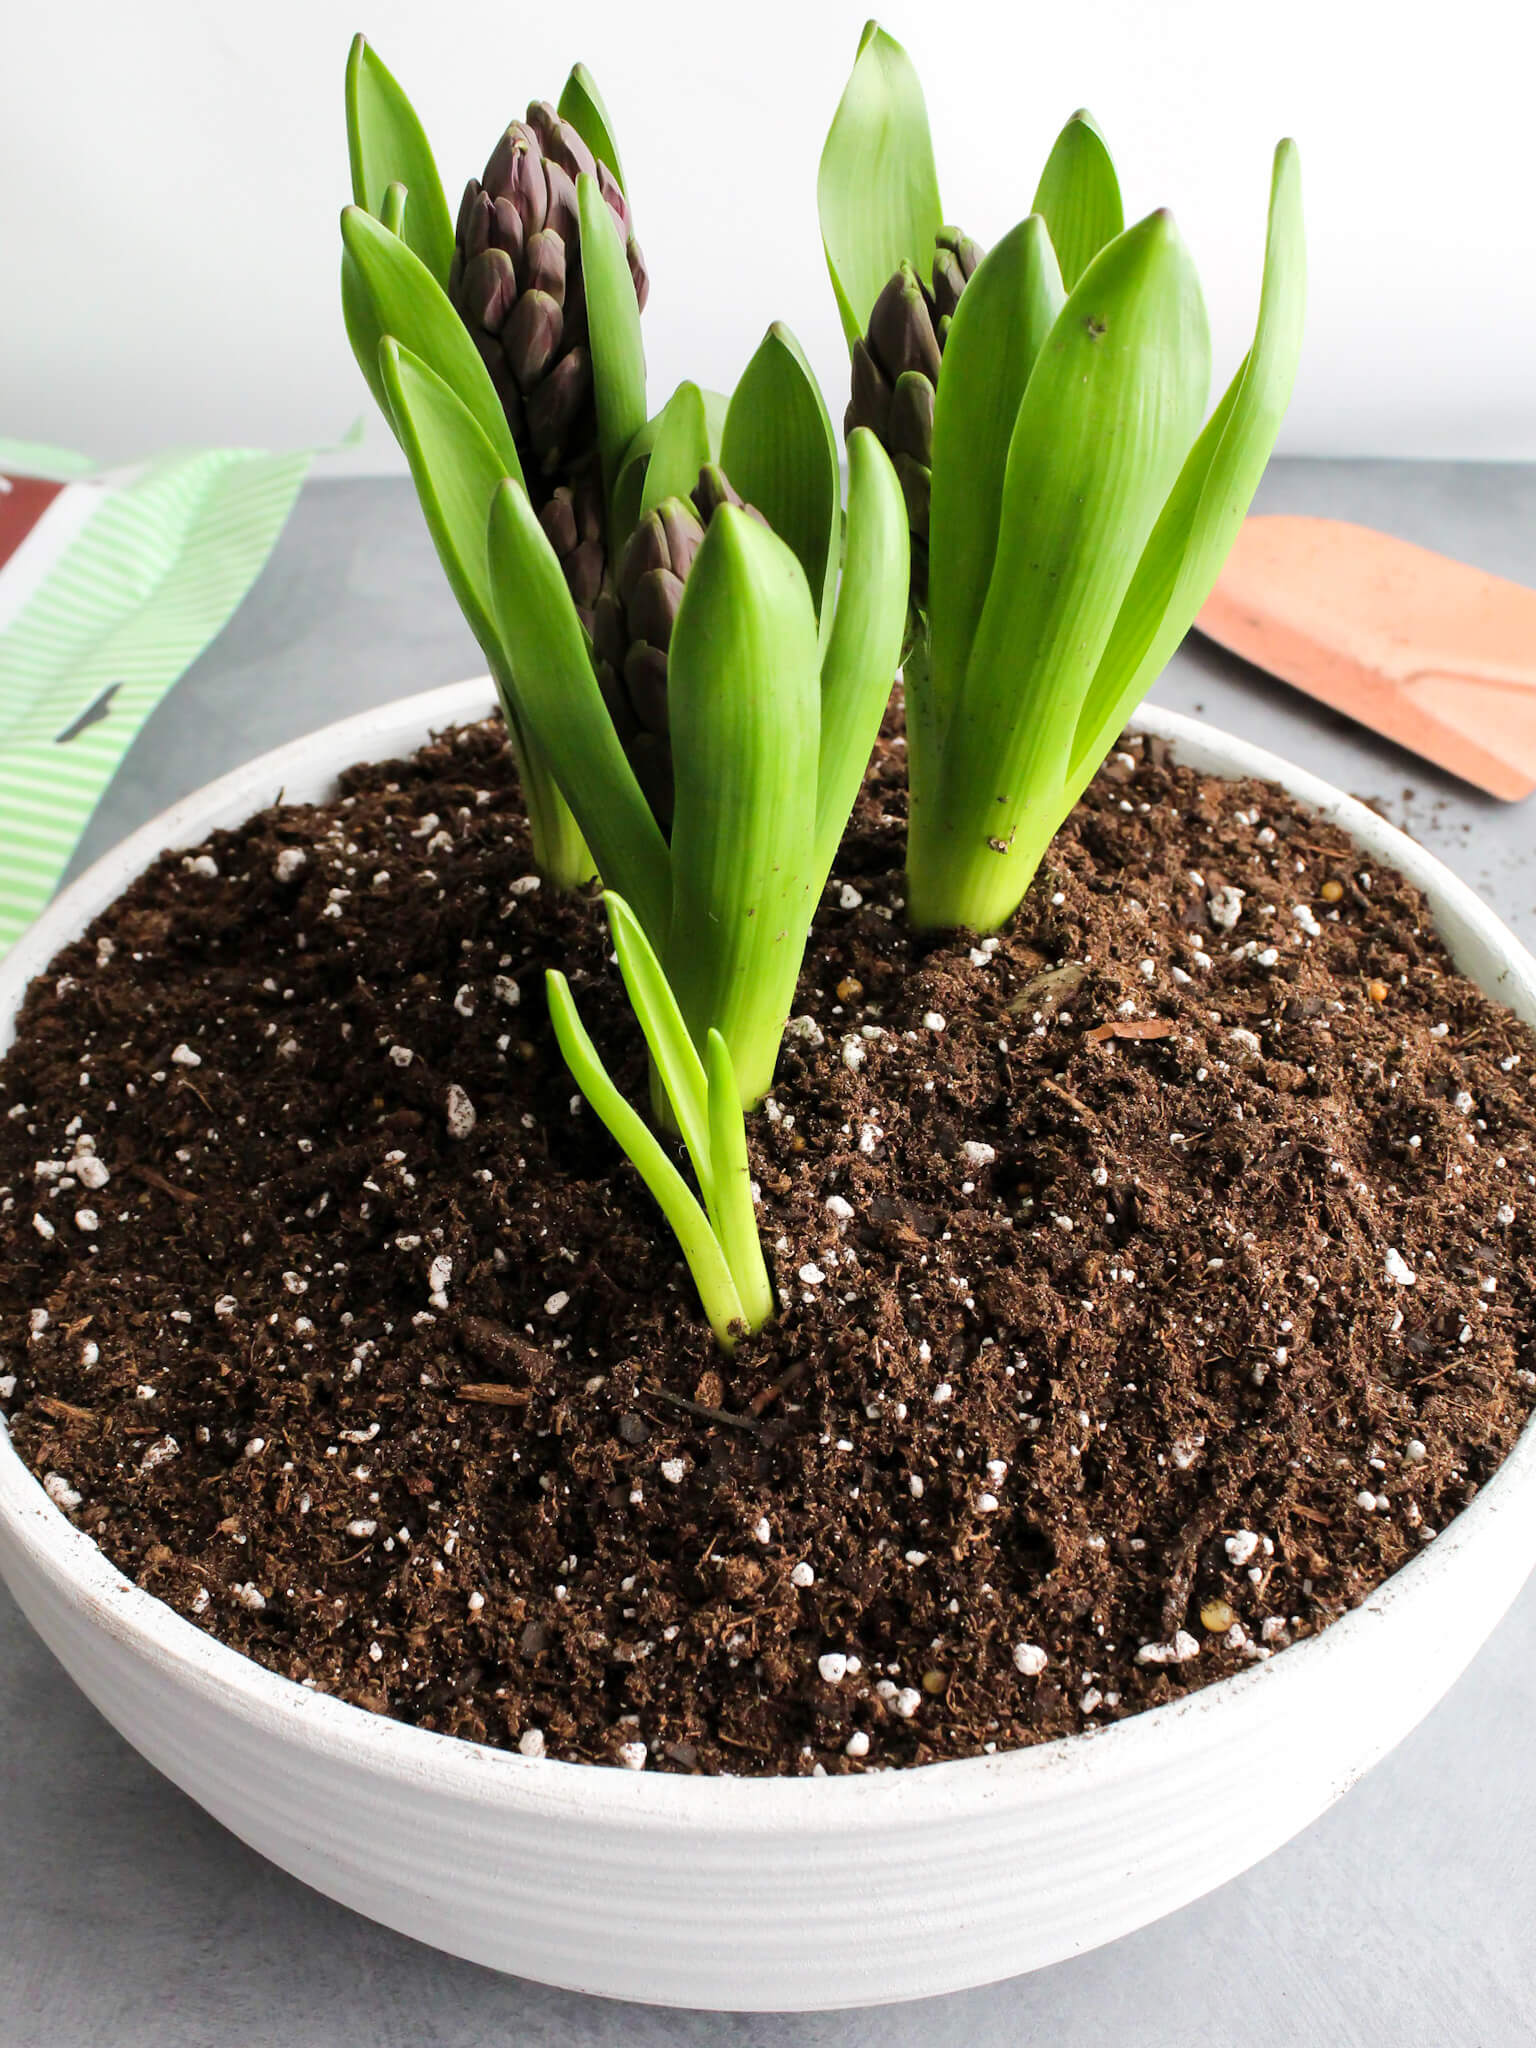
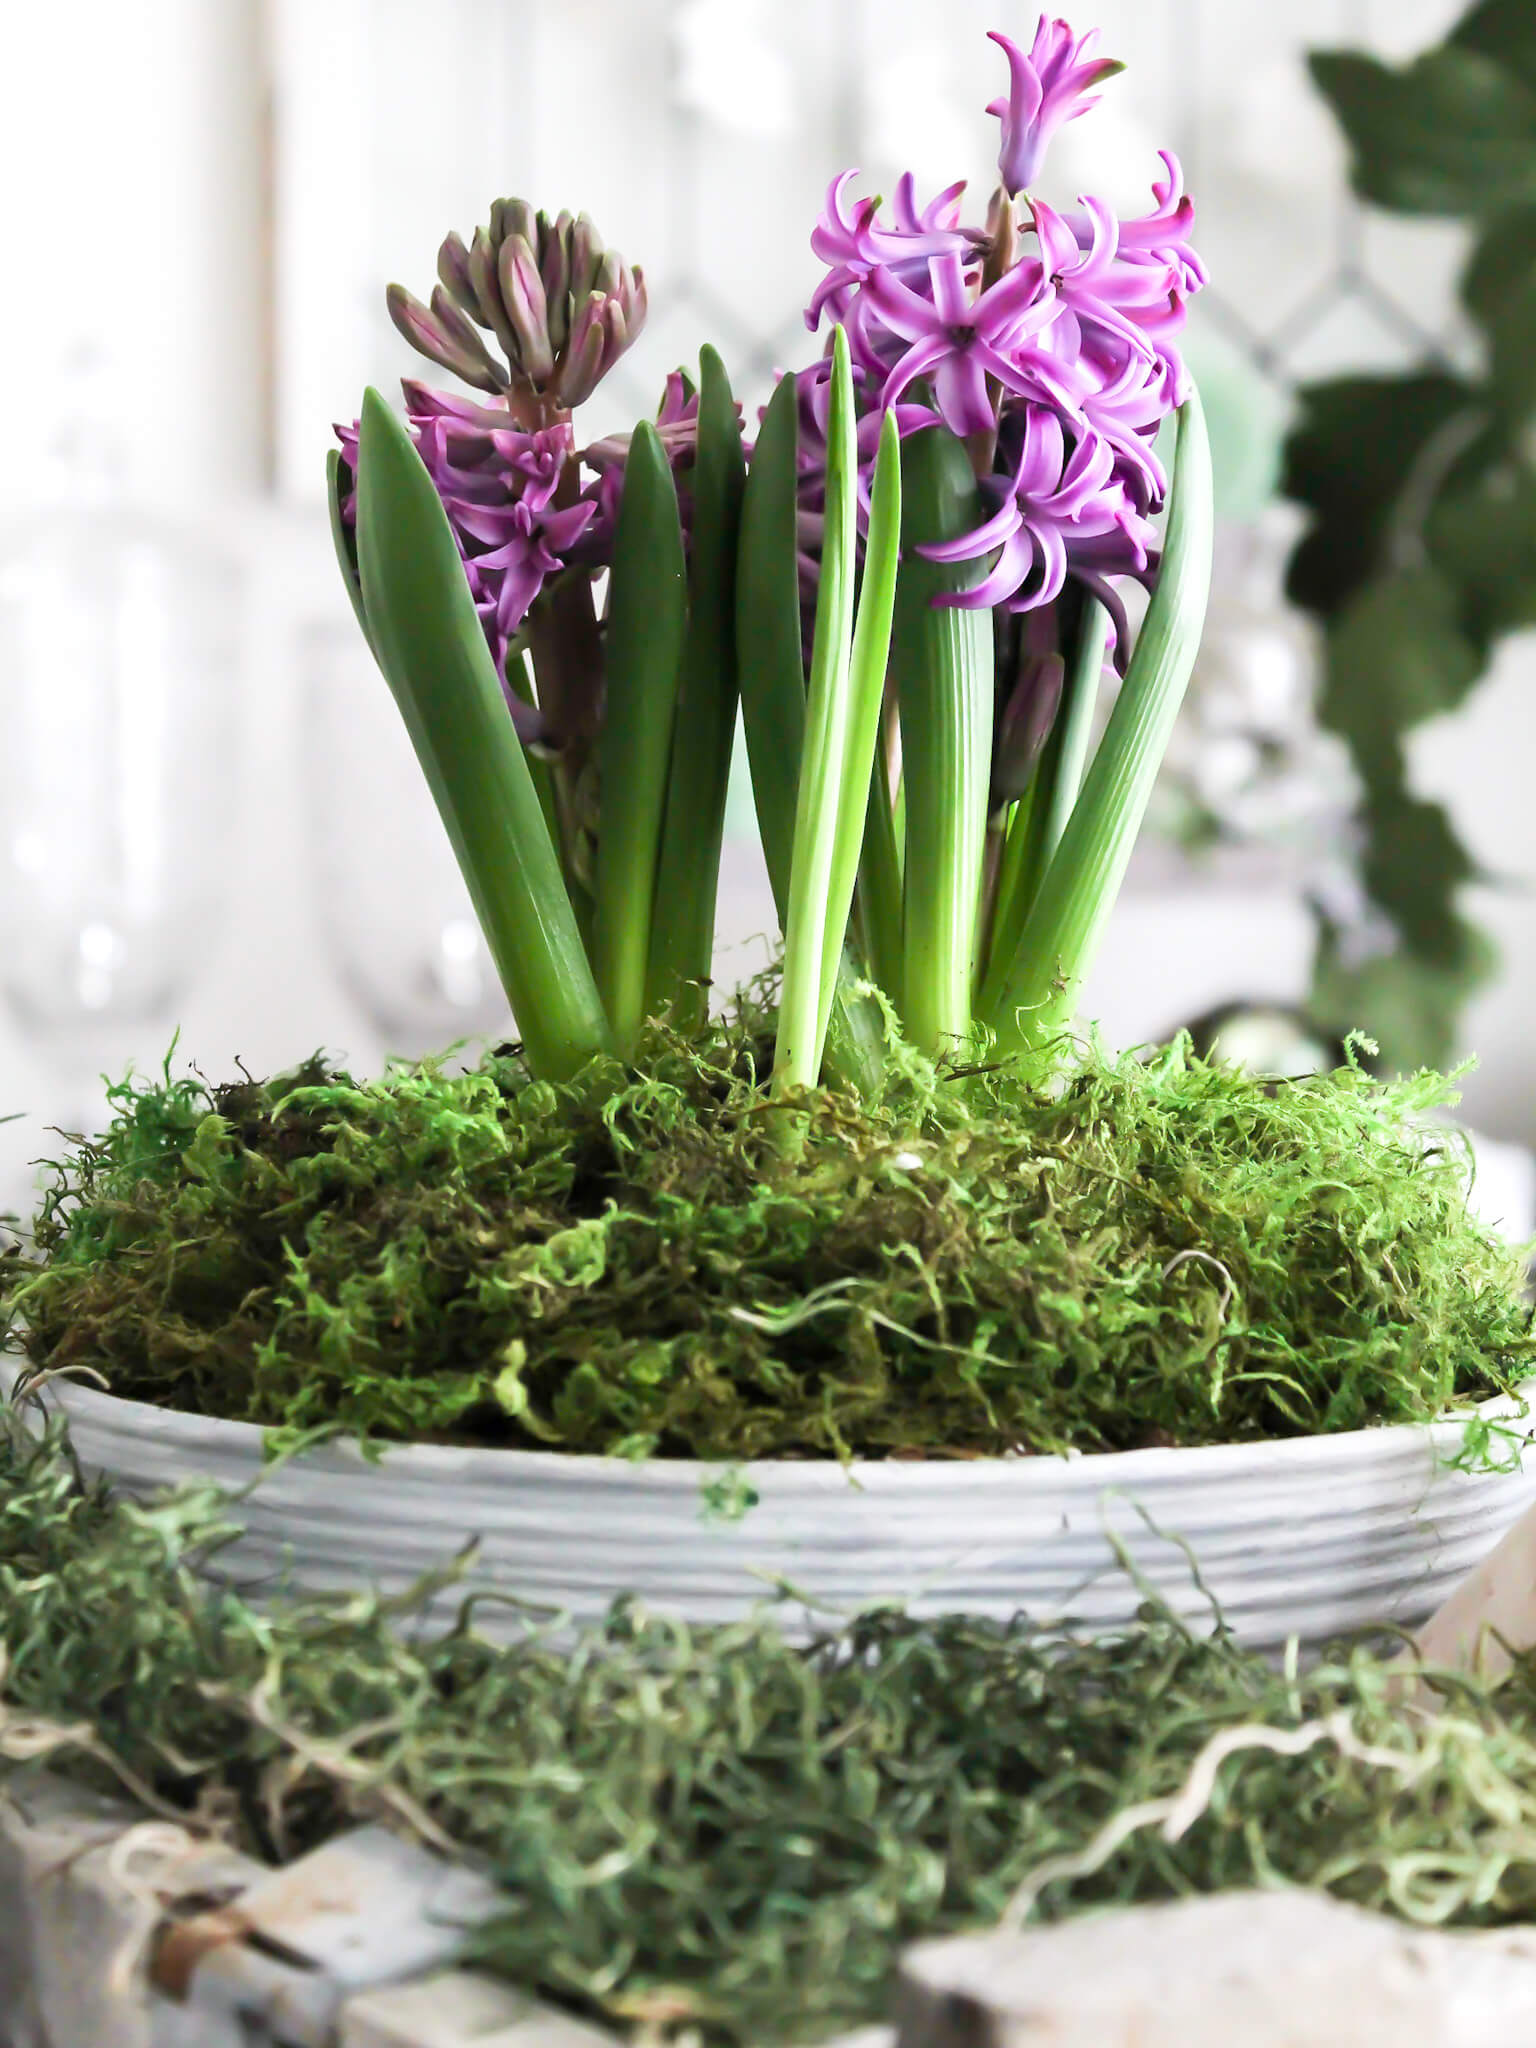
Now it’s time to add your plant! I picked up this purple hyacinth from the floral section at my local grocery store.
It’s perfect for spring, don’t you think?
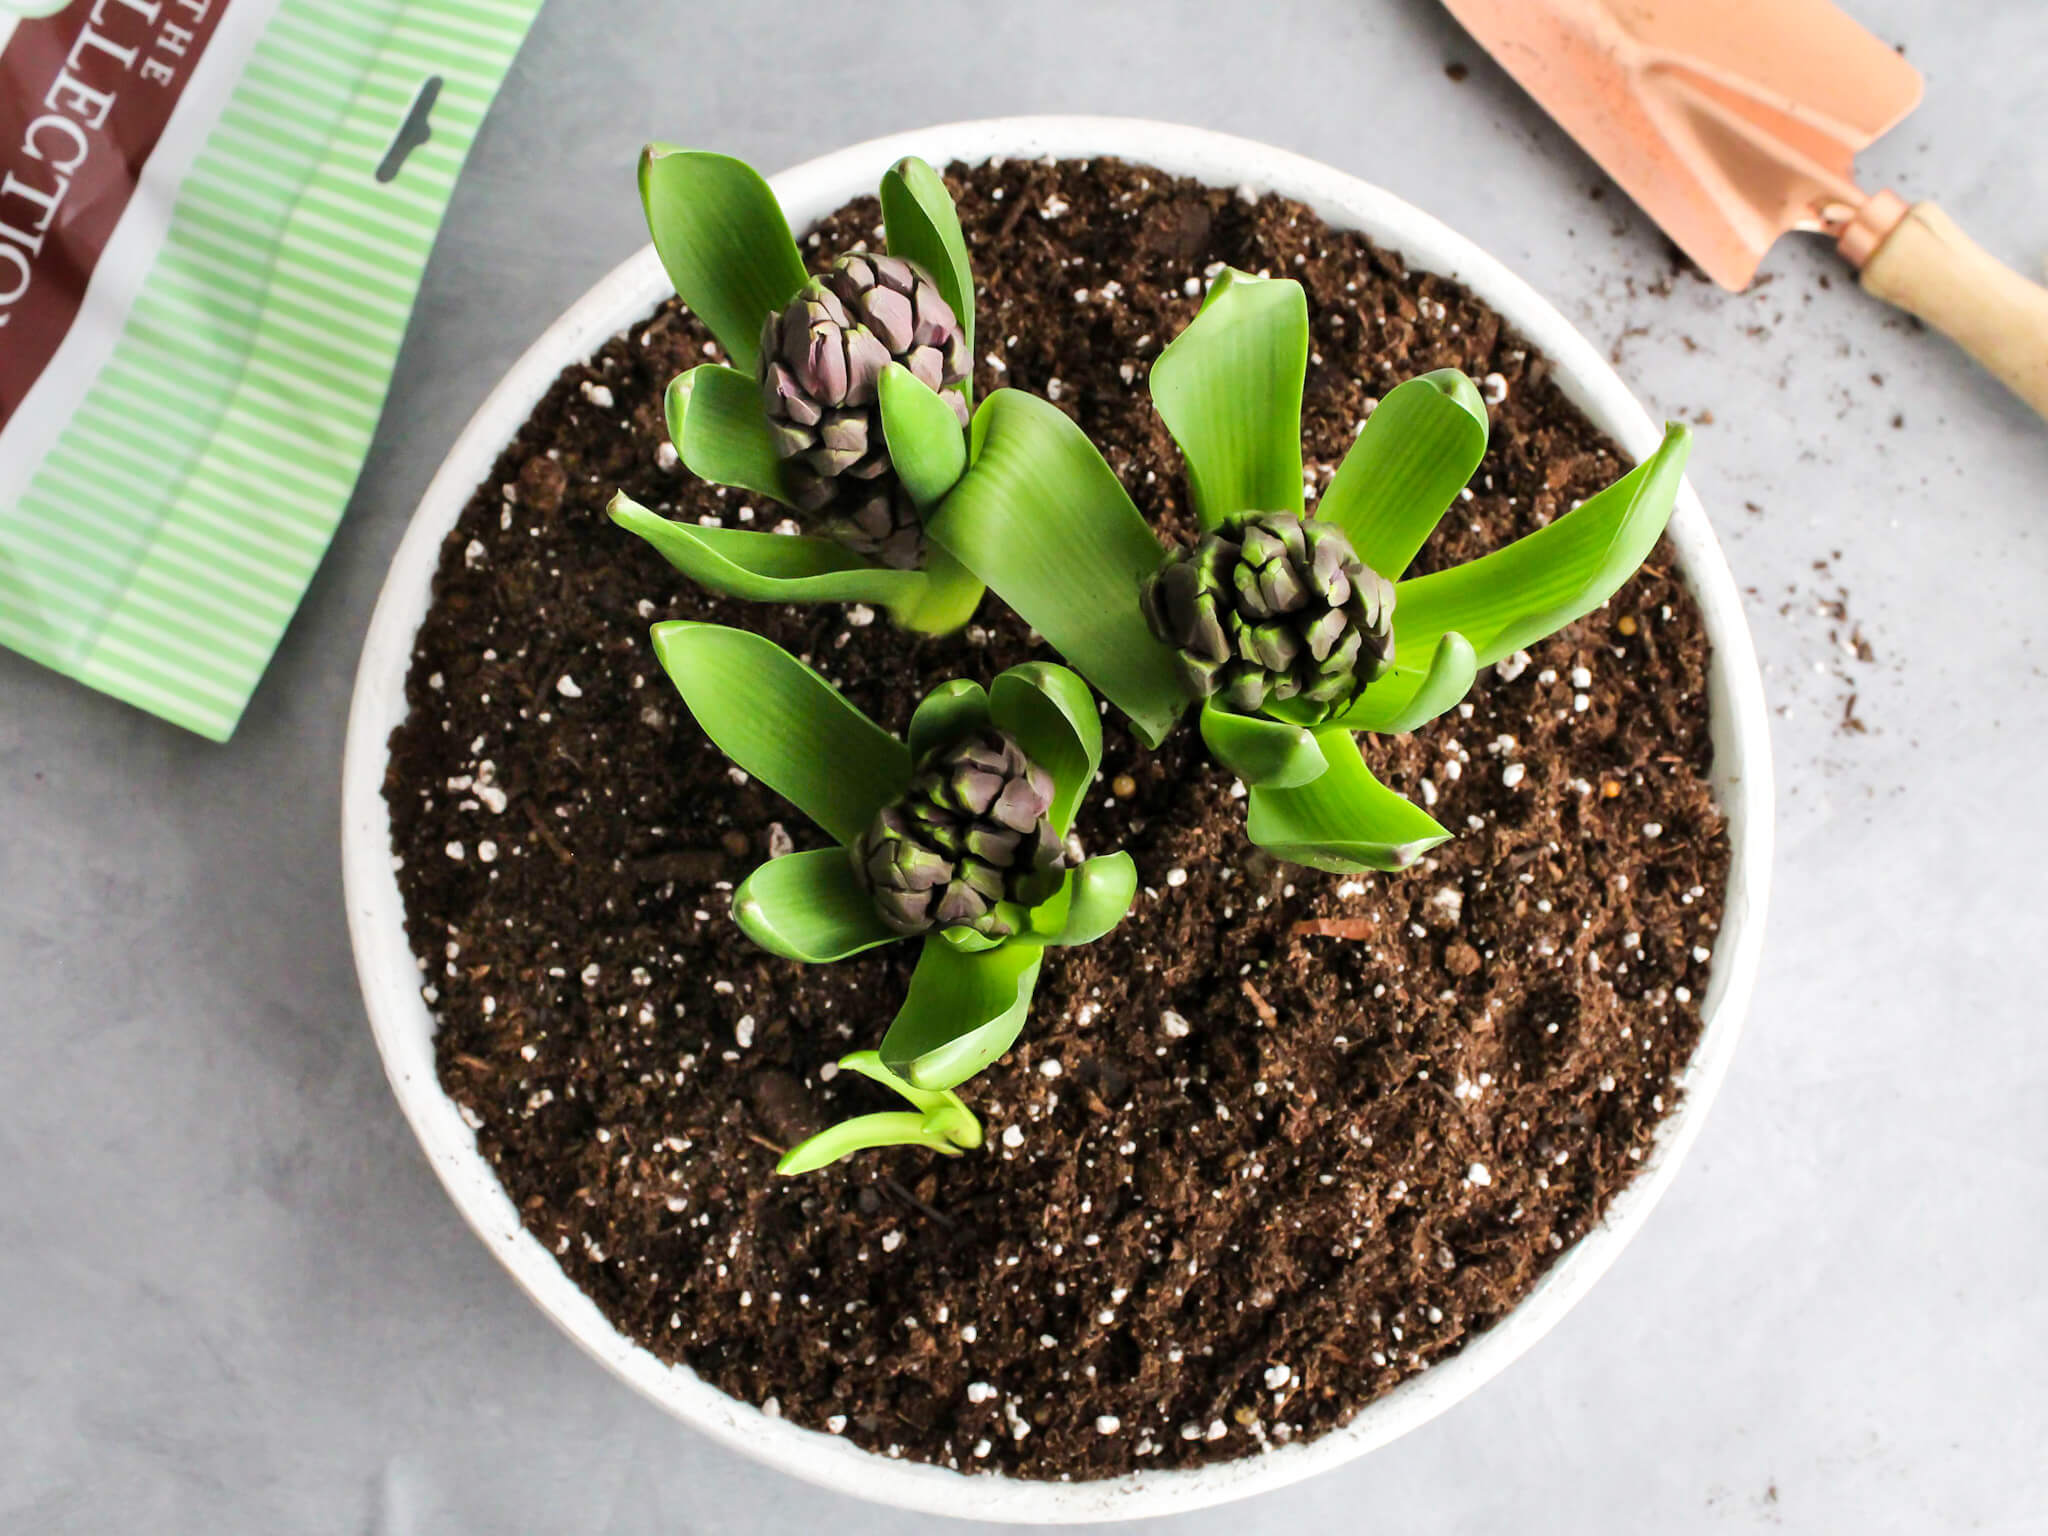
To pot your plant, dig a hole in the middle of your aged terra cotta planter.
Carefully remove your plant from its existing container, and then, gently loosen the soil around the roots.
Place your plant in the hole, and gently use your hands or small garden trowlel to cover it with soil.
TIP FROM JEN: Don’t forget to water! Just follow the watering guide for your plant to keep it happy and thriving.
The fun part about this DIY aged terra cotta pot project is that you can totally make it your own!
You can plant anything you like, from succulents to houseplants, or even some colorful spring annuals like pansies, petunias or begonias.
Just pick what you love and go for it!
Step 6: Top with Moss (Optional)
To finish off the DIY aged spring planter, add some preserved moss to the top for a little extra color and texture.
Since my planter will be indoors, I decided to include it, but this step is completely optional.
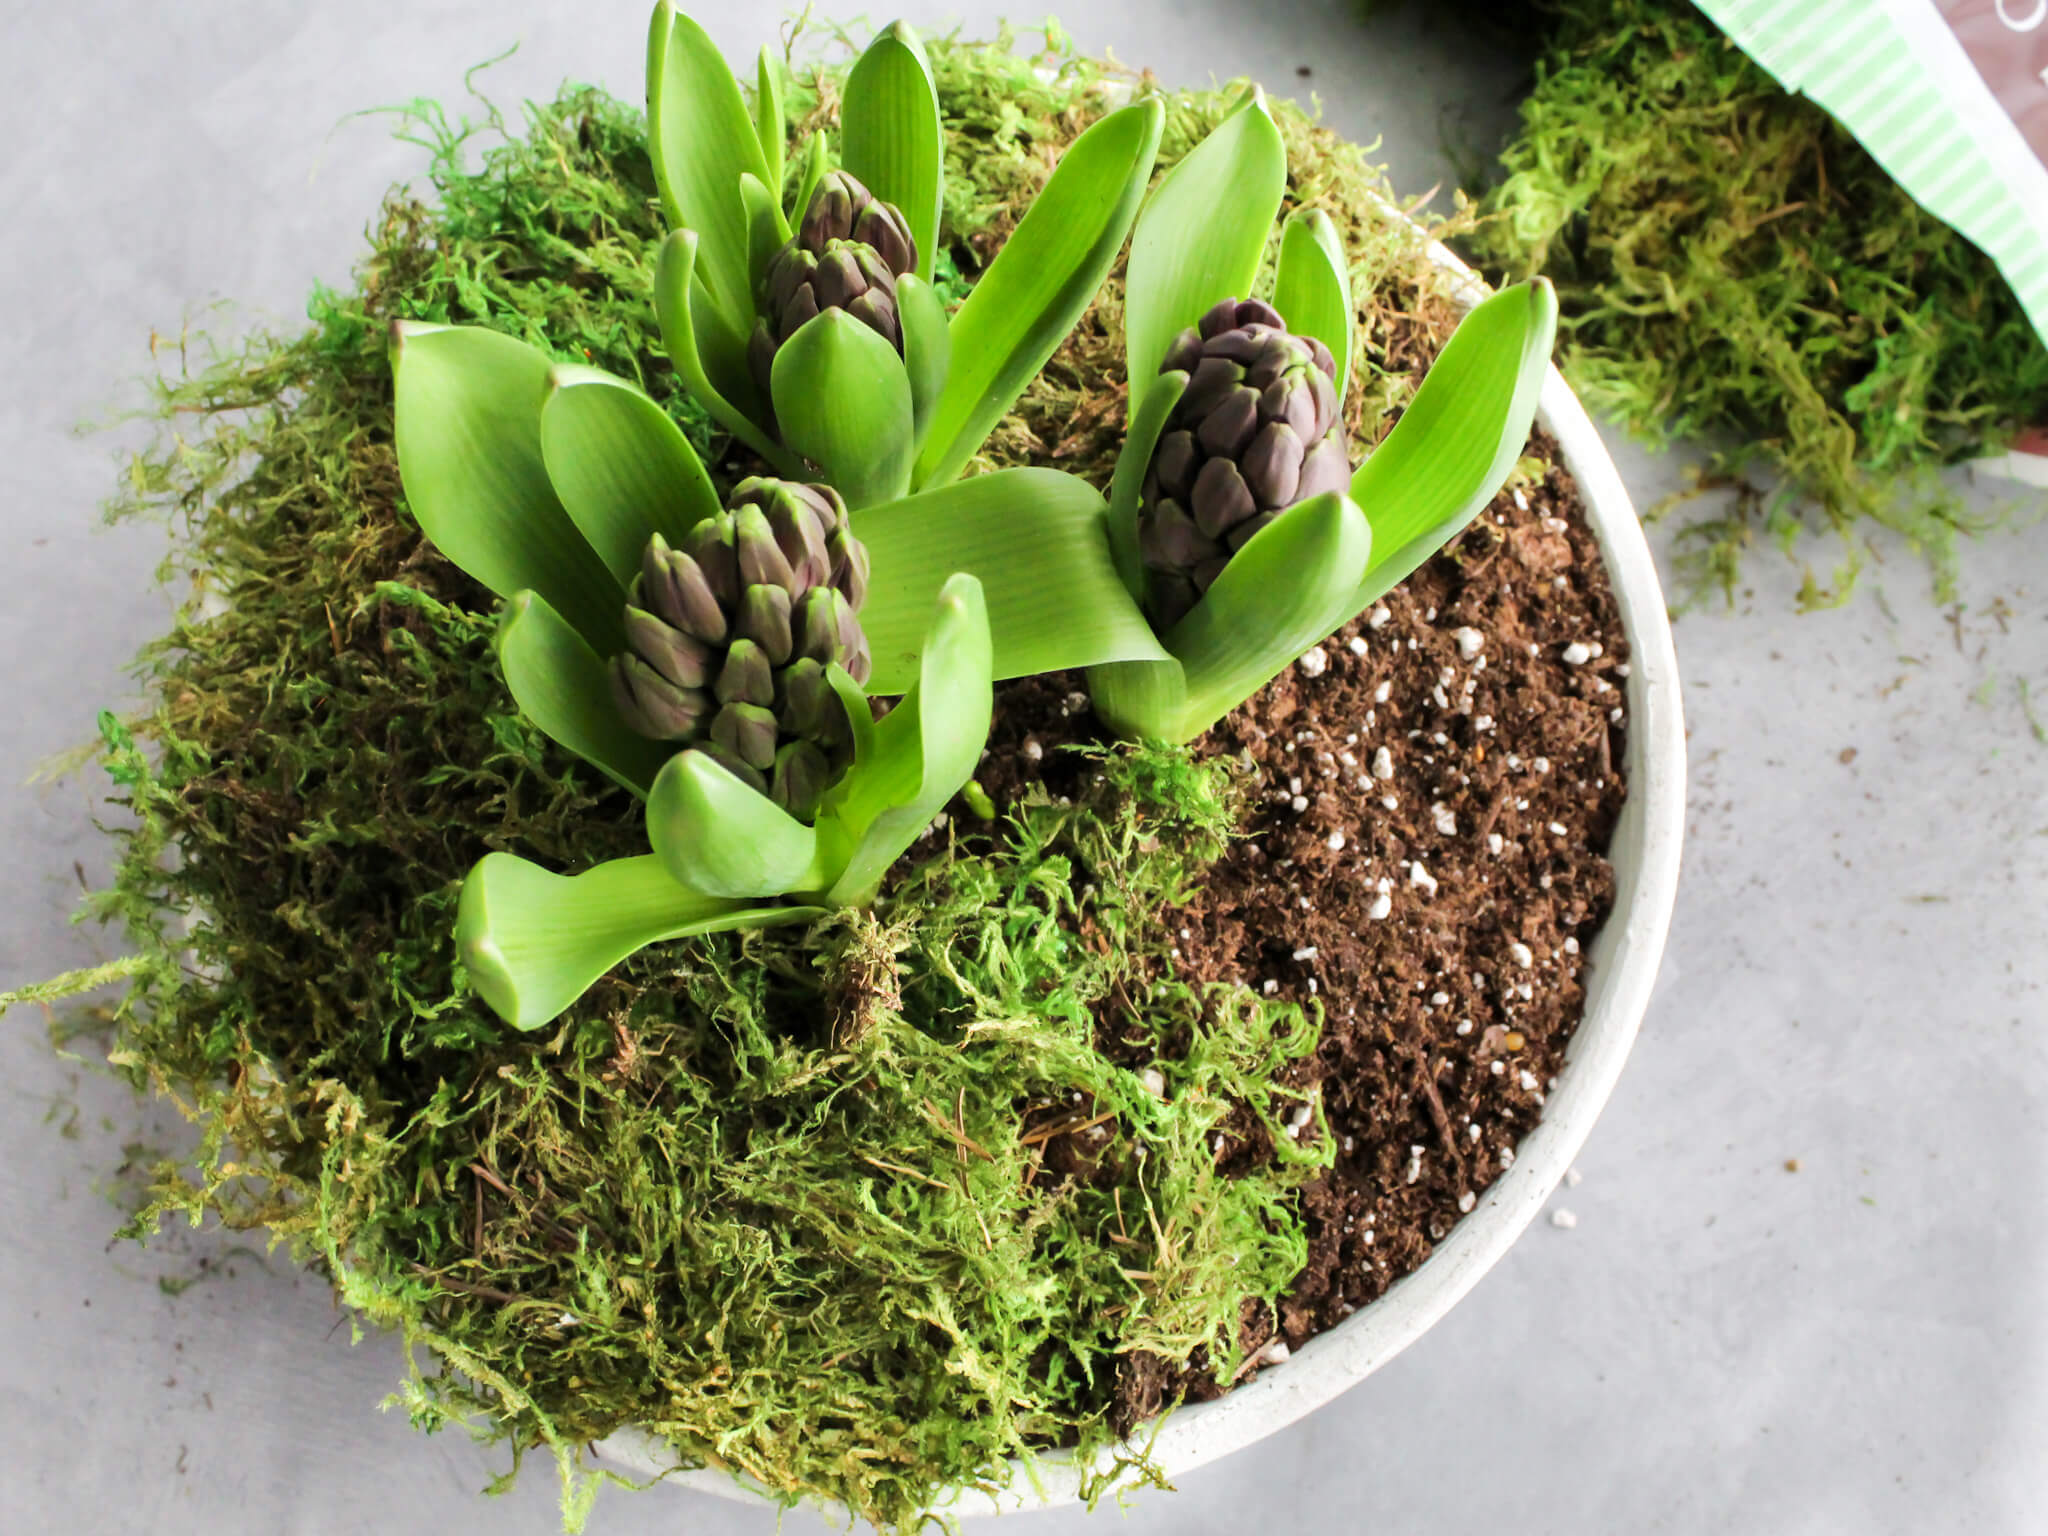
TIP FROM JEN: If you plan to use your planter outside, feel free to skip this step. While preserved moss can handle a bit of moisture, it’s not great with prolonged water exposure or too much humidity.
It can affect the preservation and might even lead to mold or change in texture and color.
Other Ways to Create an Aged Terra Cotta Pot
We’ve already covered how to age terra cotta pots with baking soda and paint, but there are plenty of other methods you can try too!
Here are a few simple techniques to give your flower pots a natural time-work and rustic look using items you might already have at home.
How to Age Terra Cotta Pots with Salt
Mix salt with vinegar, then apply it to the pot, and as it dries, it gives the pot a worn, distressed look.
The more layers you apply, the more aged the pot will appear!
How to Age Terra Cotta Pots with Yogurt
Coat your pot with plain yogurt and leave it in a sunny spot. The yogurt will add a green patina color to your pots, giving them an authentic, weathered feel.
How to Age Terra Cotta Pots with Lime
Mix two cups of garden lime with 1 1/2 cups water to create a lime past and use a paint brush to your terra cotta pots.
The lime will create an aged, chalky effect.
Sand lightly with sandpaper to create aging spots and spray with a clear matte protective coat.
It’s a great way to give your pot a patina look, almost like it’s been sitting outside for years.
More Spring DIYS from Midwest Life and Style
If you love this DIY for aged terra cotta pots, you might also like some of my other favorite spring craft projects.
Easy DIY Aged Terra Cotta Spring Flower Pot
I hope you enjoyed my tutorial for this easy DIY spring planter.
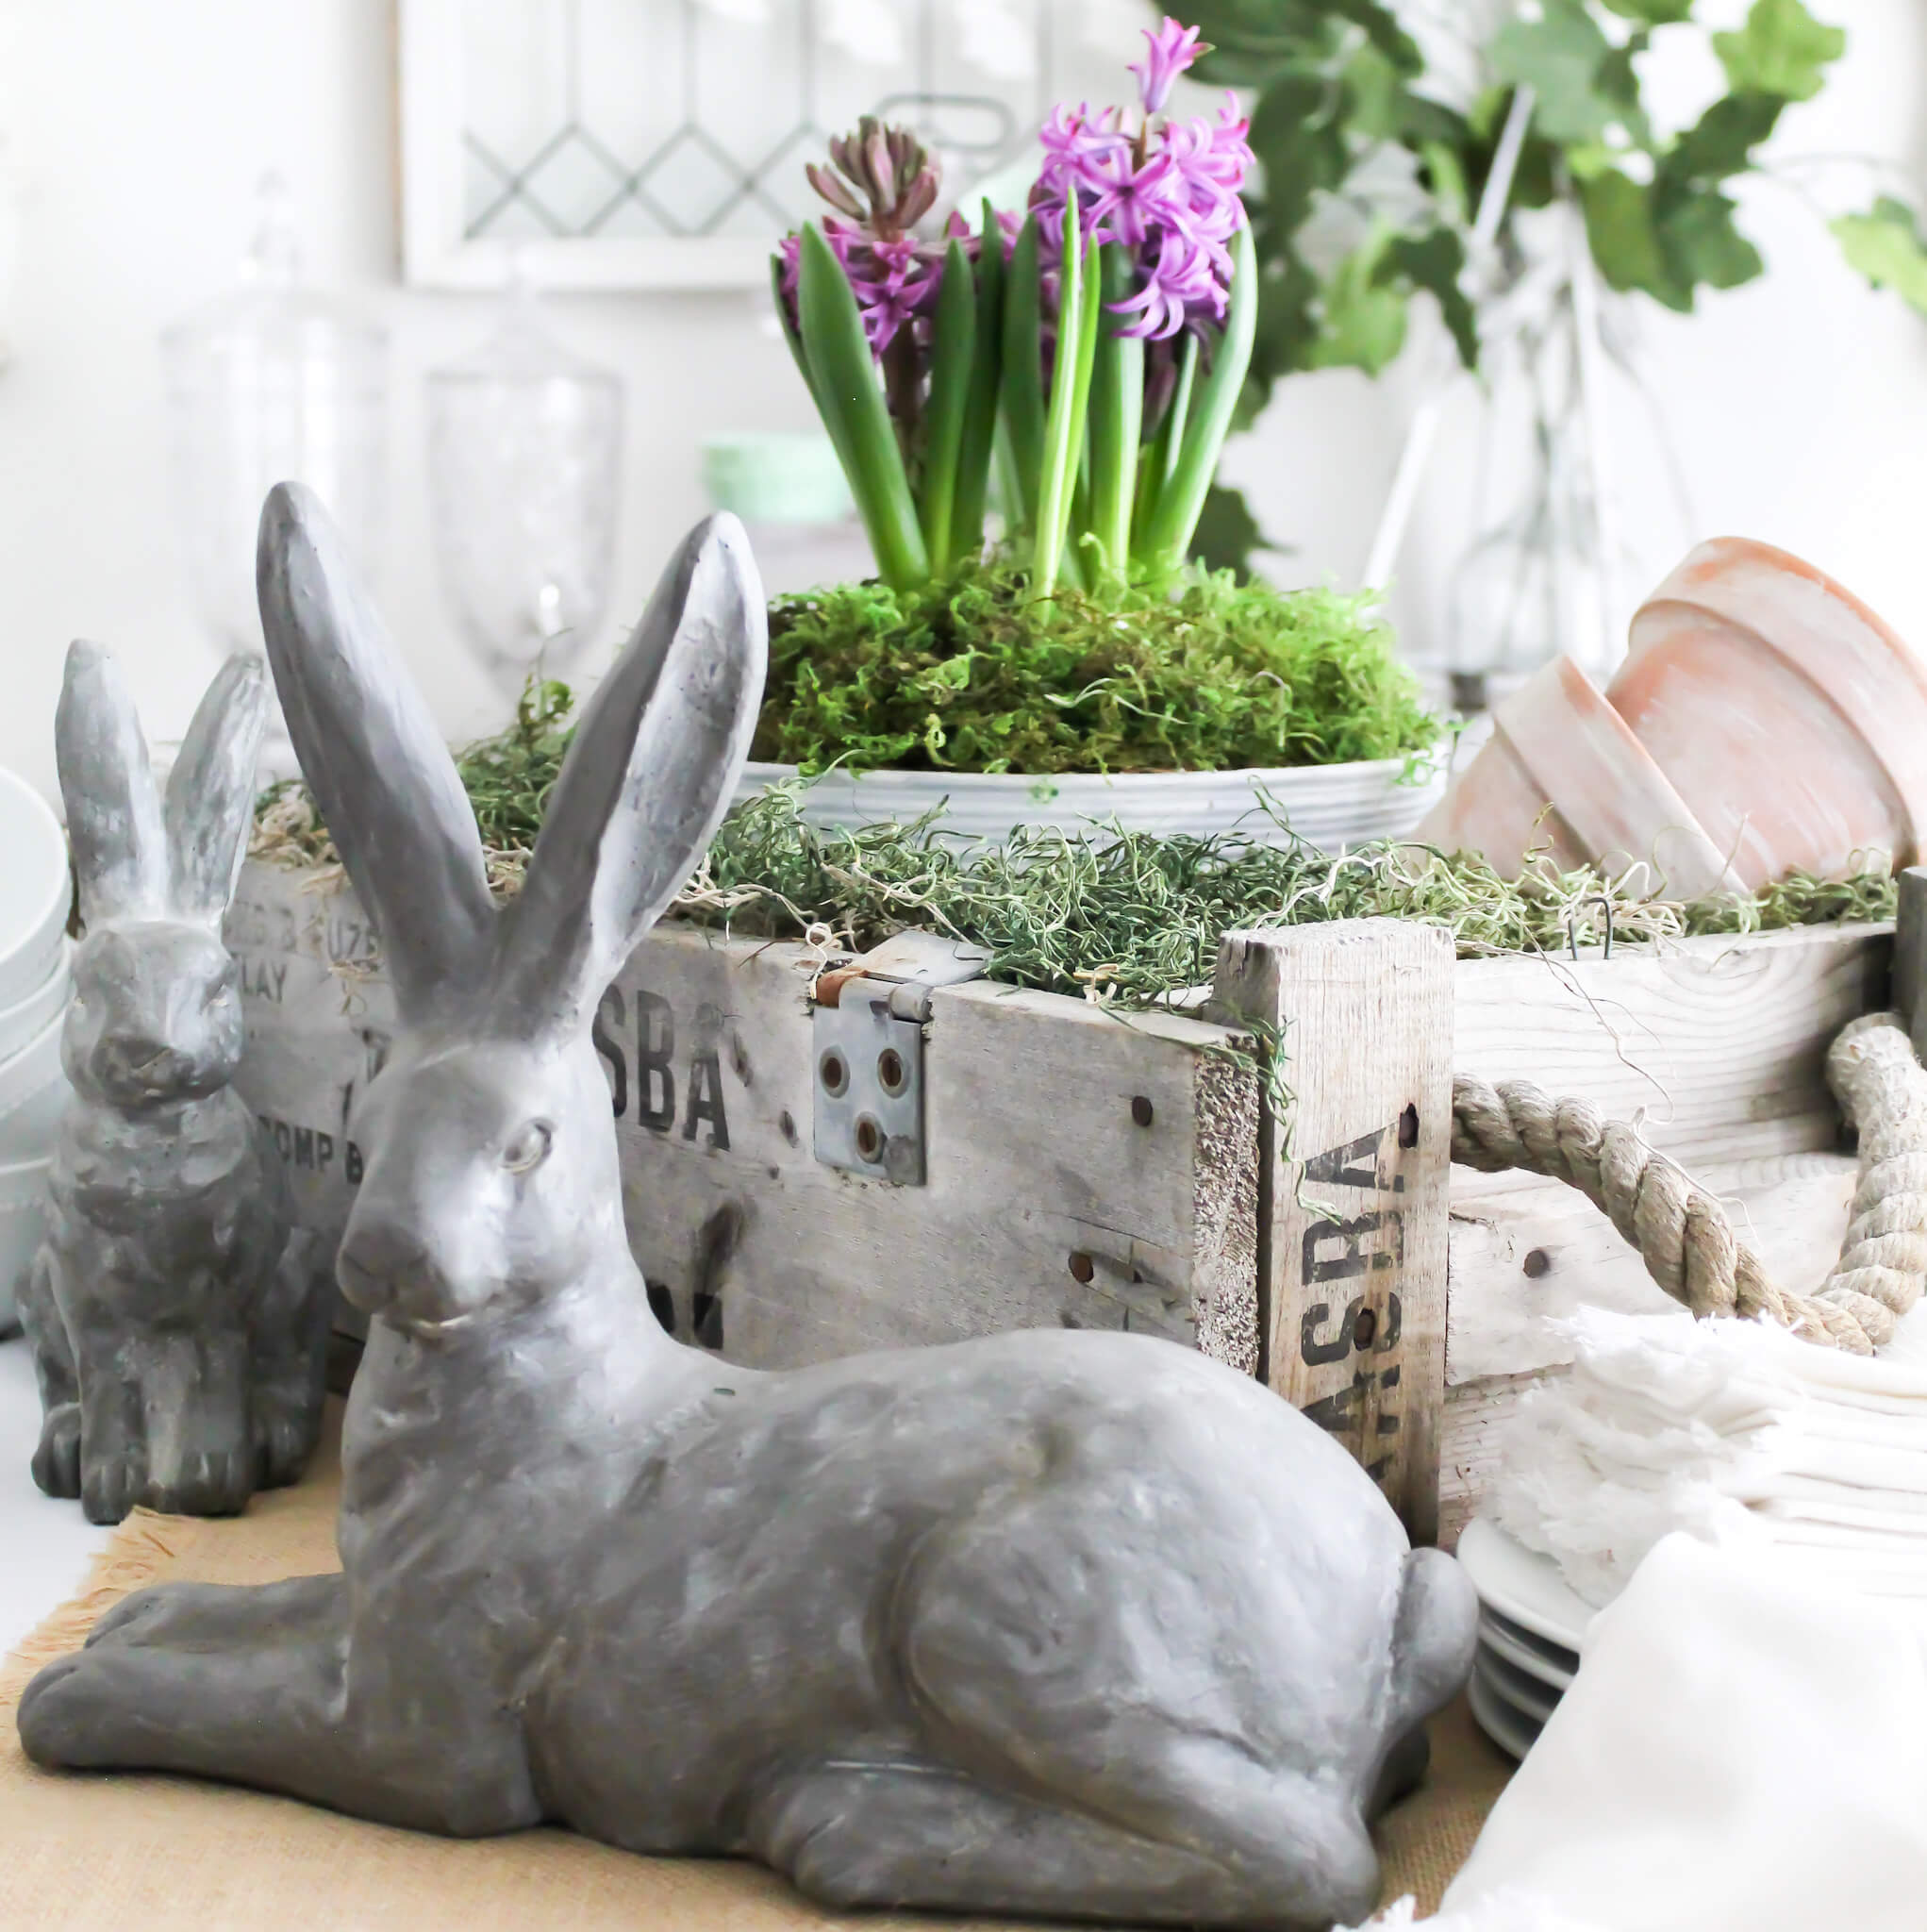
It’s so simple that I was able to complete the project in just one afternoon.
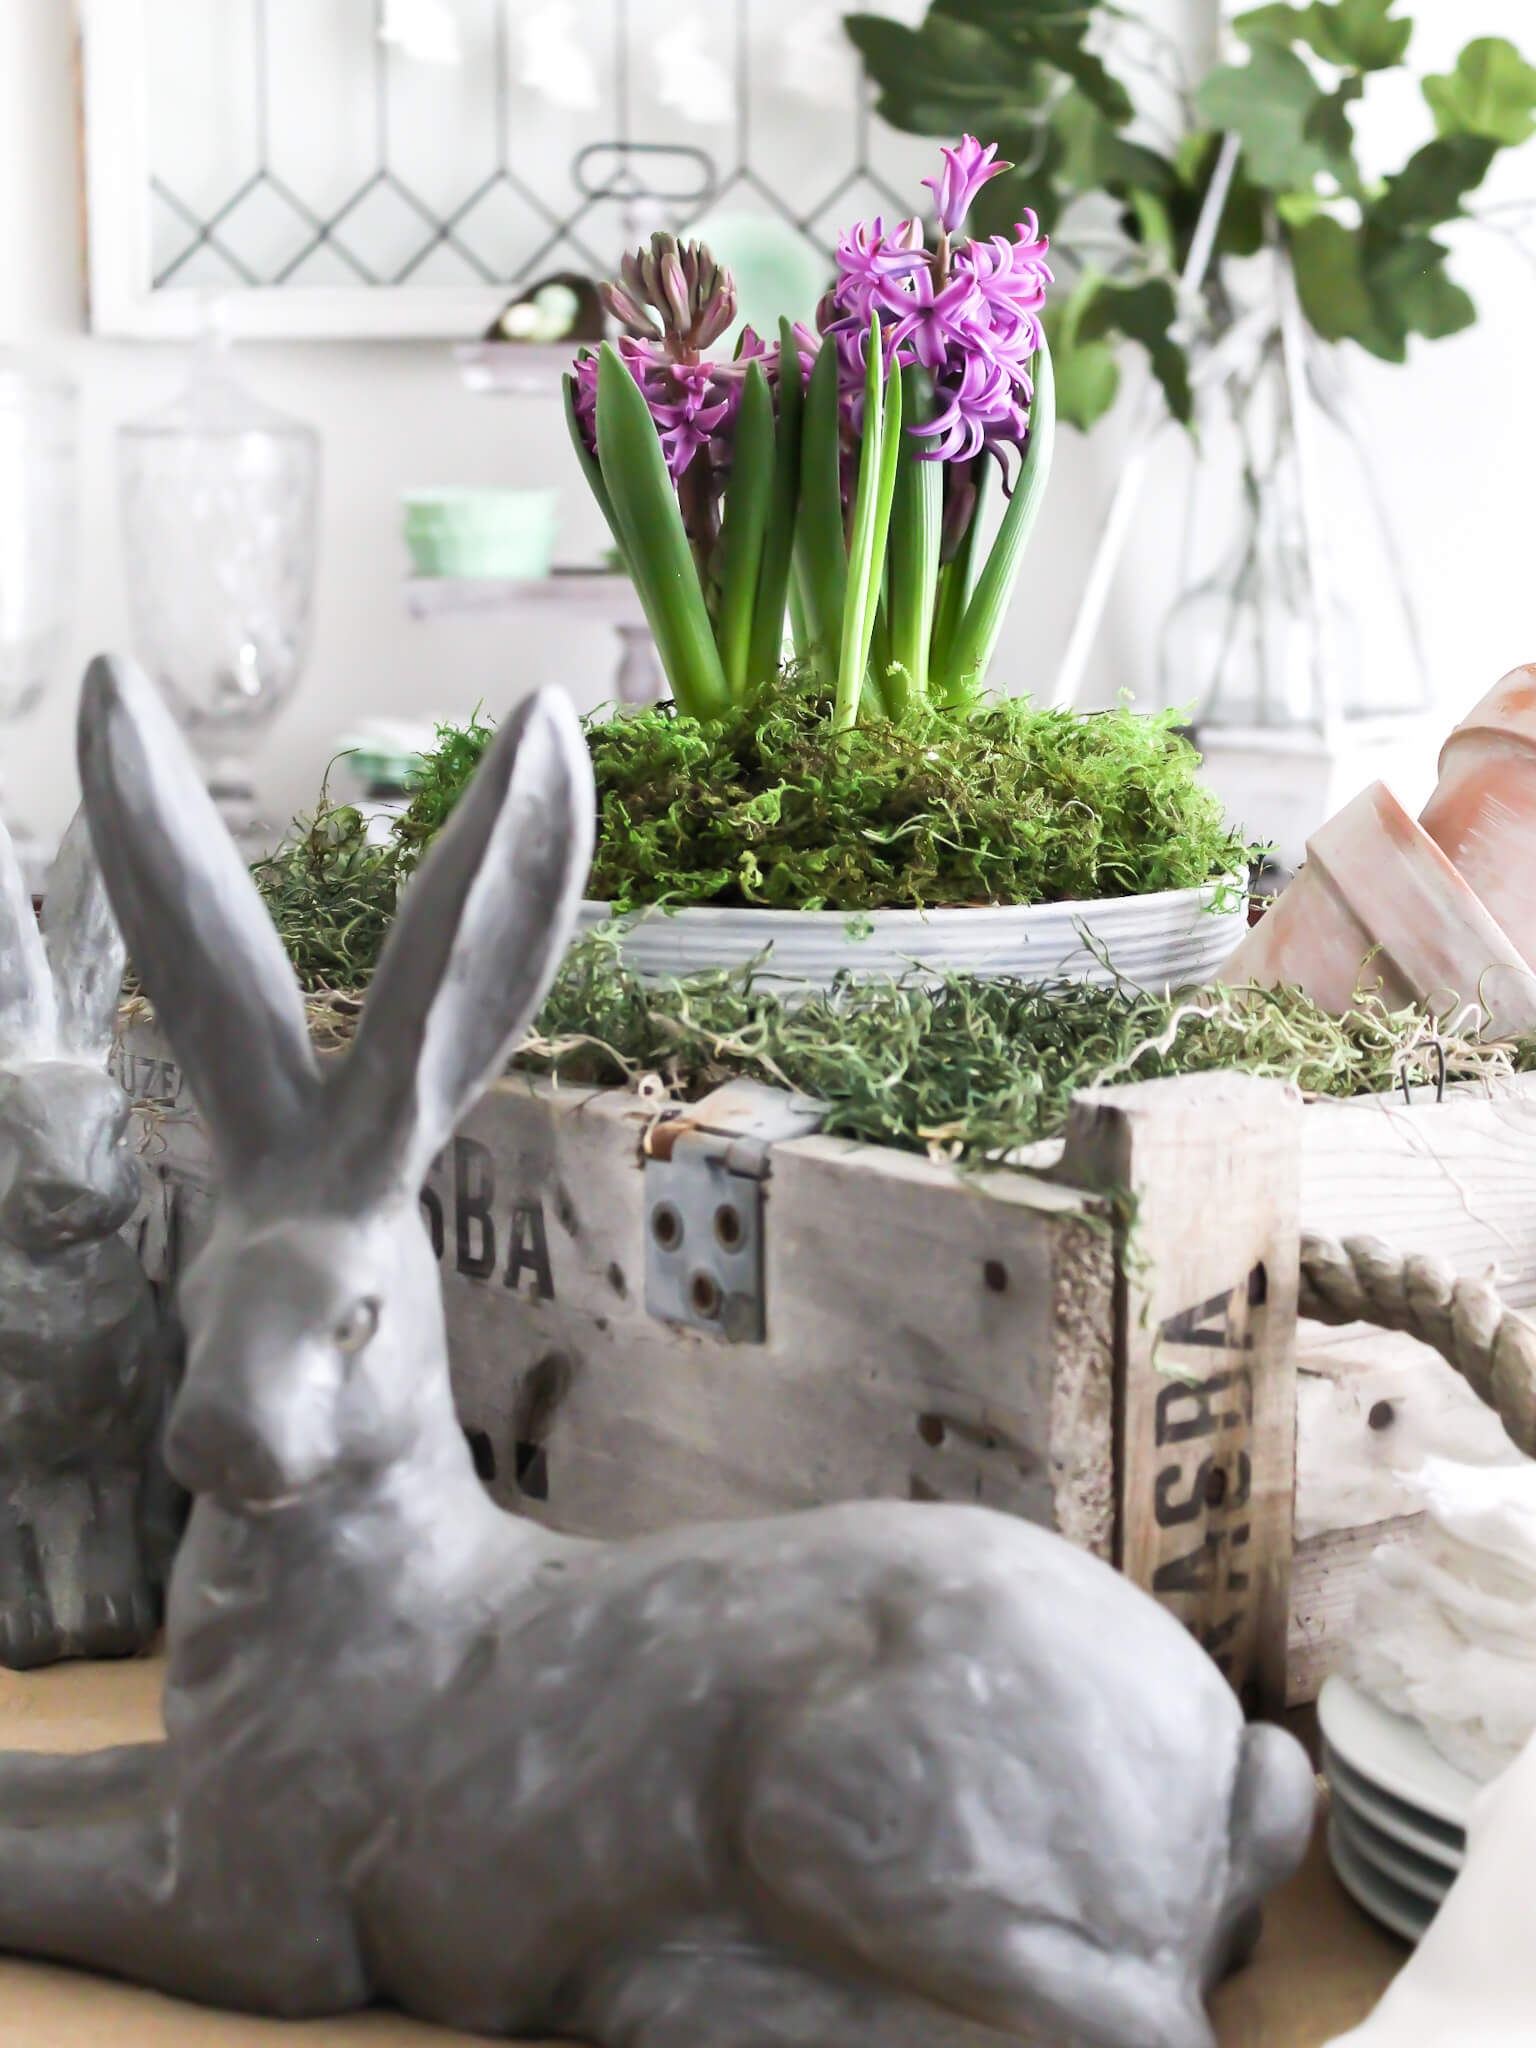
It looks perfect styled on my spring-inspired garden tablescape, and I love how it ties in with the rest of my spring home decor.
It would be great as a centerpiece for a spring garden party, baby shower, Easter brunch, or Mother’s Day luncheon.
One of these cute aged terra cotta pots would make a perfect gift for a friend or neighbor, and it also makes a sweet and thoughtful hostess gift for any occasion.
Thanks so much for stopping by the blog today.
I hope you enjoyed this DIY project and feel inspired to try it out yourself.
Happy crafting!

Did You Enjoy this Post? PIN It for Later!


Love this idea, Jen!! Such an easy yet rewarding Spring project! Pinned!!
Thanks so much, Rachel! I’m glad you love it too.
This project puts me in the mood for spring! Great tutorial Jen! I am thrilled to tell you I am featuring this post in the next Tuesday Turn About Link Party! Thanks for sharing and I hope to see you at the next TTA! 😊
Thanks so much, Cindy. Very ready for spring over here. I’m so glad you enjoyed it and looking forward to the next TTA party.
Project to bring anticipation of the coming spring! Love it!
I’m ready! Bring on spring!
This is such a beautiful idea! I love what you planted too! I’m so glad you are joining us today!!!
Thank you, Kristin. I’m so happy to join you all again. The hyacinth has been a great addition to our spring table…and it smells amazing too!
This turned out so great Jen! So perfect for spring, too!
I’m really happy with how it turned out. Thank you, Ana. And it smells amazing too!
Oh Jen I love this! It turned out so pretty and it’s so doable! Pinning!
Thank you, Kelly! I can’t wait to see your project.😘
Your spring planter looks gorgeous! I’ve seen this technique and have been intrigued by it. Doing it on a planter is a great idea with a really nice end result. Adding the diluted black paint for your last coat really makes your planter look aged.
Thank you, Paula. It was so easy. I can’t wait to try this paint mixture out on some of my other pots and planters.
This is so beautiful Jen! I love the flowers you chose and I definitely need to get some of that beautiful moss. You did a great job with the plant pot- Fusion is so good!
Thank you so much, Shawna. I’m so happy with how it turned out. I need to try this paint mix on some more projects!