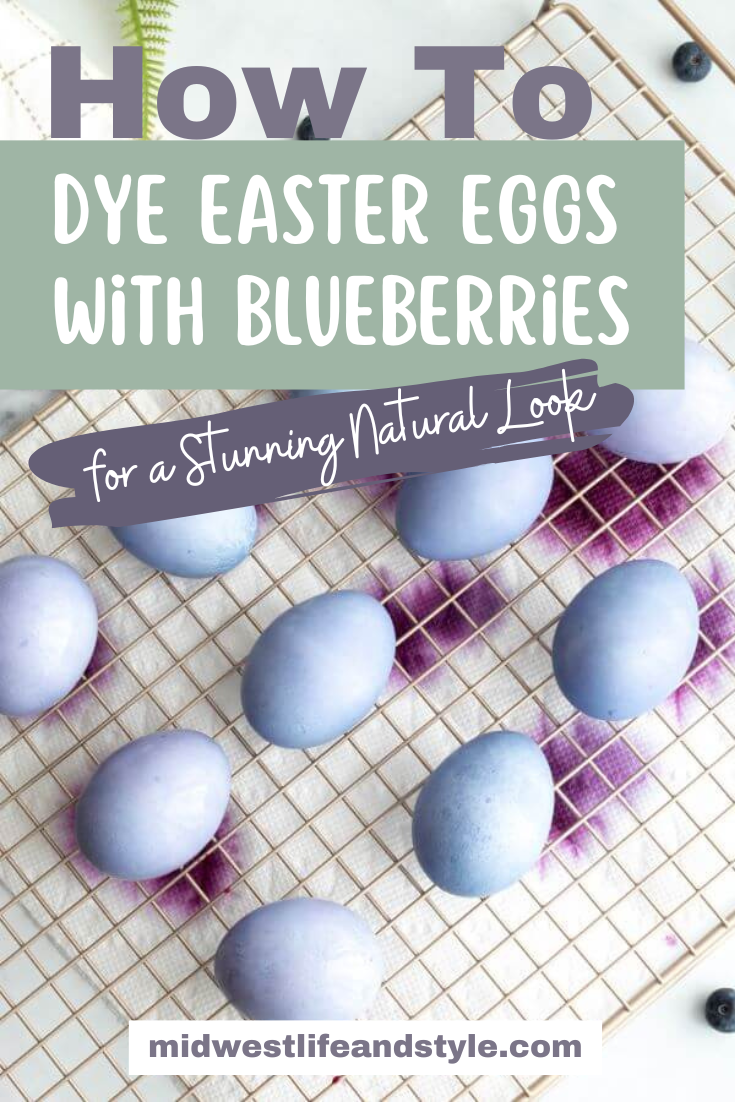
No fancy egg dye kit? No problem. Learn how to make natural dyed eggs for Easter with blueberry juice and vinegar.

*As an Amazon affiliate, I earn from qualifying purchases at no extra cost to you. My blog contains other affiliate links as well for your convenience. To learn more, you may read my Disclosure Policy. Thank you for supporting my blog!
This post was originally published on April 13, 2022. Last updated on April 17, 2025
Blueberry Dyed Easter Eggs
As a kid growing up, dyeing eggs was always one of the things I looked forward to the most at Easter time.
That, and of course, the annual egg hunt!
And while store-bought kits are fun, there’s something special about dyeing Easter eggs with ingredients from your kitchen.
This method of dyeing with blueberries is easy, mess-free, and a fun activity the whole family can enjoy together.
Table of Contents
- Blueberry Dyed Easter Eggs
- Ingredients for Blueberry Dyed Easter Eggs
- Equipment Needed
- How to Dye Easter Eggs with Blueberries
- How to Store Your Dyed Easter Eggs
- Simple Ways to Decorate with Your Dyed Easter Eggs
- Other Ideas for Naturally Dyed Eggs
- Final Thoughts on Making Blueberry Dyed Easter Eggs
- More Easter Recipes from Midwest Life and Style
- Printable Recipe Card for Blueberry Dyed Easter Eggs
- Did You Enjoy This Recipe? PIN It for Later!
Ingredients for Blueberry Dyed Easter Eggs
A few years ago, I read a magazine with tips on how to make diy dyed eggs using natural ingredients.
I shared my first attempt at DIY Easter eggs on Instagram, but now that I have the blog, I felt like they deserved a share here, too.
Here’s what you’ll need for this simple egg dye recipe:
- 1 dozen eggs, hard boiled
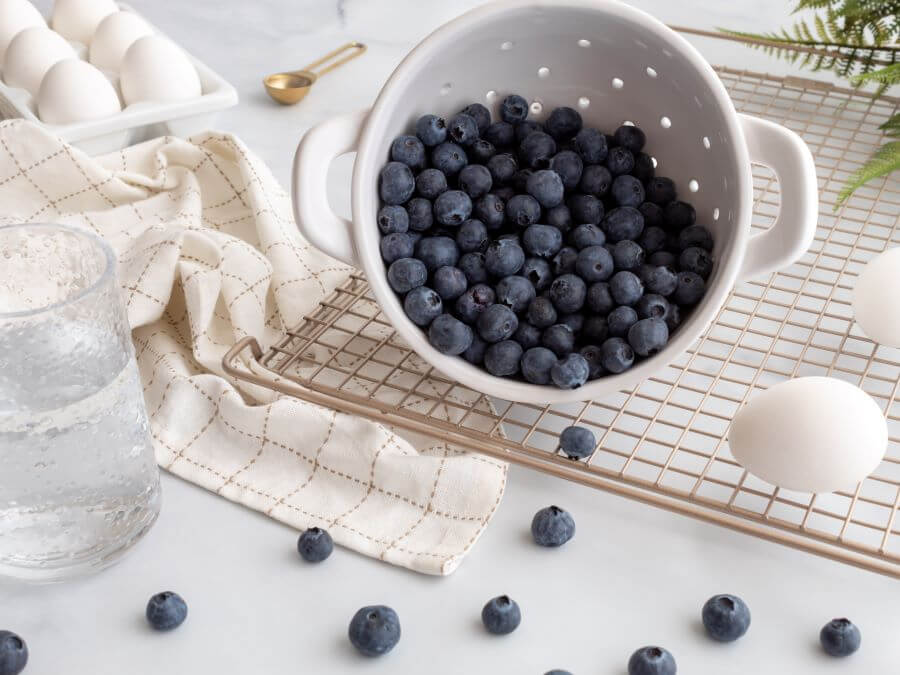
- 2 cups fresh blueberries
- 2 cups water
- 1 teaspoon distilled white vinegar
Equipment Needed
- Medium to large saucepan
- Measuring cups
- Measuring spoons
- Strainer
- Glass jars
- Small serving spoon
- Wire cooling rack
How to Dye Easter Eggs with Blueberries
Thes eggs are a fun Easter activity for the whole family…and you don’t need a fancy dye kit!
Read on to learn how to create DIY colored Easter eggs naturally.
Step 1: Prep The Dye
In a medium saucepan, pour in two cups of water and bring it to a boil.
Once the water is boiling, add two cups of blueberries.
Cover the pan, reduce the heat, and let it simmer for 10 minutes.
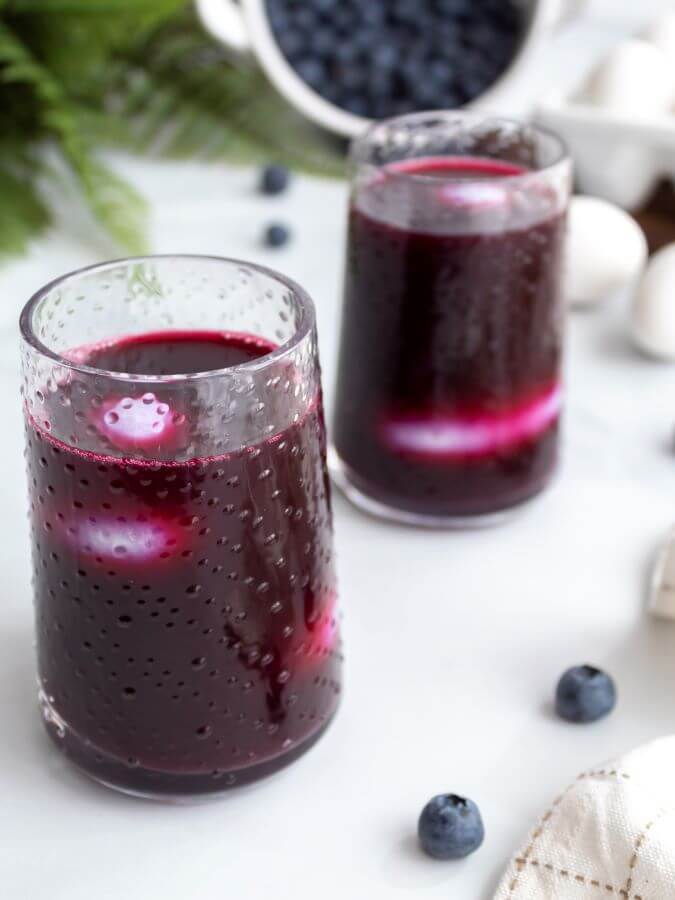
After simmering, remove your pan from the heat, strain the blueberry liquid into a heat-safe glass jar, and discard the leftover berries (or compost them if you’re able!).
Then add one teaspoon of distilled white vinegar to the blueberry water, and let the mixture cool to room temperature.
This simple solution makes a beautiful base for your DIY dyed Easter eggs.
Step 2: Dying the Eggs
While the blueberry mixture cools, hard boil your eggs.
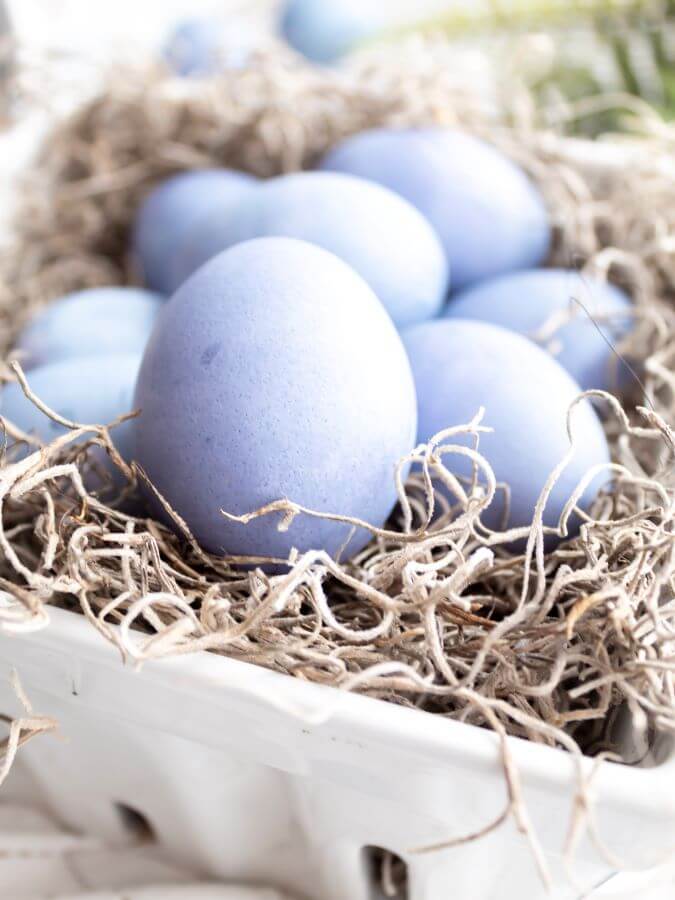
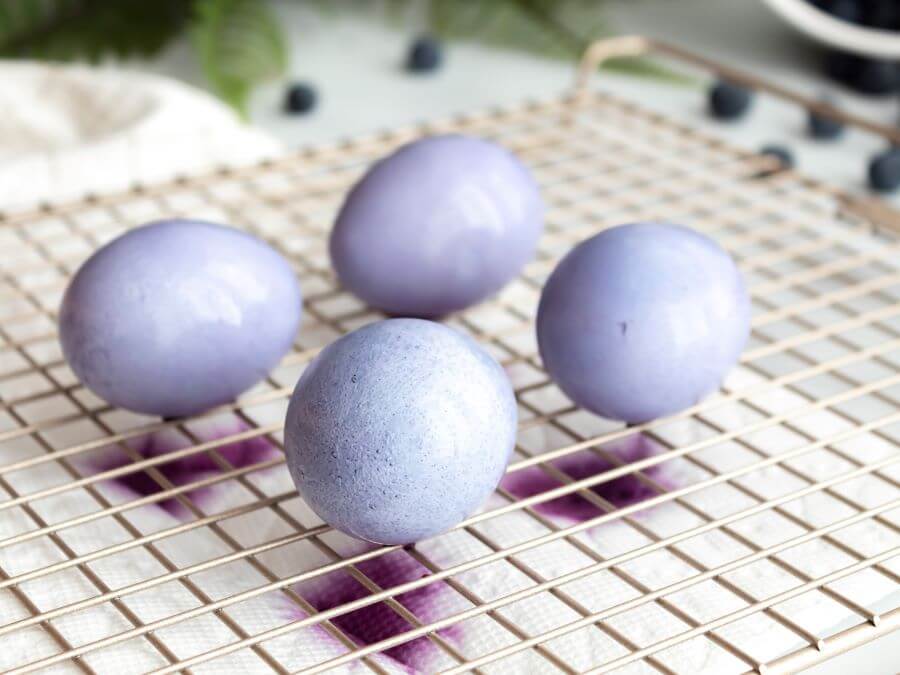
You can use brown eggs, but I’ve found that white eggs absorb the color better, resulting in a rich, deep blue.
Once the dye is ready, it’s time to dye Easter eggs!
Gently place each egg in the blueberry dye, letting it soak for at least 3–5 minutes, turning the eggs occasionally with a spoon to ensure even coverage.
The longer you soak them, the deeper the shade of blue will be.
Step 3: Let the Eggs Dry
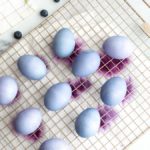
When you’re done dipping the eggs in the dye, carefully remove each one and place them on a wire rack to drip dry.
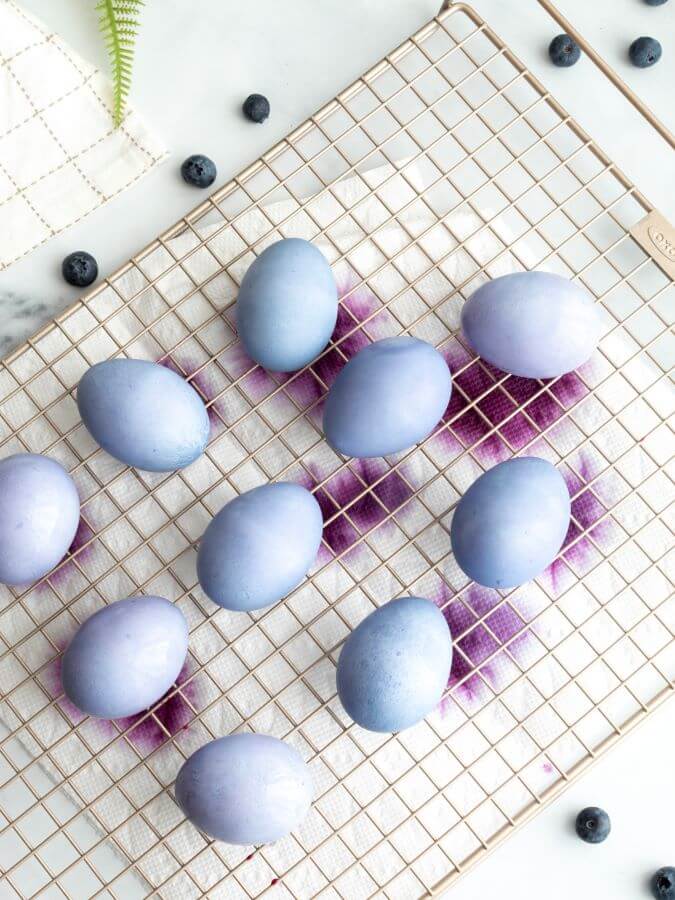
It goes without saying, but blueberry dye can and does stain!
Be sure to protect your counters with a layer of paper towels.
And if you’re doing this project with little ones, have them wear aprons or old clothes to protect from splashes and spills.
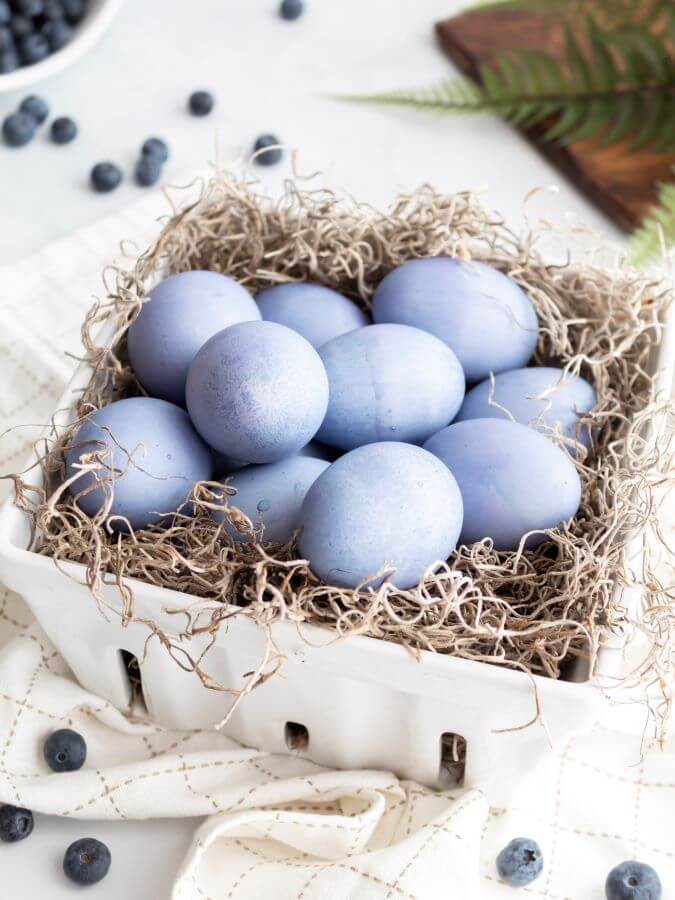
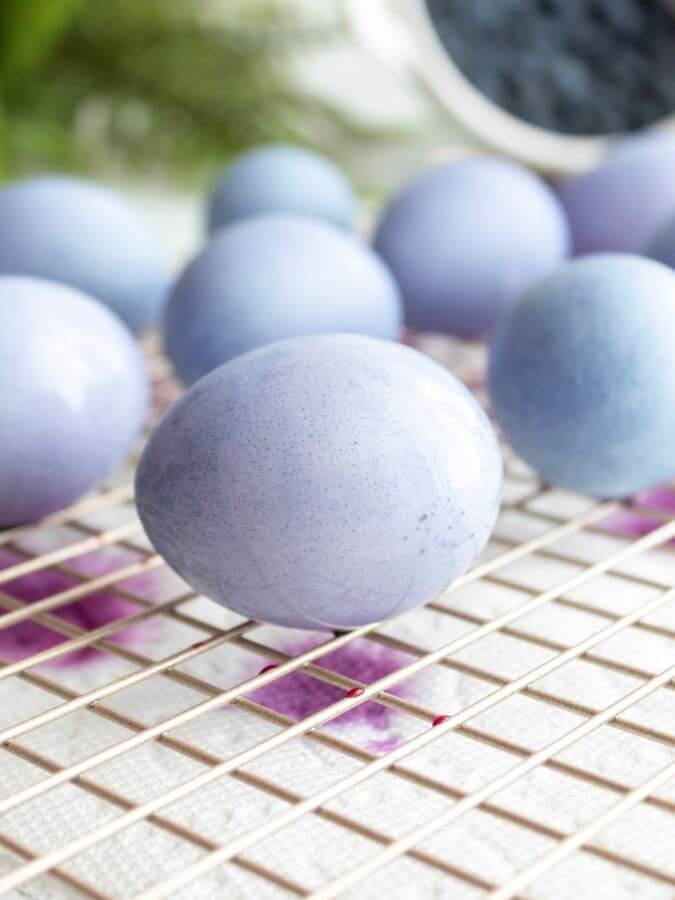
In the end, you’ll have gorgeous, robin’s egg-colored dyed eggs that are totally natural and safe to eat.
They’re proof that diy Easter egg coloring doesn’t have to be complicated.
How to Store Your Dyed Easter Eggs
If you’re planning to eat your dyed eggs, be sure to store them in the fridge and eat them within a week.
If you’re using them for a display or an Easter egg hunt, plan to dye eggs for Easter the same day and discard any that sit out too long.
TIP: Just remember, per the USDA, hard boiled eggs left out for more than two hours aren’t safe to eat.
Simple Ways to Decorate with Your Dyed Easter Eggs
Looking for a way to use your naturally dyed eggs beyond the kitchen?
These pretty blue eggs are more than just fun to make, they’re perfect for decorating, too!
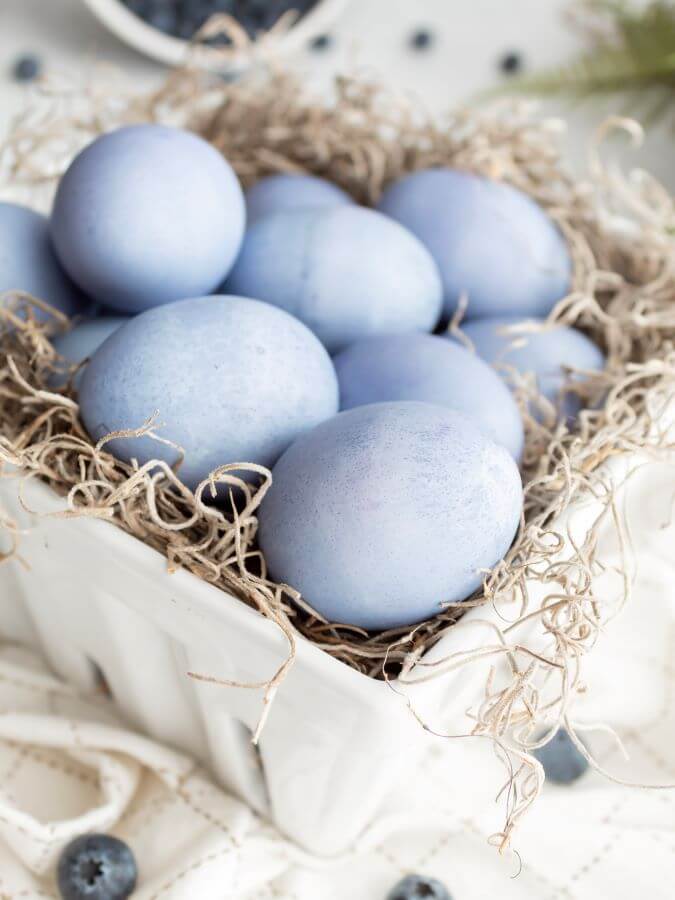
Here are a few simple styling ideas to inspire you.
Style them in a pretty bowl – Arrange your naturally dyed eggs in a decorative bowl and place it on your kitchen island, dining table, or coffee table for a simple pop of spring color.
Sprinkle them down the center of your table – Looking for an easy and affordable way to dress up your Easter tablescape? Try scattering a few of your dyed eggs along the center of the table. Mix in some greenery, candles, or a handful of spring flowers for a simple look that feels festive without being complicated—or expensive!
Nestle them in a basket with moss – Create a charming, nature-inspired display by tucking your DIY Easter eggs into a basket lined with faux moss, straw, or shredded paper. This works great as an accent on an entryway table or hutch.
Layer them in a vintage crate or wooden tray – For a rustic look, stack your dyed eggs in an old wooden crate or tray. Mix in a few faux flowers or greenery to complete the look and create a sweet Easter vignette.
Tuck them into greenery or floral garlands – Add your blueberry dyed Easter eggs to a garland or tucek them in with some spring flowers for a one-of-a-kind Easter centerpiece.
Other Ideas for Naturally Dyed Eggs
Want to try more natural egg dyes?
Once you’ve nailed down dyeing with blueberries, it’s fun to experiment with other ingredients you might already have in your kitchen.
Here are a few easy ways to make your own DIY colored Easter eggs—no food coloring required!
Purple Cabbage for Blue Eggs
Chop about 2 cups of cabbage and simmer it in 2 cups of water for 10–15 minutes. Strain out the cabbage, add a splash of vinegar, and let your eggs soak.
Beets for Pink Eggs
Slice a large beet (or two) and boil in water to create a vibrant pink dye. The longer you let your eggs sit, the deeper the color.
Yellow Onion Skins for Orange Eggs
Gather the papery skins from a few yellow onions and simmer them in water. This creates a beautiful, warm orange hue.
Red Onion Skins for Red or Lavender Eggs
Similar to yellow onion skins, red ones give off a mix of red or lavender tones depending on the egg and how long they sit in the dye.
Ground Turmeric for Yellow Eggs
Add 1–2 tablespoons of turmeric powder to boiling water, then stir in vinegar. This one’s super simple and makes bright, cheerful yellow eggs.
Final Thoughts on Making Blueberry Dyed Easter Eggs
Thank you for stopping by! If you’ve ever wondered how to dye Easter egg shells naturally without chemicals,
I hope this guide inspires you to try dying eggs without food coloring.
It’s one of my favorite simple Easter traditions, and I’d love to hear how yours turn out!
Leave a comment if you give it a try, and tag me on Instagram so I can see your beautiful creations.
Happy Easter!

P.s. If you need some last-minute ideas for your Easter brunch check out a few of my other favorite Easter recipes.
More Easter Recipes from Midwest Life and Style


Printable Recipe Card for Blueberry Dyed Easter Eggs
Natural Blueberry Dyed Easter Eggs
Ingredients
- 1 dozen eggs, hard-boiled
- 2 cups water
- 2 cups fresh blueberries
- 1 tsp. distilled white vinegar
Instructions
- Use a medium saucepan, pour in two cups of water, and bring to a boil.
- Once the water is boiling, add two cups of blueberries, cover the pan, and reduce the heat. Simmer the water and blueberries for 10 minutes.
- Remove the pan from the heat and use a strainer to pour the water into a heat-safe glass jar. Discard the blueberry waste.
- Add one teaspoon of distilled white vinegar to the water, and then set it aside and let it cool to room temperature.
- While the blueberry dye cools, hard-boil one dozen eggs and allow them to cool fully before dying.
- Soak each of the eggs in the dye mixture for at least 3-5 minutes. Use a spoon to turn each egg as needed to make sure it gets dyed on all sides.
- When done, carefully remove all of the eggs and place them on a wire rack to drip dry.
I would love to see what you make! If you try any of my recipes, be sure to tag me in your photos!
IG: @midwestlifeandstyle + #midwestlifeandstyle
Did You Enjoy This Recipe? PIN It for Later!

Leave a Reply