Are you ready to decorate for spring? Learn how easy it is to style a beautiful Easter vignette in just 5 simple steps.
Shop The Post
All the items featured in this post are linked below for easy shopping.

*As an Amazon affiliate, I earn from qualifying purchases at no extra cost to you. My blog contains other affiliate links as well for your convenience. To learn more, you may read my Disclosure Policy. Thank you for supporting my blog!
How to Style an Easter Vignette in 5 Easy Steps
Are you ready to decorate for spring? Easter is one of my favorite holidays. And while I don’t go overboard with holiday-specific decor, I love adding a few simple Easter-inspired touches to our home to celebrate the season.
One of my favorite ways to quickly add pops of seasonal decor throughout our home is by creating a small, curated vignette.
If you’re looking for an easy idea for the season, I’m spilling the details on how you can style a beautiful Easter vignette in just 5 simple steps.
Whether you’re decorating a coffee table, spring mantel, a console table in your entryway, or even your kitchen island, these tips will help you create a look that is cohesive and complements your home’s style.
Table of Contents
- How to Style an Easter Vignette in 5 Easy Steps
- What You Need to Style a Spring Vignette
- Step 1: Start with an Inspiration Piece
- Step 2: Anchor the Arrangement with a Base
- Step 3: Add Fresh or Faux Spring Greenery
- Step 4: Build Up the Height for Depth and Dimension
- Step 5: Add the Finishing Touches
- Bonus Tip: My Favorite Trick for a Perfect Easter Vignette
- More Easter Decor Ideas Love
- My Finished Easter Vignette
- Did You Enjoy this Post? PIN It for Later!
What You Need to Style a Spring Vignette
Between scrolling through social media and walking through the aisles of your favorite retailers, the pressure to buy a cart full of new decor every season is real!
And let’s be honest, sometimes it is really hard to skip buying all the cute new things.
But I’m proud to say I created this entire look without spending a single penny.

Before you head to the store, I encourage you to shop your home first. Here are the basic supplies you’ll need together for a beautiful Easter vignette.
Step 1: Start with an Inspiration Piece
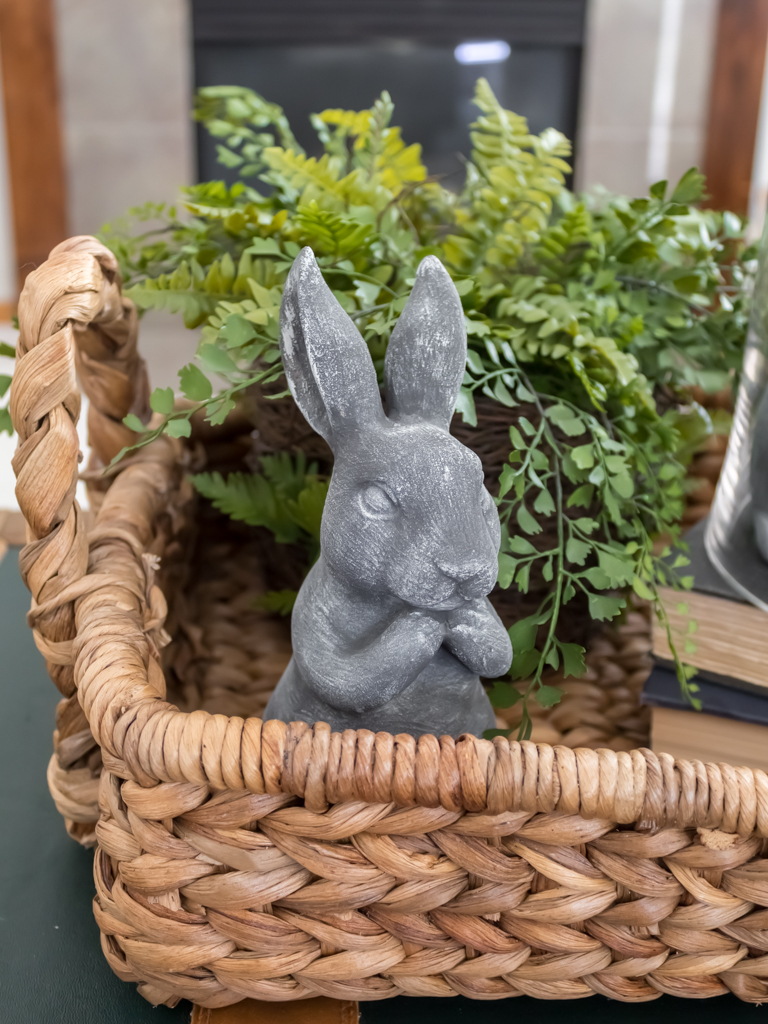
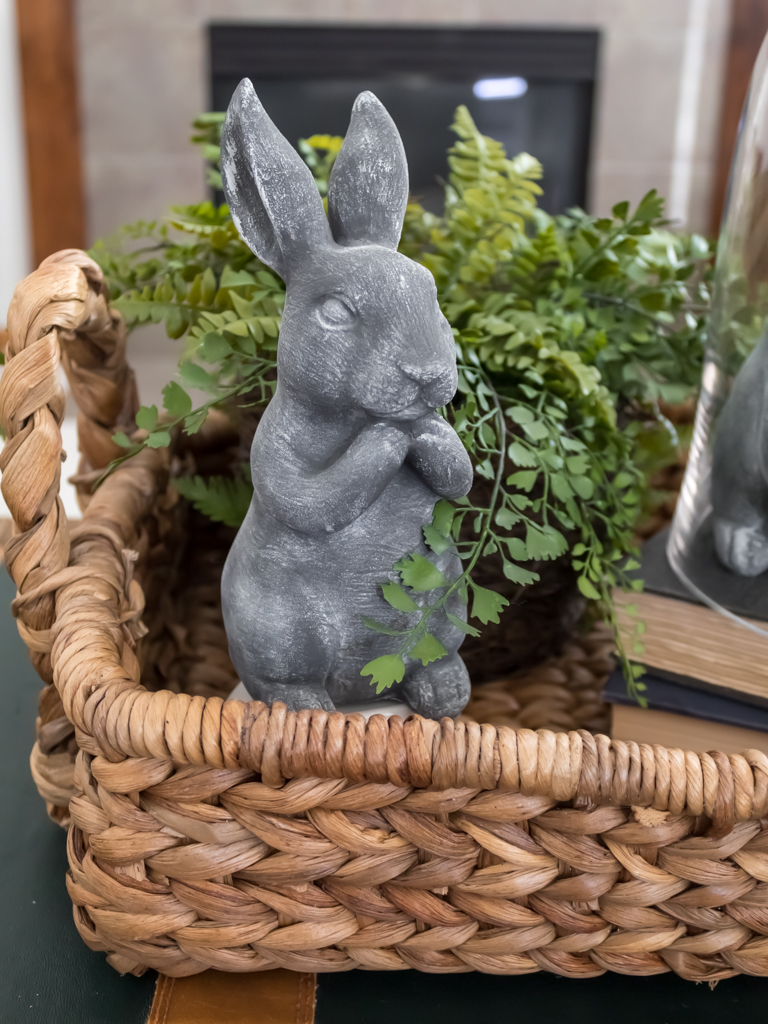
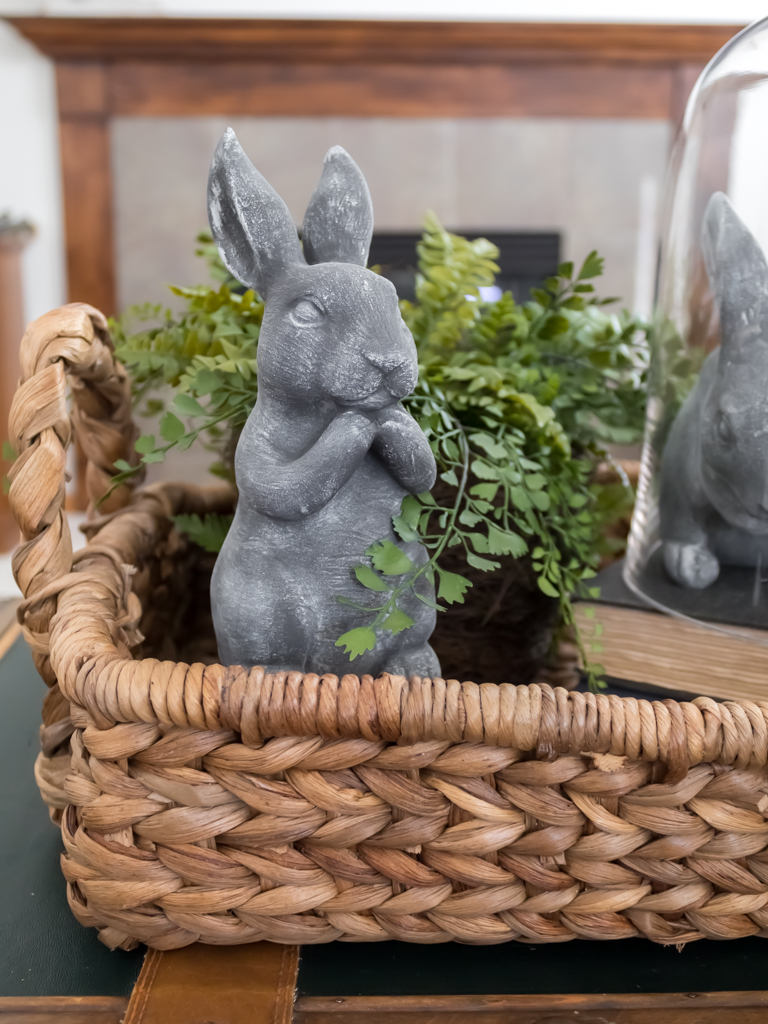
Regardless of what I am styling in my home, I always like to start with an inspiration piece. When I think about Easter, I instantly think about bunnies!
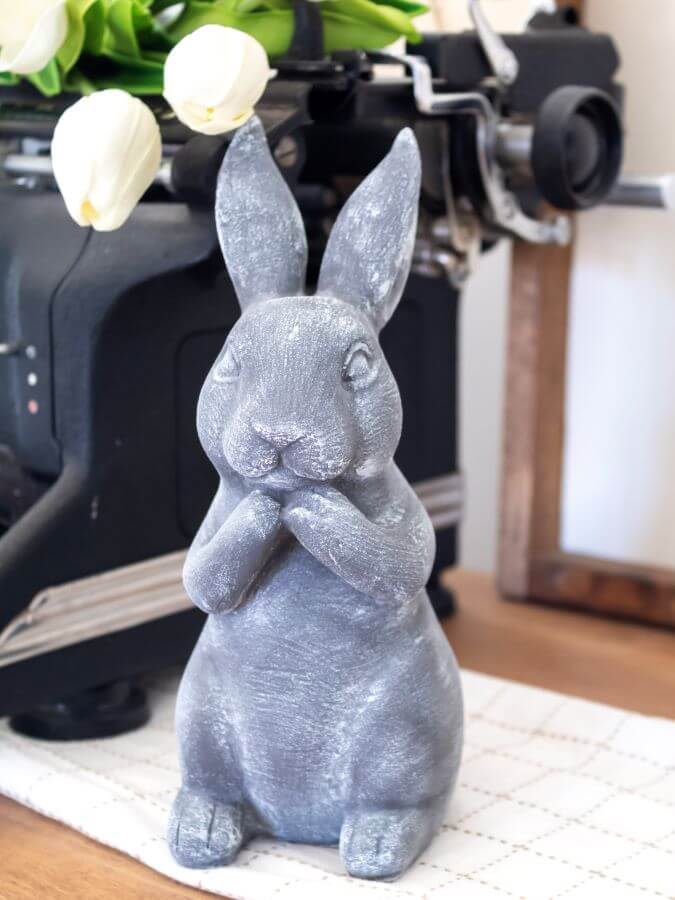
Since I already had these at home, these DIY faux stone bunnies were the perfect starting point for creating my vignette.
One of my all-time favorite projects, they are an affordable dupe of these popular brand-name rabbits. And who doesn’t love a good look-alike?
Styling Tip
If you feel stuck, use your inspiration item(s) as a guide. Pick pieces with similar colors so your decor looks cohesive and tells a story.
Step 2: Anchor the Arrangement with a Base
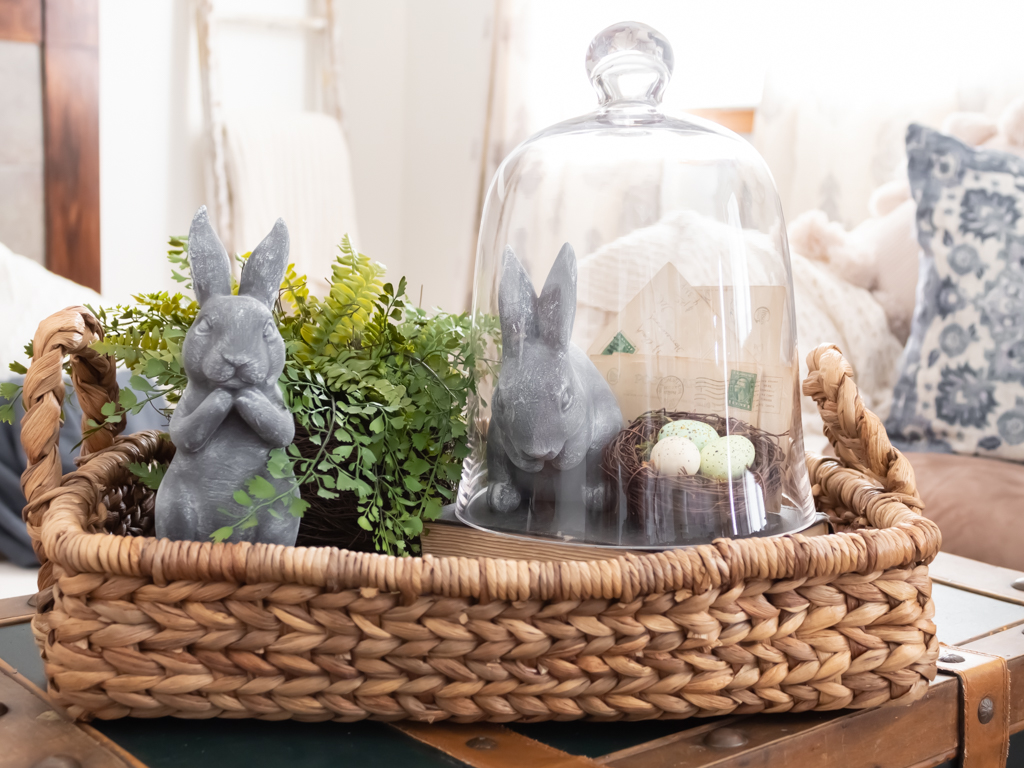
When I style a vignette, I like to start with a base. Think of this as the “anchor” of your grouping.
A base helps define your space and keeps your decor from looking like a collection of random objects floating on a table.
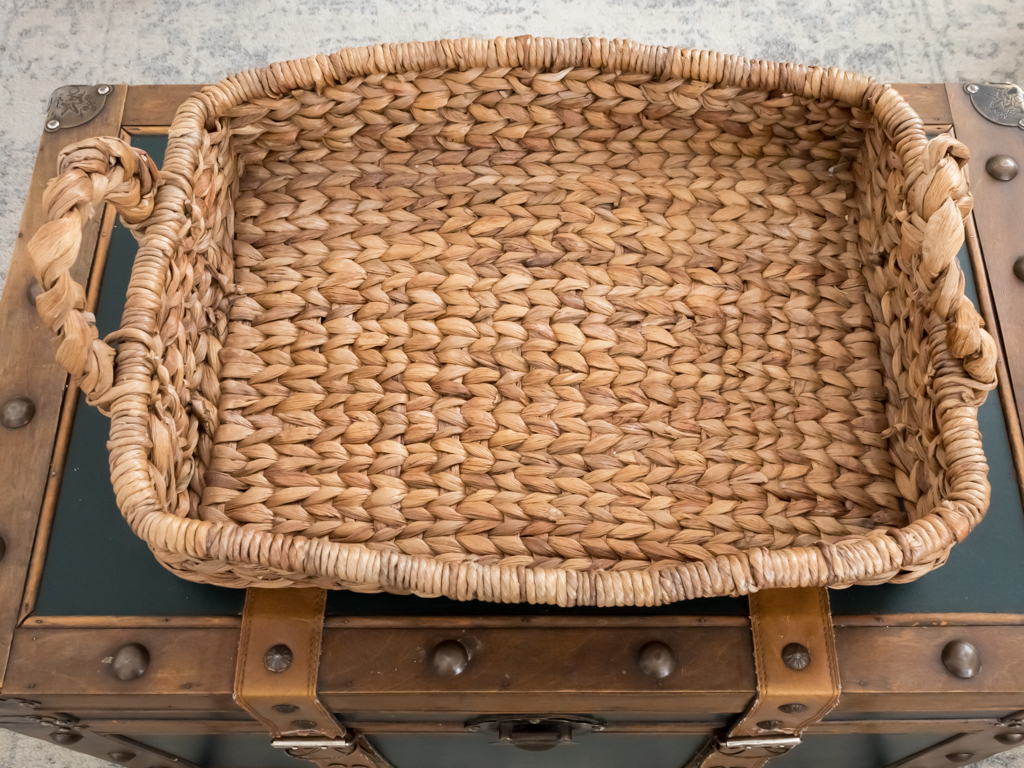
I used a woven basket for my Easter vignette, but you don’t need to buy anything new. Don’t forget to shop your home first before going shopping. You might be surprised by what you already have tucked away in a closet or even being used in another room.
You can also try swapping a basket for one of these items:
Styling Tip
If you decide to invest in a few new pieces, look for items that are versatile. A high-quality piece is worth the investment because it can be restyled and used year-round.
Step 3: Add Fresh or Faux Spring Greenery
Greenery is a staple in my decor year-round, but it’s especially important in the spring and summer months.
After a long Midwest winter, adding a bit of greenery is the perfect way to bring the outdoors in and add a much-needed pop of color to your home.
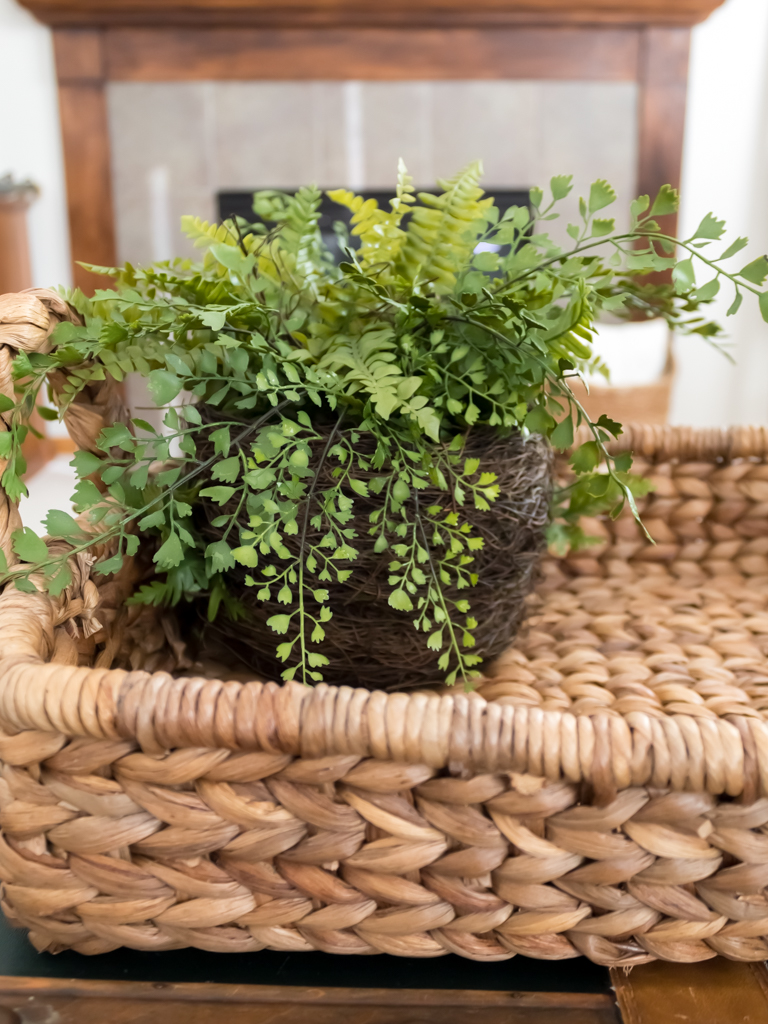
If you’re like me and struggle with a “black thumb,” a high-quality faux plant is the way to go.
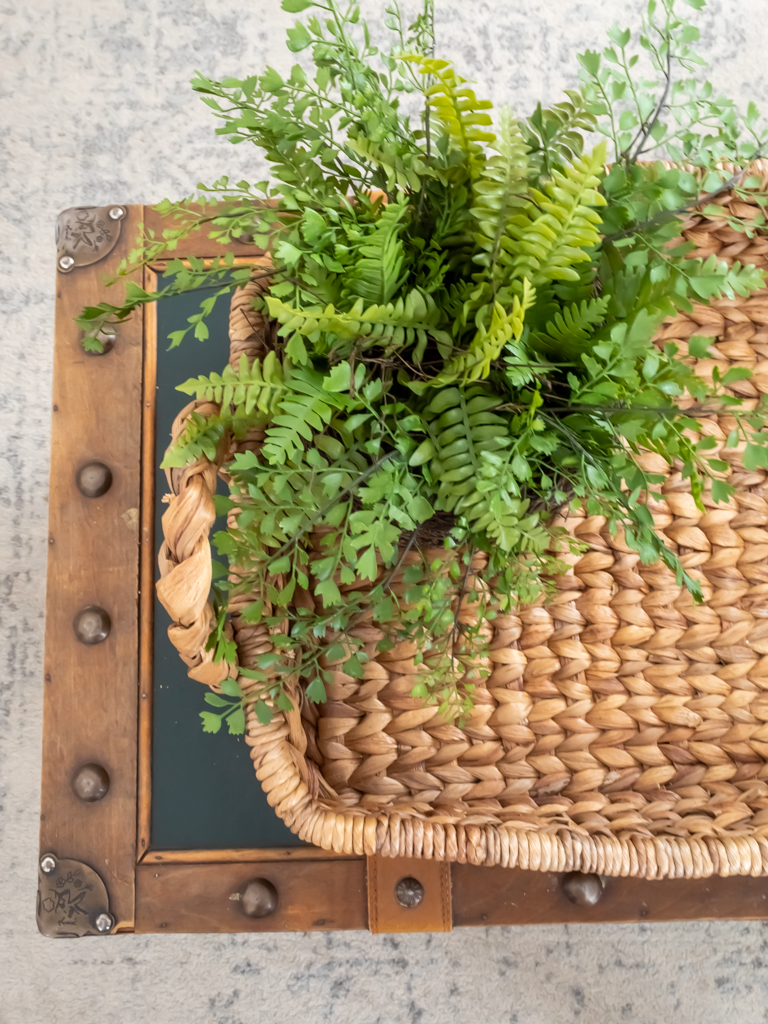
For this Easter vignette, I used a faux fern. It’s the perfect size for my basket and adds a natural look that every spring display needs.
If you prefer real plants, try these low-maintenance options:
Step 4: Build Up the Height for Depth and Dimension
For added depth and dimension in my vignettes, I like to use items of varying heights that help to draw your eyes up.

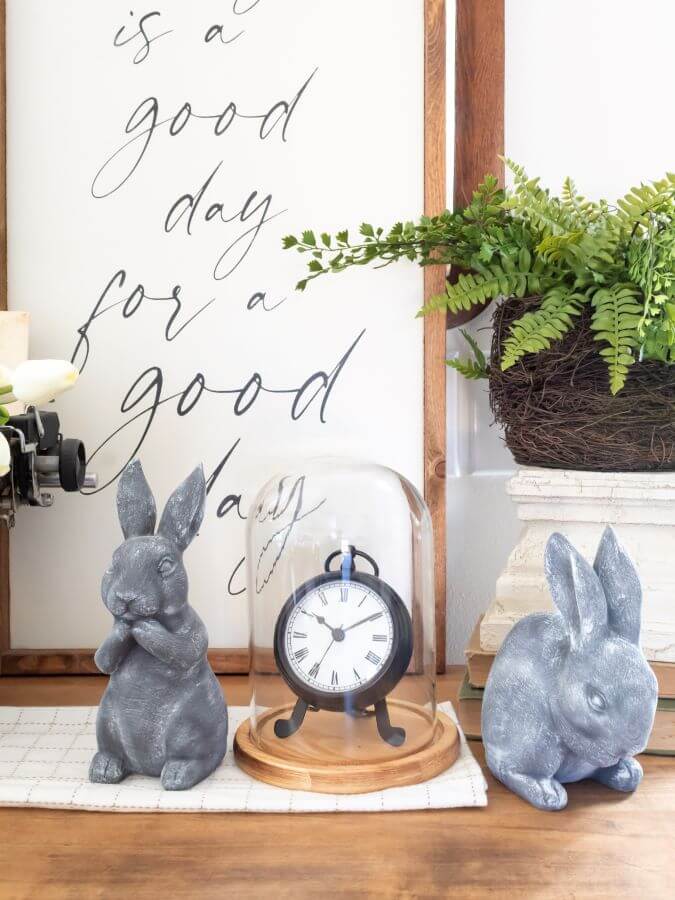
A stack of vintage books is one of my favorite tricks for adding a bit of “oomph” and visually increasing the height of a vignette.
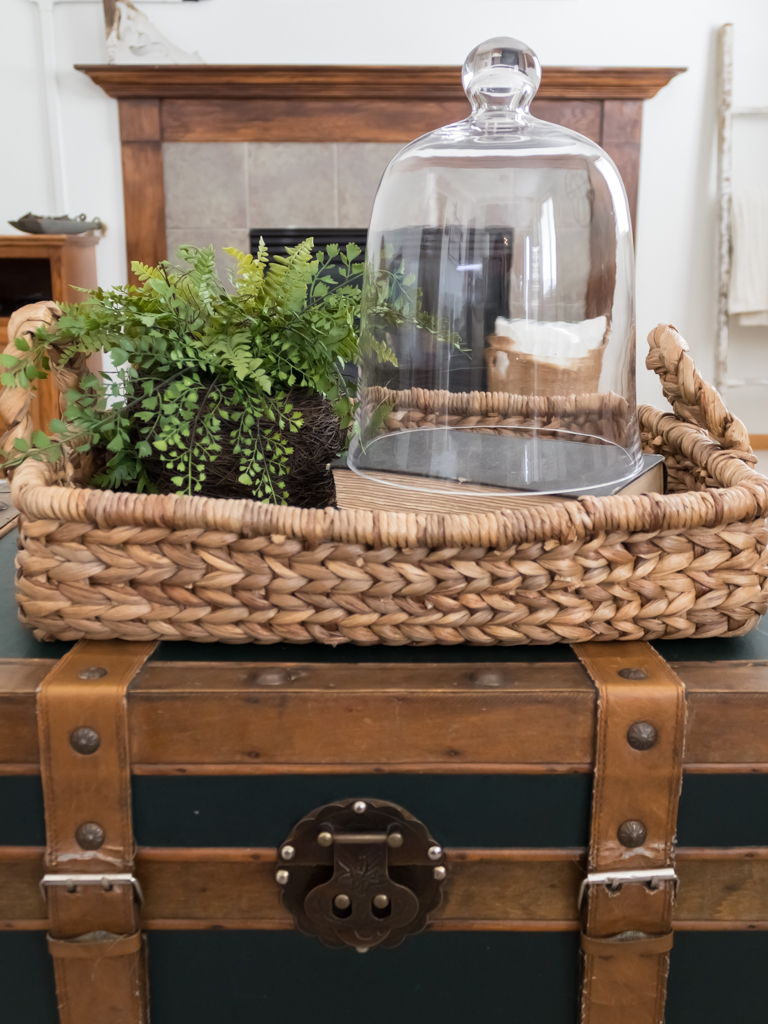
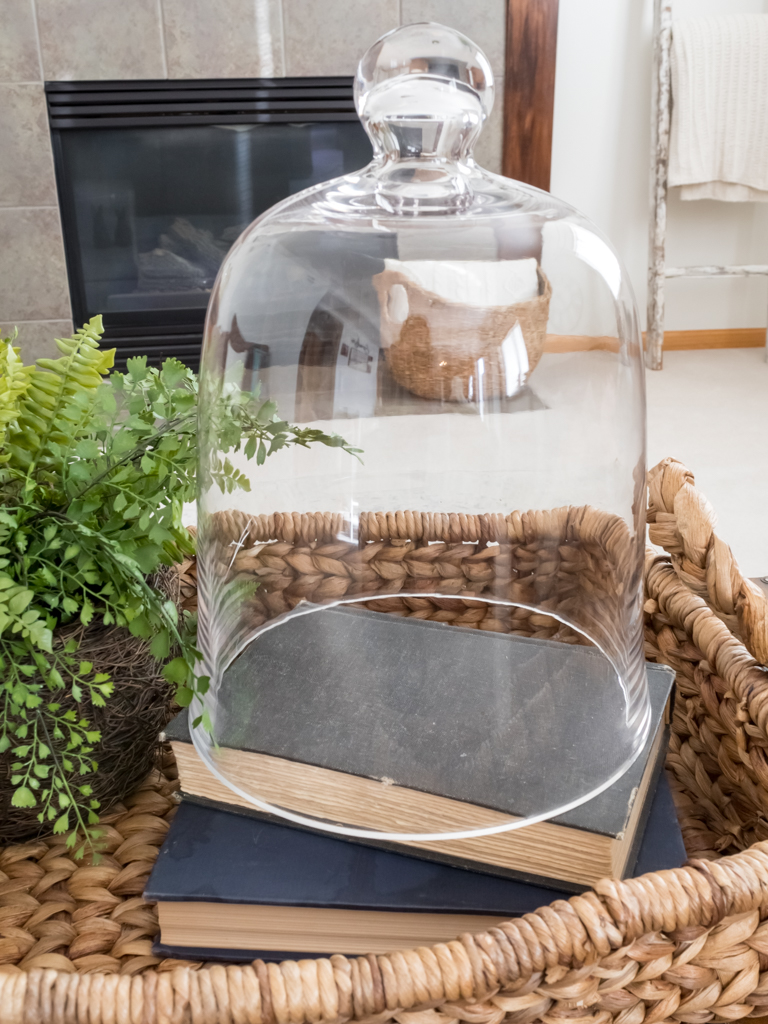
On its own, my cloche is too short and feels lost at the bottom of the basket.
You can see how something simple, like a few books, makes a big difference. Not only do the books add some much-needed height, but the covers add color too.
Step 5: Add the Finishing Touches
Remember those bunnies I shared at the beginning of the post?
I didn’t forget about them!
Once the larger decor pieces were in place, I was ready to add the finishing touches to my Easter vignette.
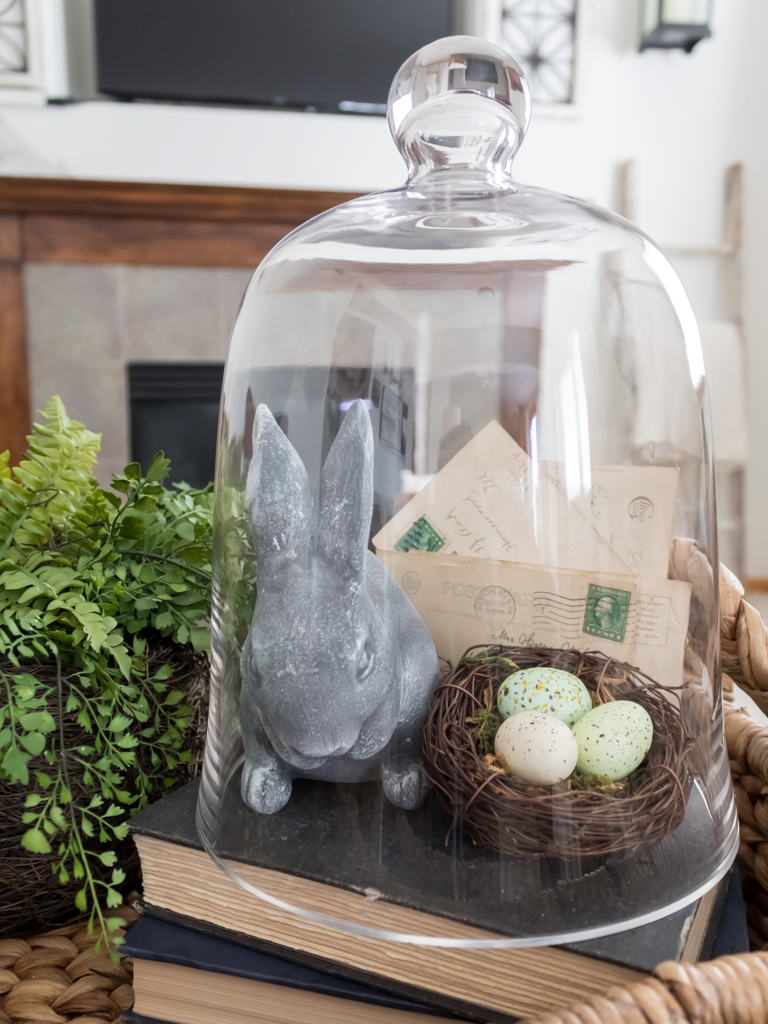
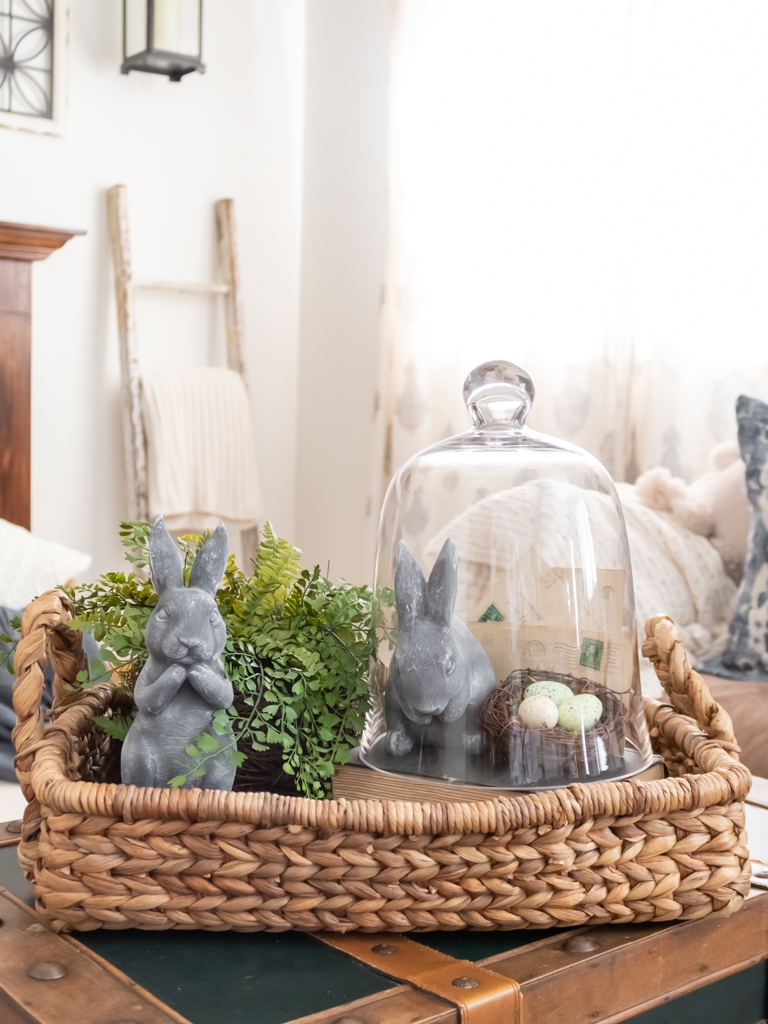
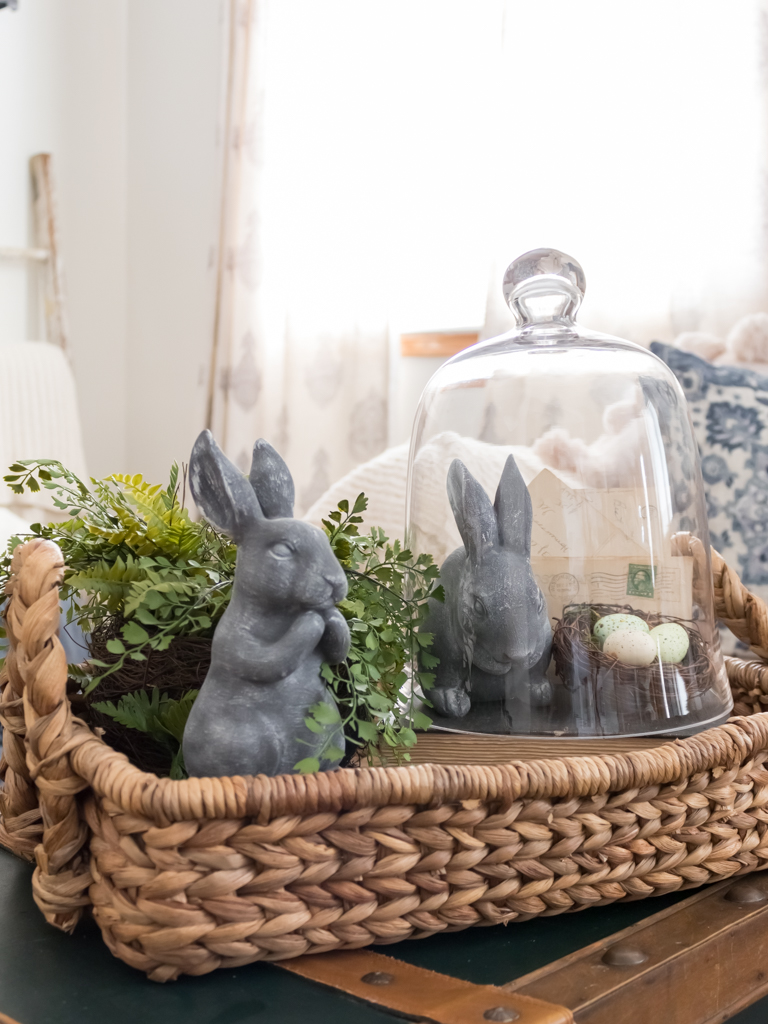
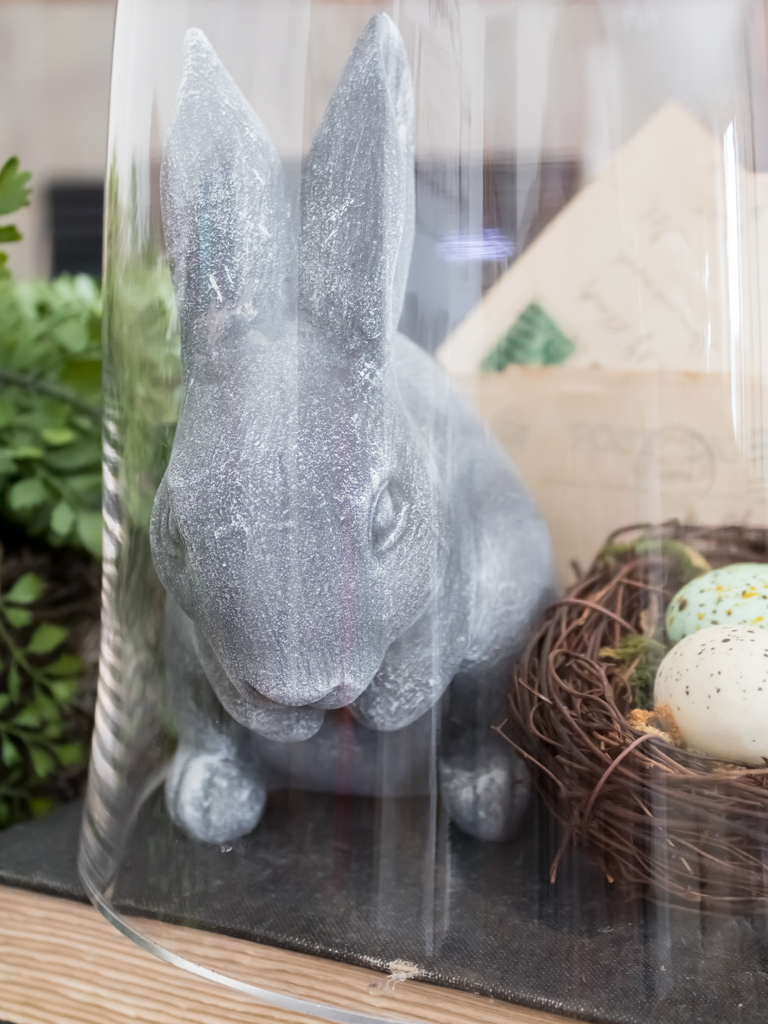
I started by placing one of the bunnies under the cloche. The cloche felt empty with the bunny alone, so I used the rule of three to pair the bunny figurine with a few other items.
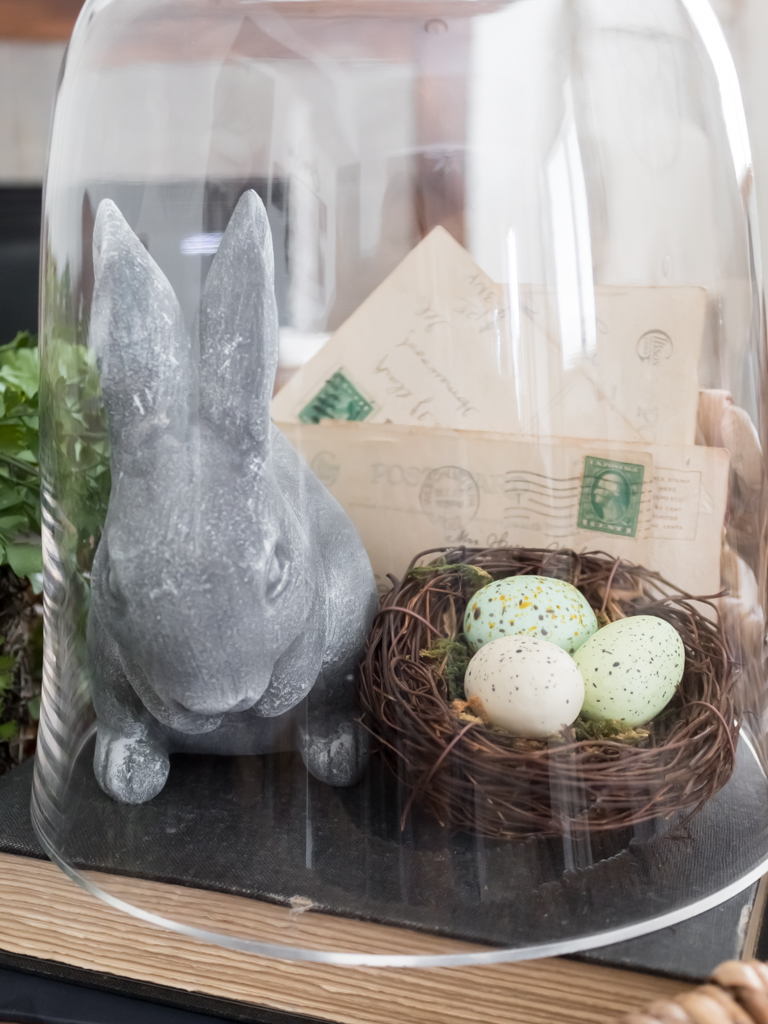
Keeping my theme and colors in mind, I added a small bird’s nest with white and green speckled eggs and several vintage postcards.
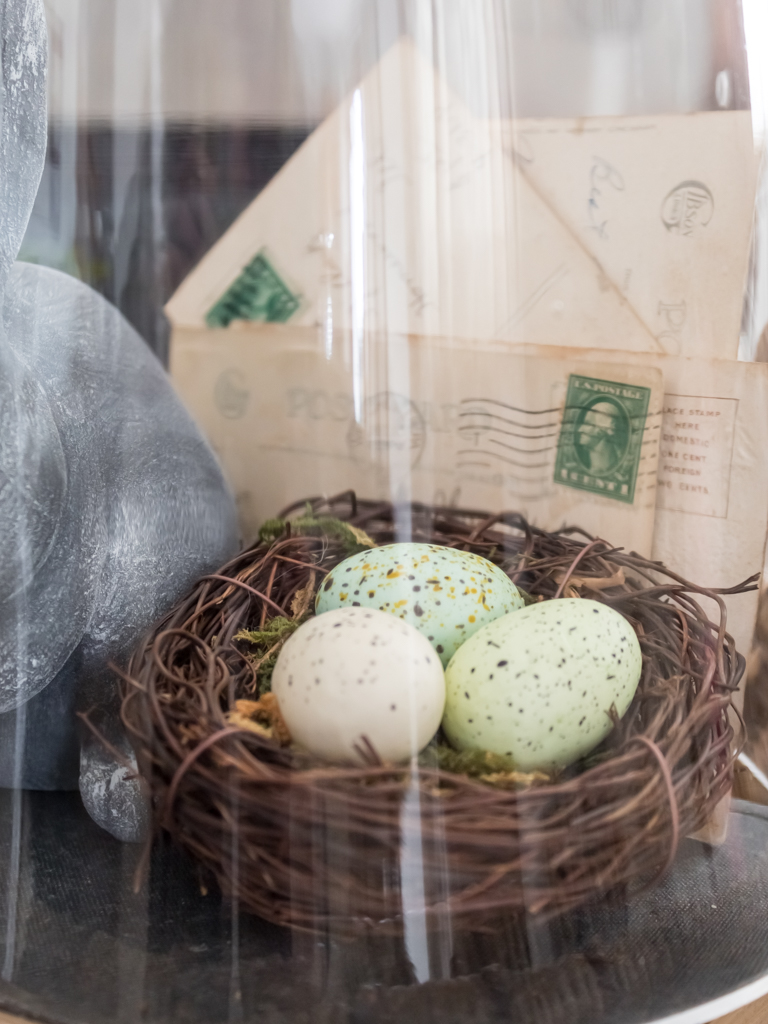
I love the combination of old and new items. The postcards even have green stamps that tie in perfectly with the rest of the decor!
Bonus Tip: My Favorite Trick for a Perfect Easter Vignette
To finish my Easter vignette, I added one more sweet little bunny to fill a space near the front of my basket.
After I stepped back and looked at the finished vignette, I felt like the bunny was a bit too short.
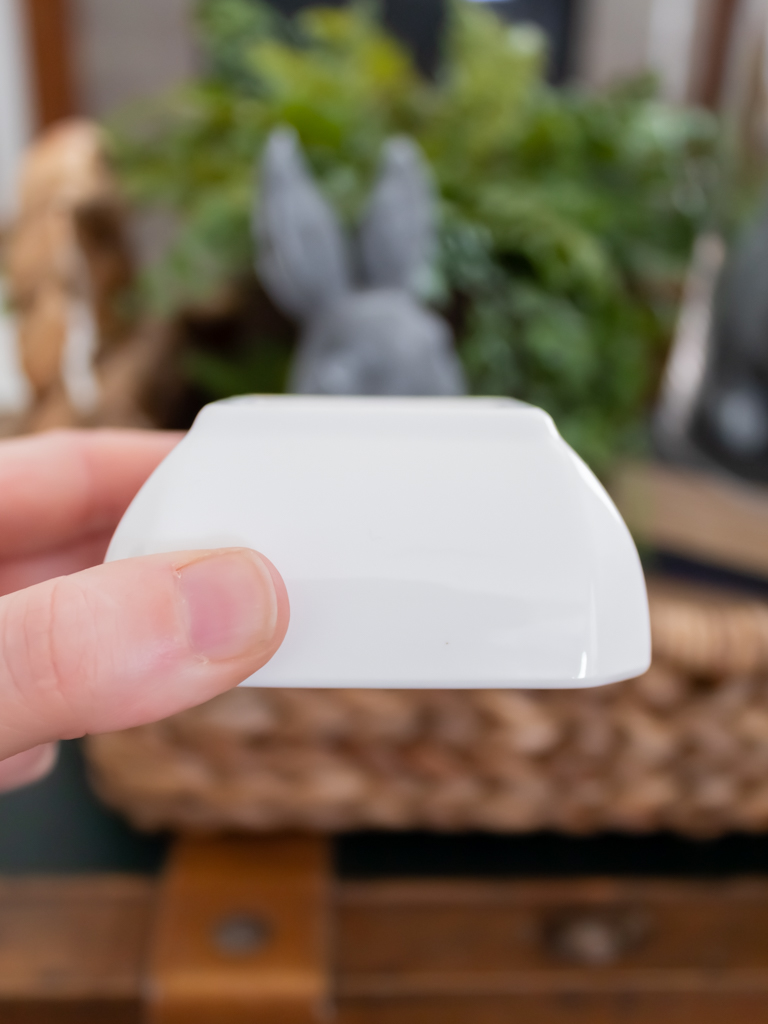
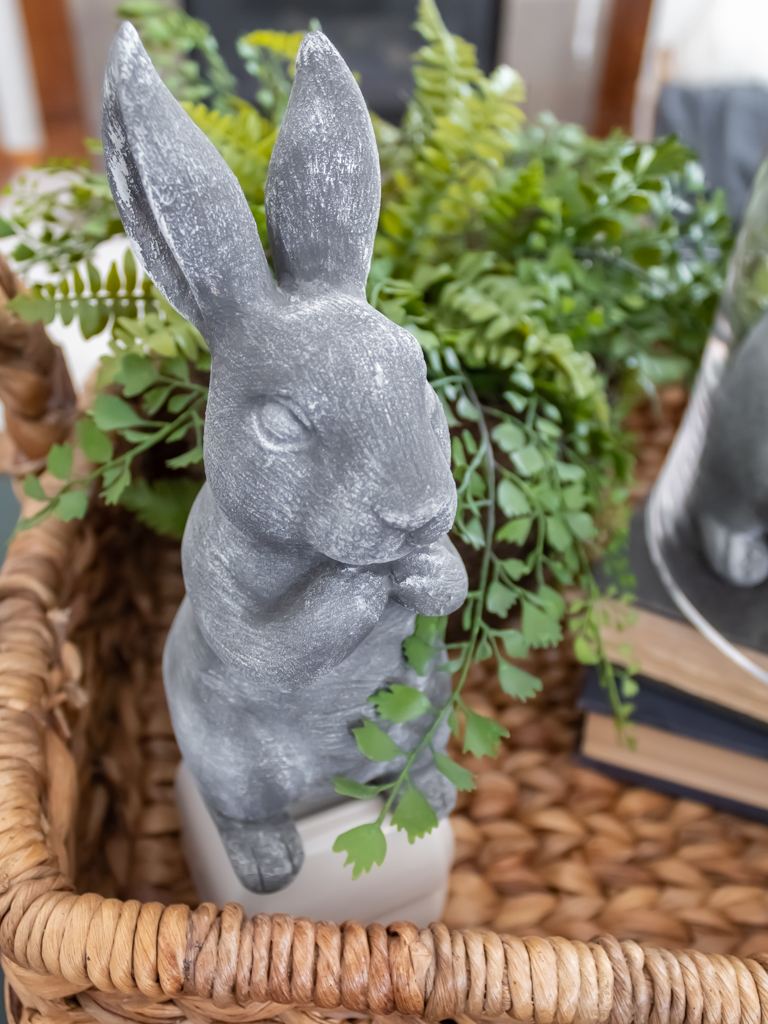
So I relied on one of my favorite tricks for making something seem taller… these small sauce bowls.
My discovery of the bowls’ secondary use was purely accidental. While it was not how I originally planned to use them, they are the perfect size for adding height to smaller decor pieces when needed.
And the bonus? They stack easily, so I can use more than one until I find the look I like best.
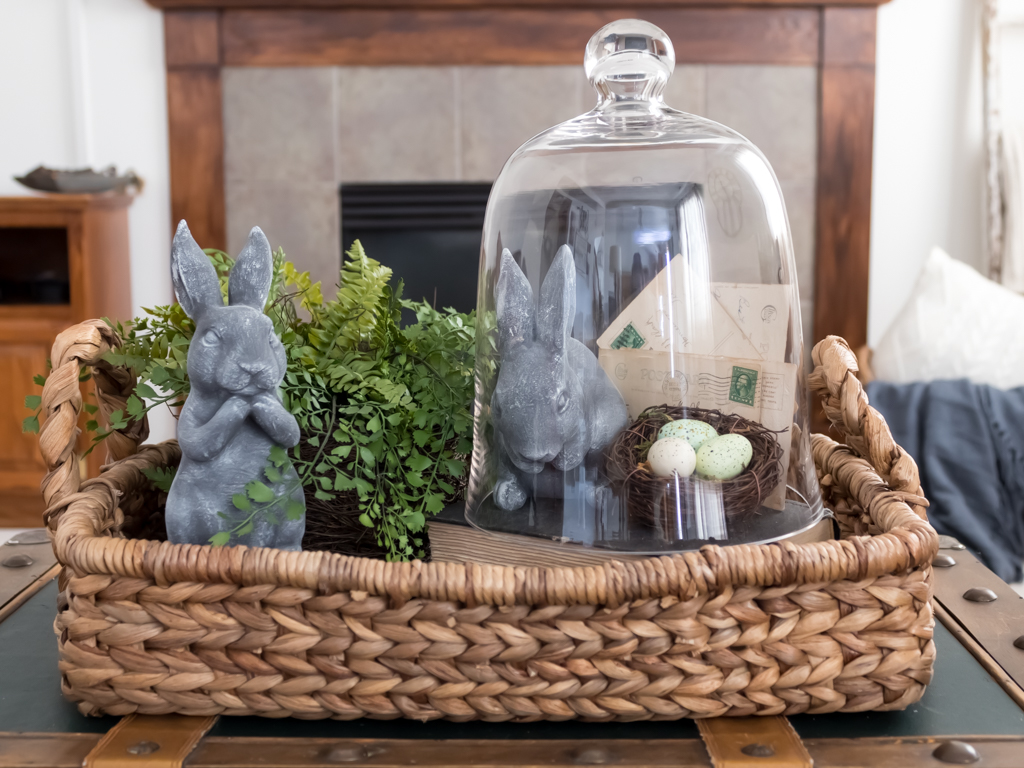
I used two for my vignette to help the bunny stand taller in the basket. See how much better he looks?
And, unless you look down into the basket, you can’t even see the stacked bowls.
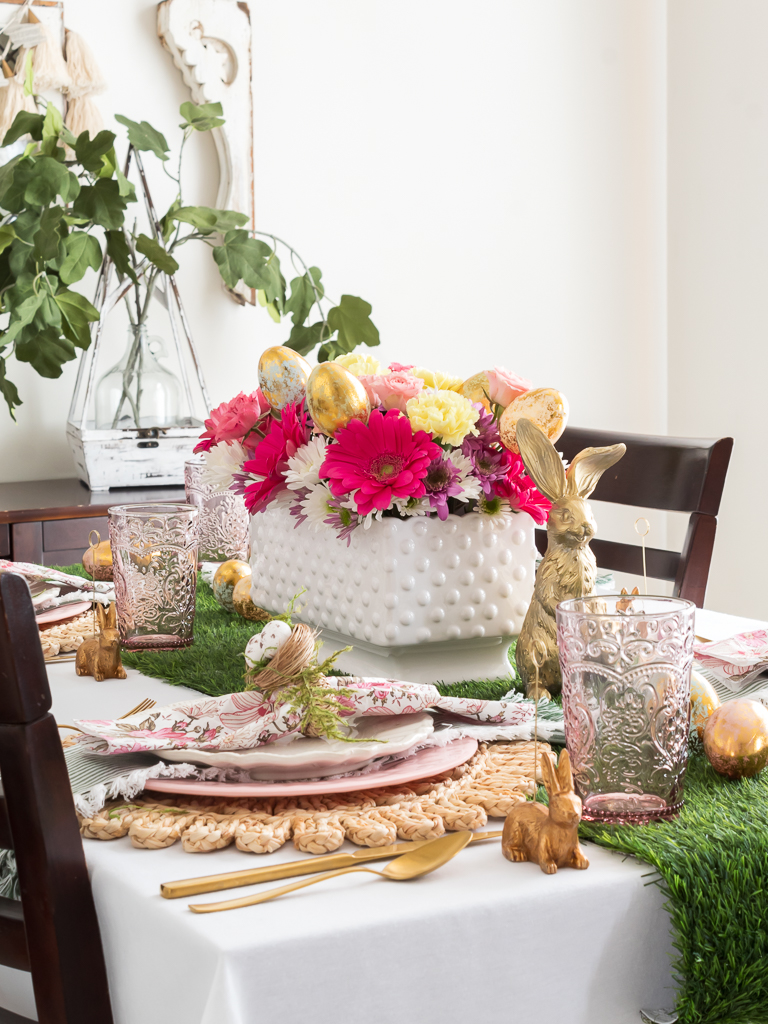
More Easter Decor Ideas Love
If you enjoyed this Easter decorating post, you might also love these other Easter decor ideas.

Shop The Post
All the items featured in this post are linked below for easy shopping.
My Finished Easter Vignette
And that’s it! Those are my 5 simple steps to style a beautiful display for Easter. I love the simplicity of this finished look, and it’s a decor piece I look forward to bringing out year after year.
As always, thanks so much for stopping by!

If you enjoyed this post, you can find more of my favorite spring DIY and decor inspiration here.
And… If you are catching up on blog posts you may have missed, be sure to subscribe to get all of the latest seasonal decor, recipes, and entertaining tips sent straight to your inbox.
Happy spring,

Did You Enjoy this Post? PIN It for Later!

This is so pretty and so many good tips! Happy weekend!
Thank you, Kim! I’m so glad you enjoyed my tips and the vignette.
Happy weekend (and spring) to you too!
I LOVE this, Jen!! That basket really makes everything feel put together and that fern is that perfect pop of green! We had the same idea with using a nest in a cloche…great minds think alike!! You styled it all so lovely with the books and the bunnies. Beautiful spring display!
Thank you so much, Rachel. And yay for great minds.😘 Cloches are so versatile! I love using mine year-round!
These are great tips jen! Thank you for sharing them!
Thank you, Stacy! Happy spring my friend!